

Deploying a Kubernetes Cluster with Amazon EKS

"Exceptional relationship builder with a talent for forging solid, lasting relationships with management, technical staff, clients and end users" "A visionary leader with the architectural skills, experience and insight to elevate any application, computing platform infrastructure or data operation to the cloud."
TOPICS COVERED
- Introduction to AWS EKS Cluster
- Different ways to setup an AWS EKS Cluster
- Prerequisites to create an AWS EKS Cluster
- Step by step procedure to create an AWS EKS Cluster
- Deployment of Demo Application
Introduction to AWS EKS Cluster
Amazon Elastic Kubernetes Service (Amazon EKS) is a managed service that you can use to run Kubernetes on AWS without needing to install, operate, and maintain your own Kubernetes control plane or nodes. Kubernetes is an open-source system for automating the deployment, scaling, and management of containerized applications.
Amazon EKS:
- Runs and scales the Kubernetes control plane across multiple AWS Availability Zones to ensure high availability.
- Automatically scales control plane instances based on load, detects and replaces unhealthy control plane instances, and it provides automated version updates and patching for them.
- Is integrated with many AWS services to provide scalability and security for your applications, including the following capabilities: Amazon ECR for container images, Elastic Load Balancing for load distribution, IAM for authentication, Amazon VPC for isolation.
- Runs up-to-date versions of the open-source Kubernetes software, so you can use all of the existing plugins and tooling from the Kubernetes community.
Amazon EKS control plane architecture
Amazon EKS runs a single tenant Kubernetes control plane for each cluster. The control plane infrastructure isn't shared across clusters or AWS accounts. The control plane consists of at least two API server instances and three etcd instances that run across three Availability Zones within an AWS Region. Amazon EKS: Actively monitors the load on control plane instances and automatically scales them to ensure high performance.
Automatically detects and replaces unhealthy control plane instances, restarting them across the Availability Zones within the AWS Region as needed.
Leverages the architecture of AWS Regions in order to maintain high availability. Because of this, Amazon EKS is able to offer an SLA for API server endpoint availability.
Amazon EKS uses Amazon VPC network policies to restrict traffic between control plane components to within a single cluster. Control plane components for a cluster can't view or receive communication from other clusters or other AWS accounts, except as authorized with Kubernetes RBAC policies. This secure and highly available configuration makes Amazon EKS reliable and recommended for production workloads.
How does Amazon EKS work?
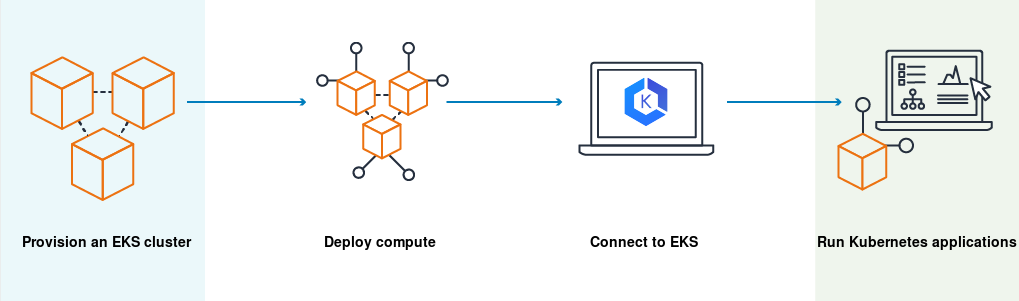
- Create an Amazon EKS cluster in the AWS Management Console or with the AWS CLI or one of the AWS SDKs.
- Launch managed or self-managed Amazon EC2 nodes, or deploy your workloads to AWS Fargate.
- When your cluster is ready, you can configure your favorite Kubernetes tools, such as kubectl, to communicate with your cluster.
- Deploy and manage workloads on your Amazon EKS cluster the same way that you would with any other Kubernetes environment.
Different ways to setup an AWS EKS Cluster
- AWS Management Console
- eksctl utility provided by AWS
- IaC (Terraform, Ansible)
Prerequisites to create an AWS EKS Cluster
You will need to make sure you have the following components installed and set up before you start with Amazon EKS:
AWS CLI – while you can use the AWS Console to create a cluster in EKS, the AWS CLI is easier. You will need version 1.16.73 at least. For further instructions, click here. Kubectl – used for communicating with the cluster API server. For further instructions on installing, click here. AWS-IAM-Authenticator – to allow IAM authentication with the Kubernetes cluster. Check out the repo on GitHub for instructions on setting this up. AWS EC2 Instance – (As a Bastion Host to manage the cluster using Kubectl)
Step by step procedure to create an AWS EKS Cluster
For this demo, I am using the AWS EC2 Instance launched in AWS Account acting as an entrypoint for API Server using Kubectl command line. All prerequisites mentioned above are already installed, & working fine.
- Create an IAM Role for EKS Cluster
- Create a dedicated VPC for the EKS Cluster
- Create EKS Cluster
- Install & Setup IAM Authenticator and Kubectl utility
- Create IAM Role for Worker nodes
- Add a Node group to EKS Cluster
- Deploying a Sample Application with ALB
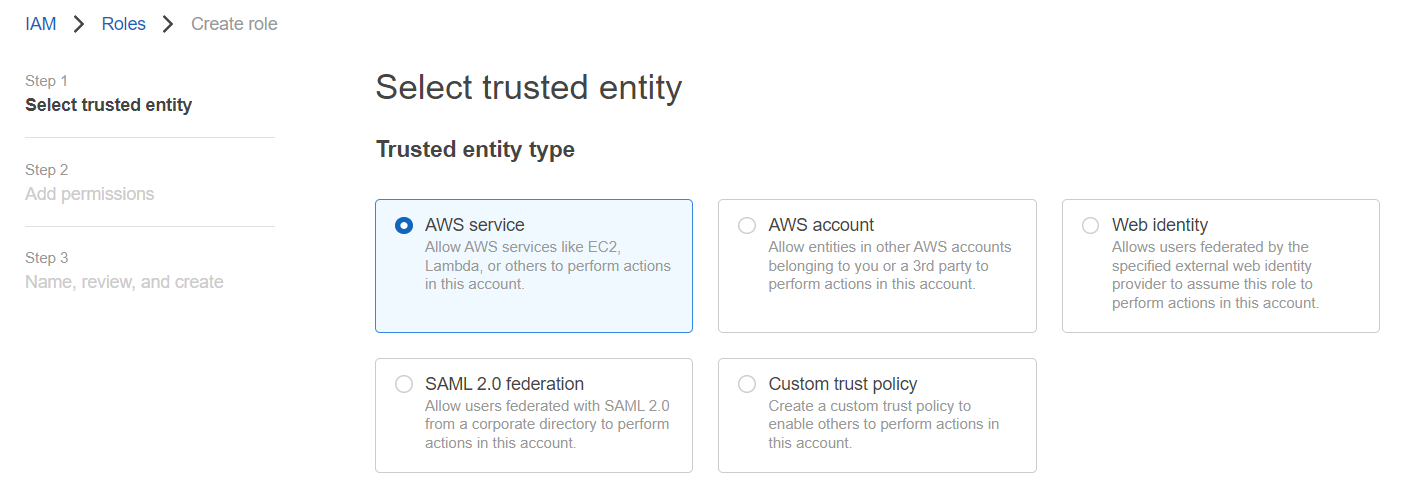
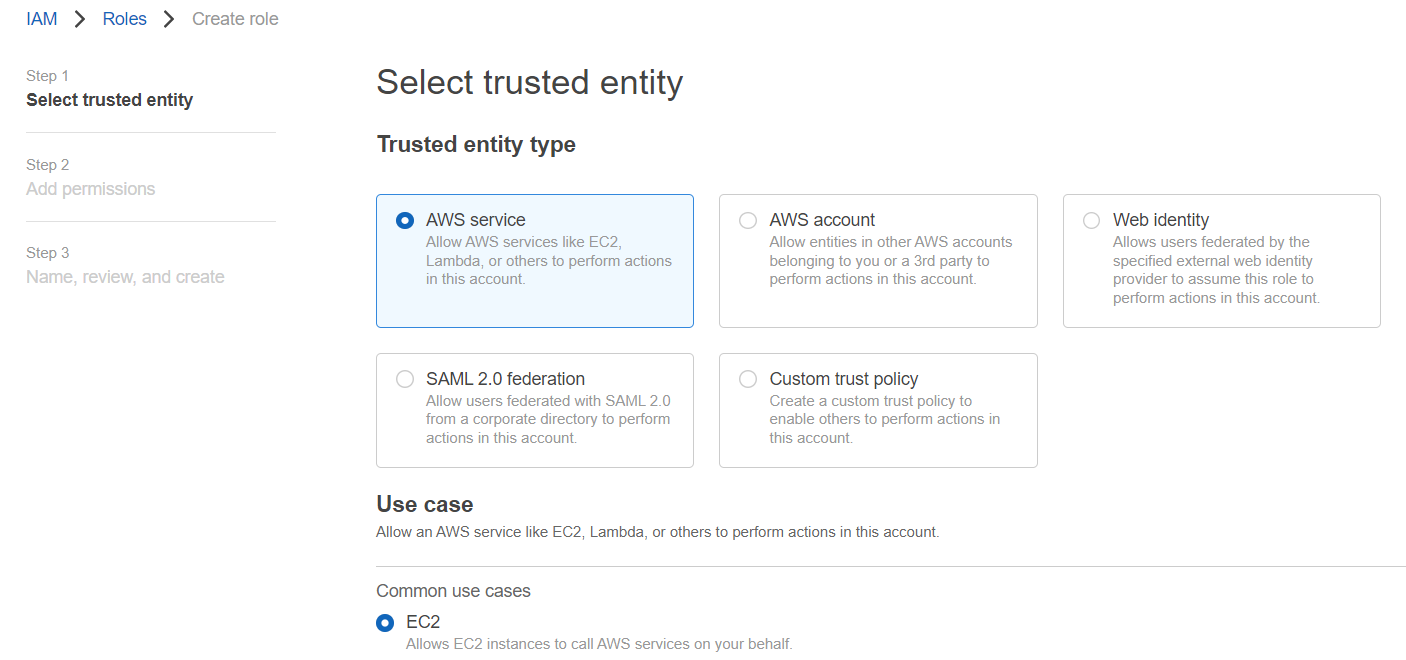
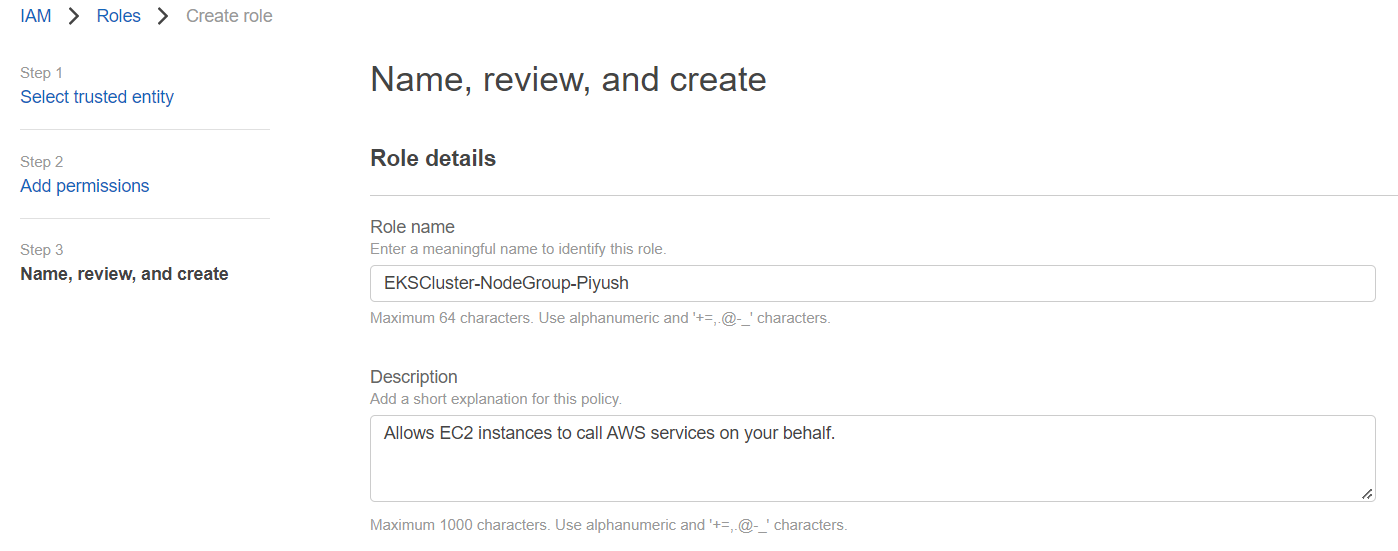
1. Create an IAM Role for EKS Cluster
Go to AWS IAM Console -> Select Roles -> Click Create Role.

Select trusted entity as AWS Service -> For Use case select EKS -> EKS Cluster
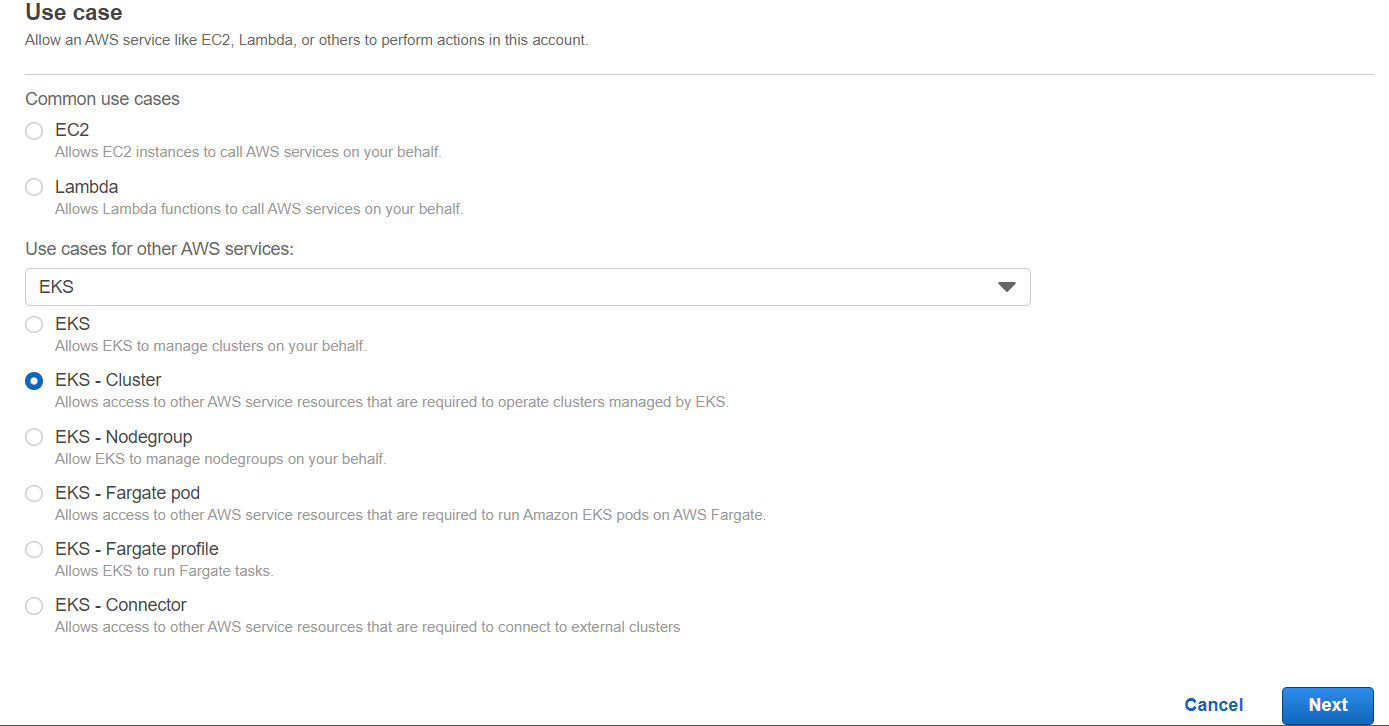
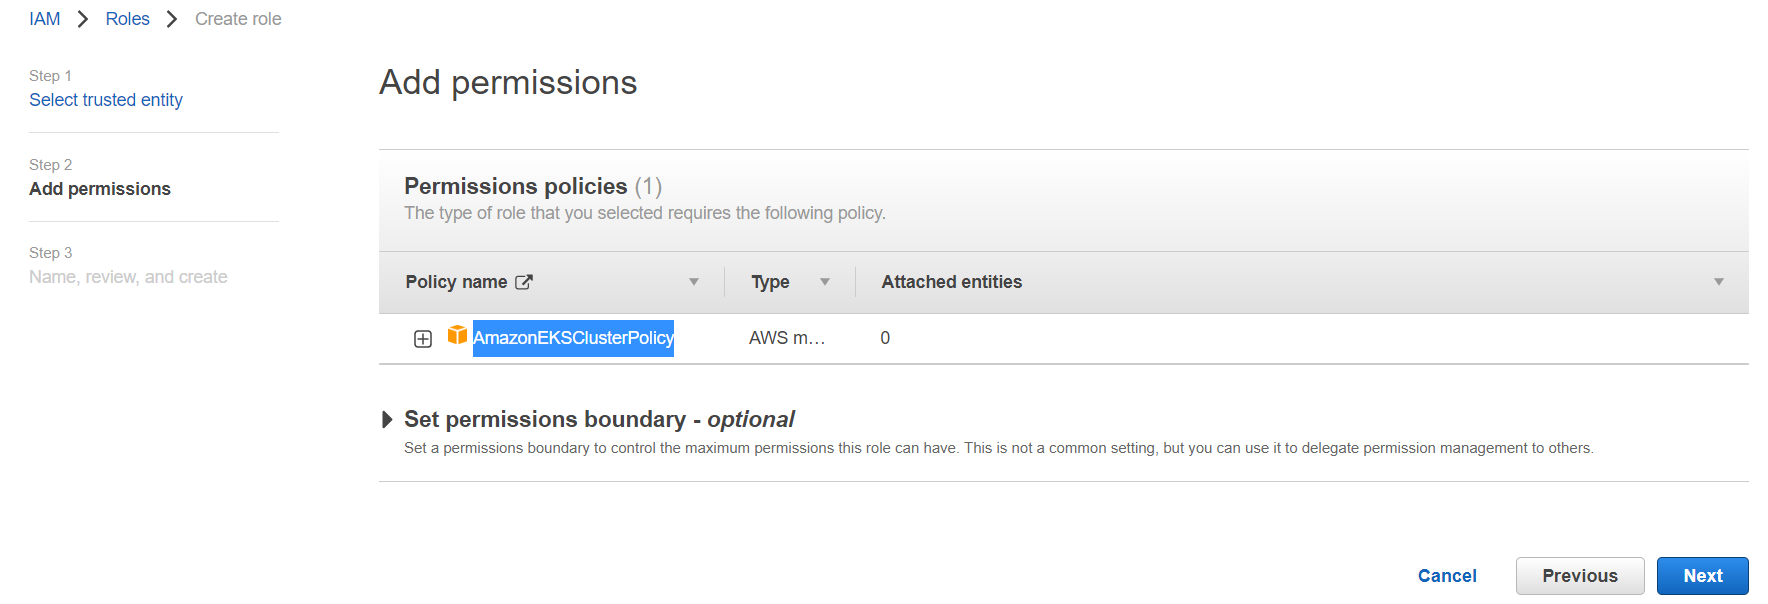
By default, AmazonEKSClusterPolicy is present -> Click Next
Name, review, and create a Role.

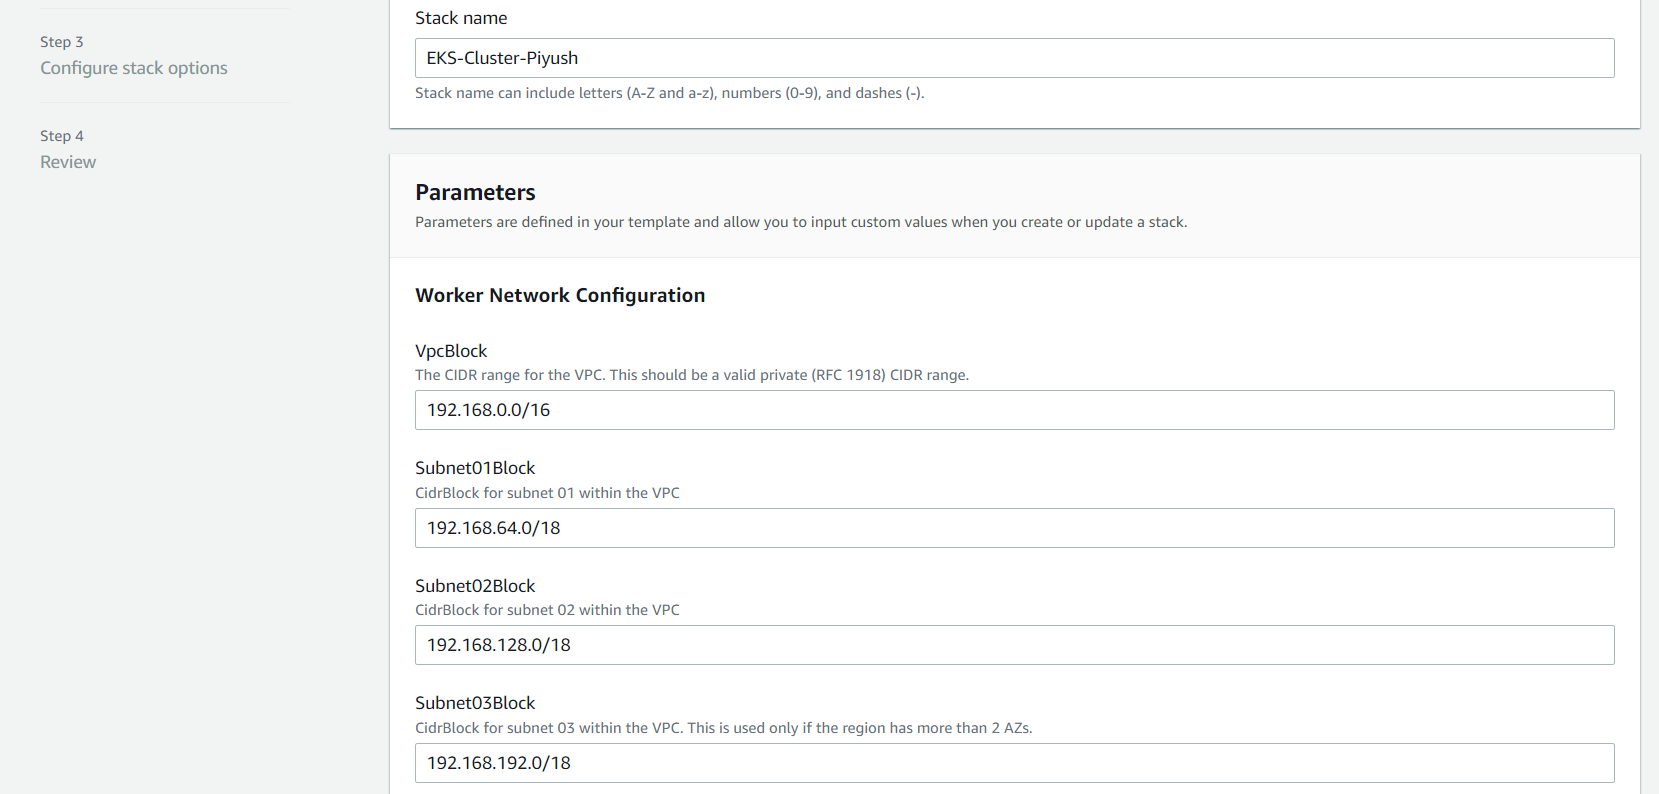
2. Create a dedicated VPC for the EKS Cluster
In order to create a dedicated VPC infra for our EKS Cluster, we will use a service CloudFormation (IaC). Open up CloudFormation, and click the Create new stack button.
On the Select template page, enter the URL of the CloudFormation YAML in the relevant section:
https://amazon-eks.s3-us-west-2.amazonaws.com/cloudformation/2019-01-09/amazon-eks-vpc-sample.yaml
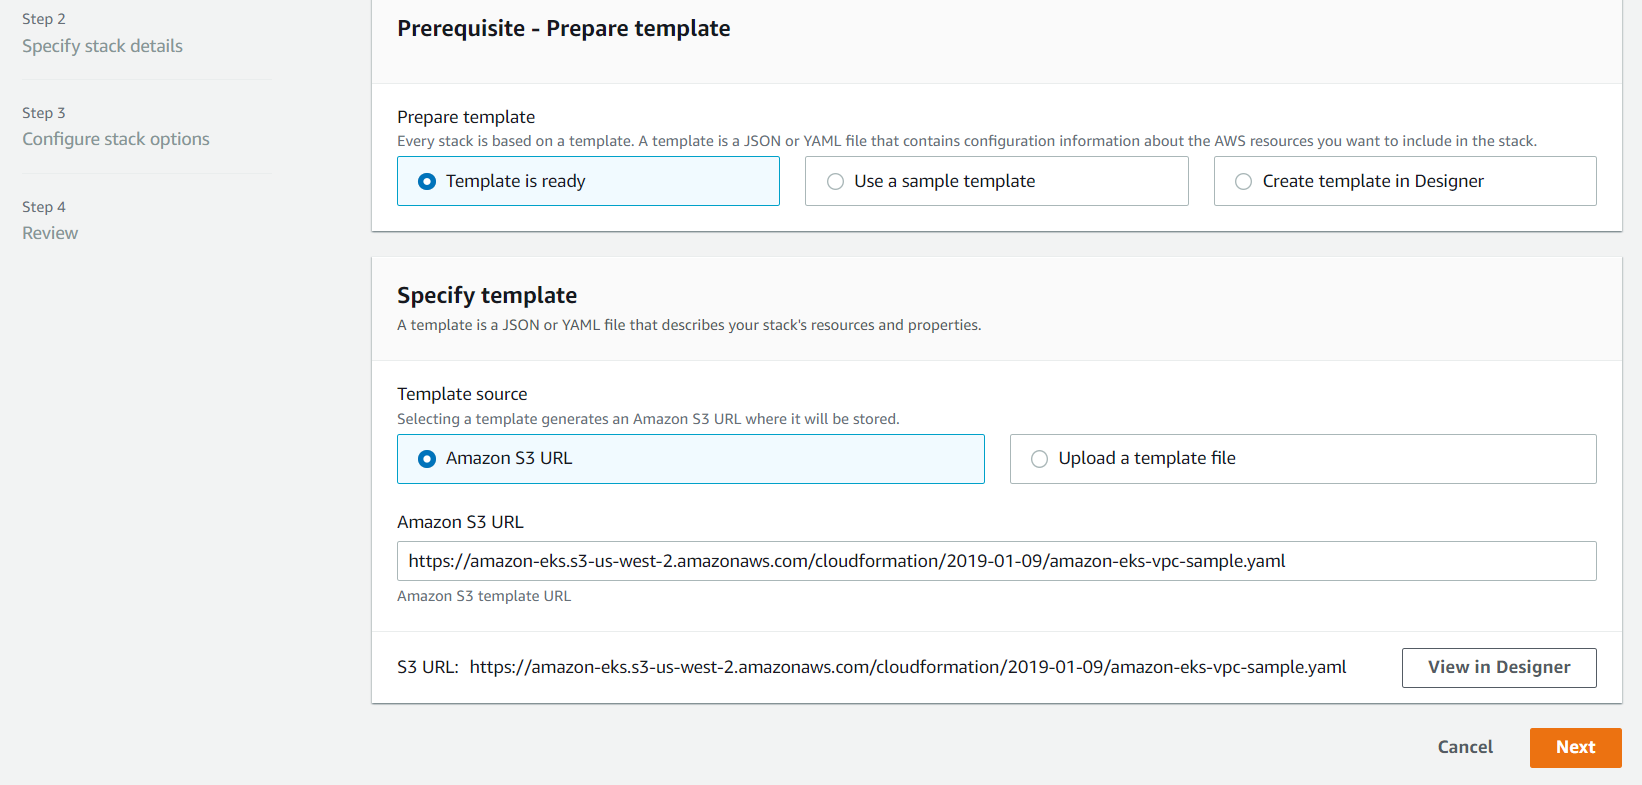
Click Next.
On the Review page, simply hit the Create button to create the VPC.
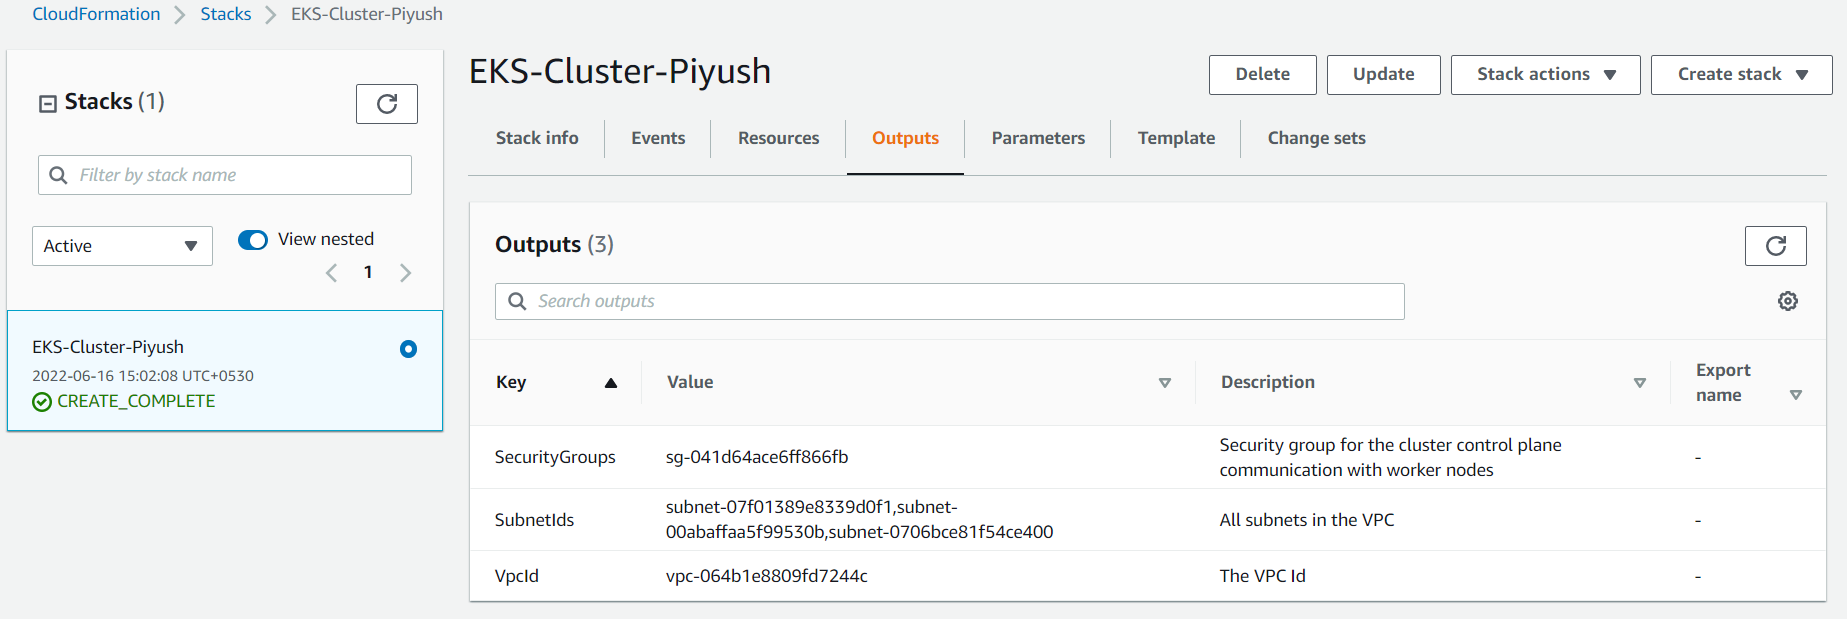
CloudFormation will begin to create the VPC. Once done, be sure to note the various values created — SecurityGroups, VpcId and SubnetIds. You will need these in subsequent steps. You can see these under the Outputs tab of the CloudFormation stack:
Ensure you have set to true the enableDnsHostnames and enableDnsSupport fields, otherwise routing to the API server won’t work.
3. Create EKS Cluster
Access AWS EKS via console -> Click Create Cluster

Enter Cluster Name -> Select Kubernetes version -> Select Cluster service role which we created in last step -> Click Next
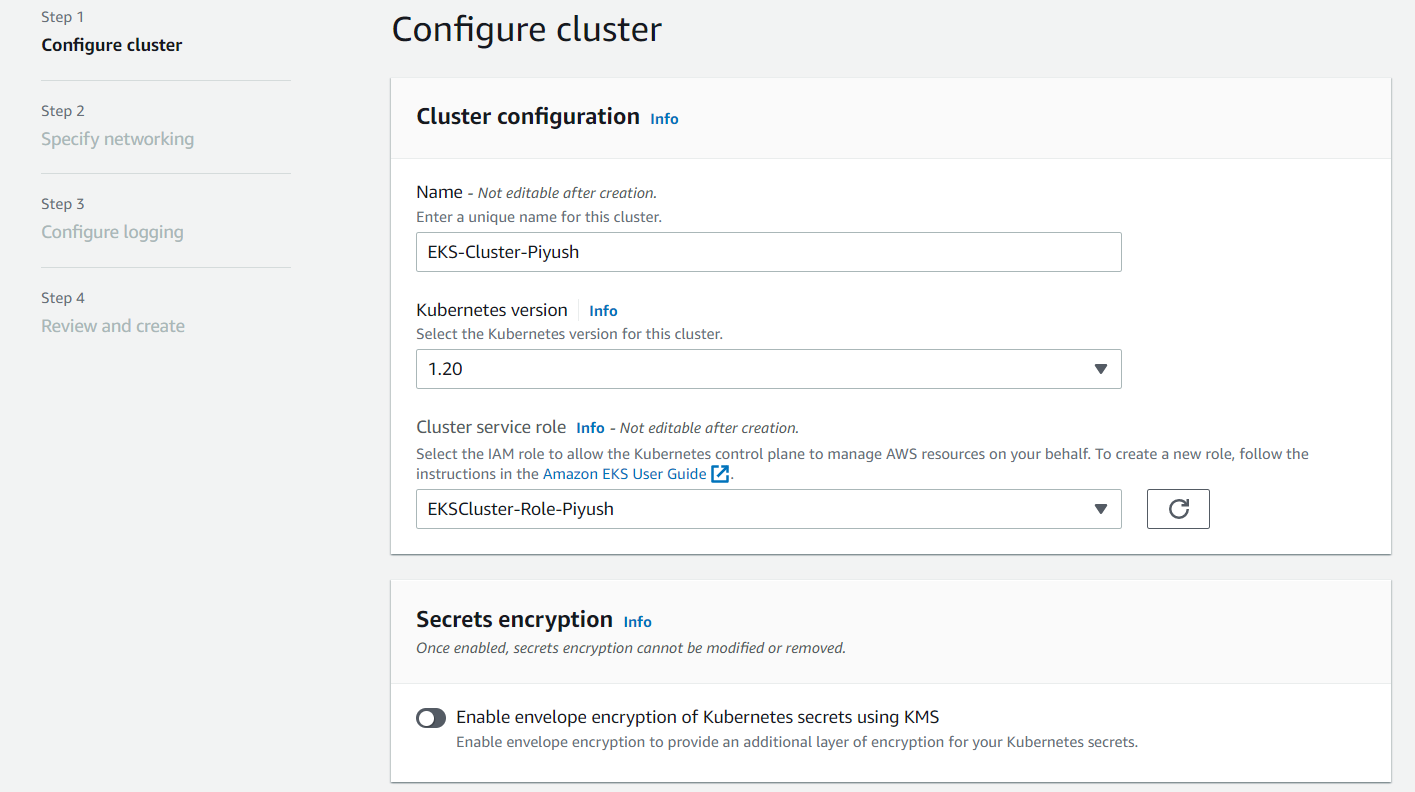
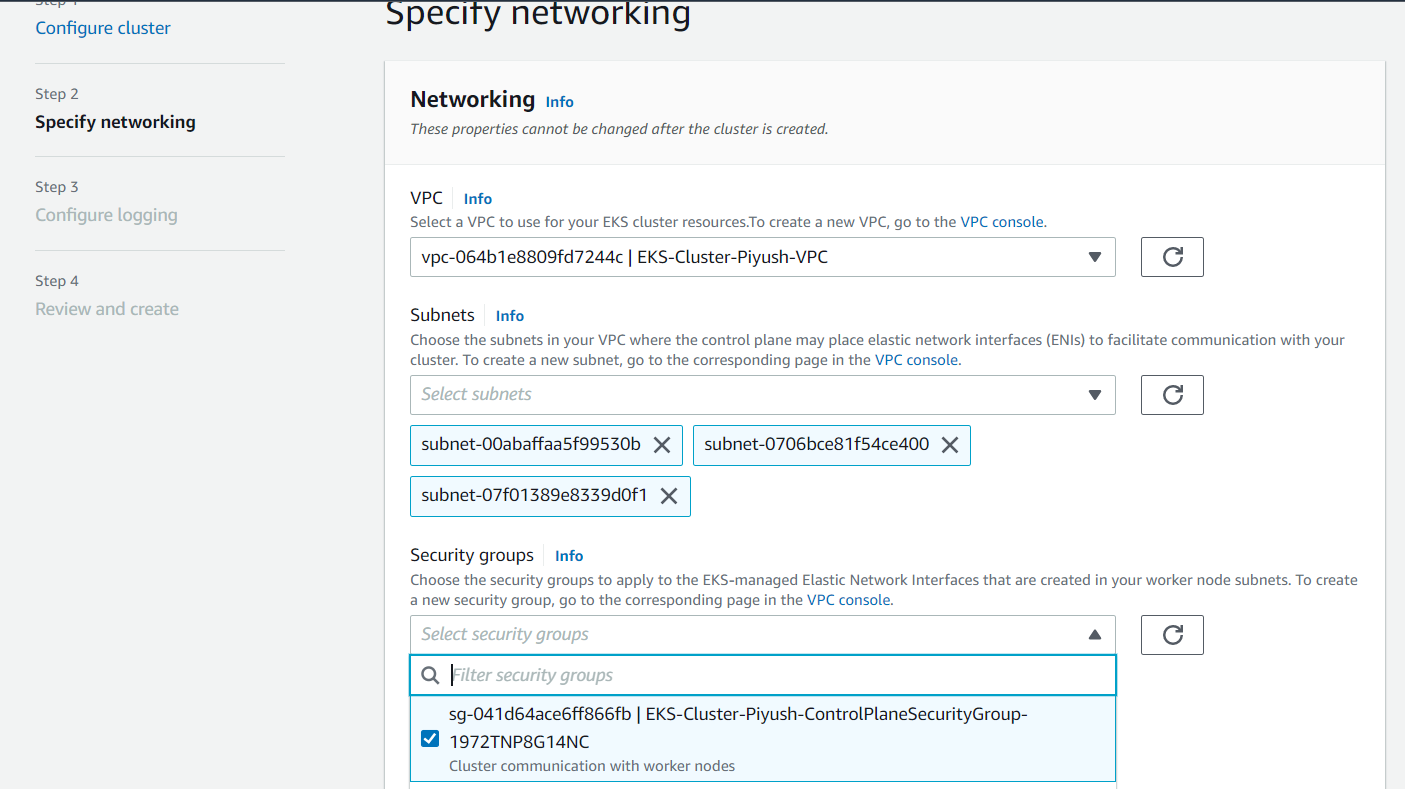
Select the dedicated VPC which we created using CF template & the subnets will get populated automatically. Select appropriate Security group which created during VPC creation.
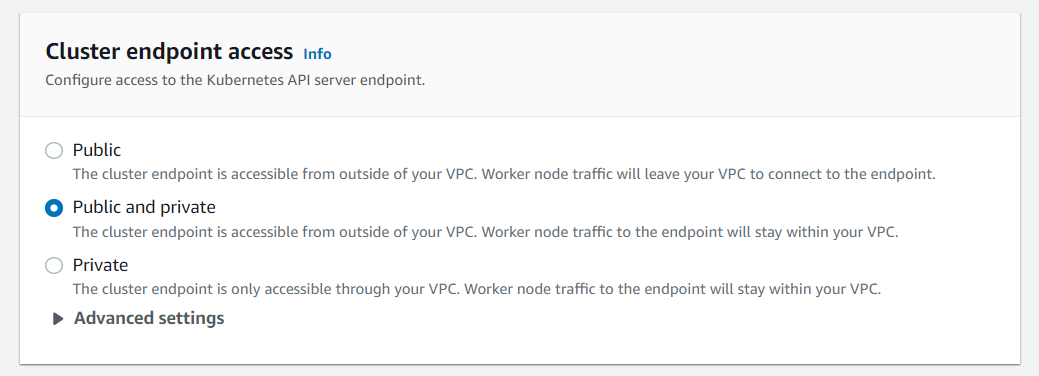
For Cluster endpoint access, I am keeping it as both Public and Private.
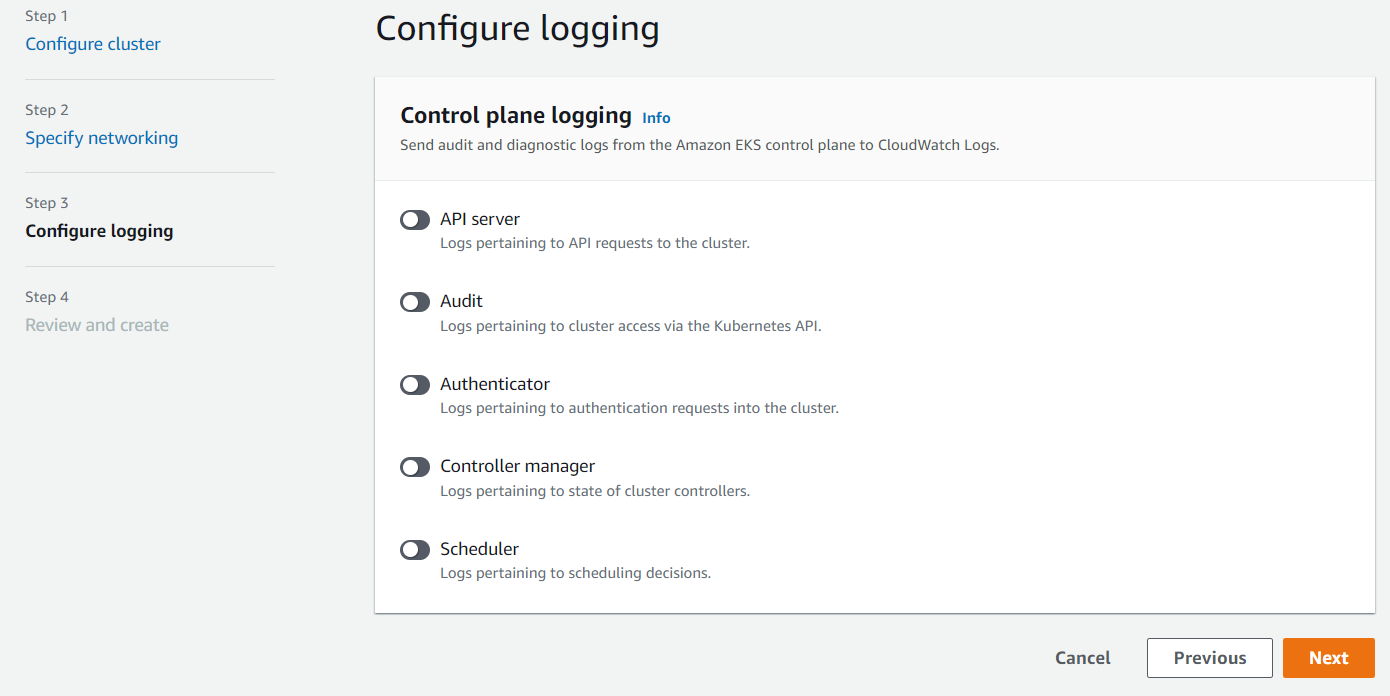
For Control plane logging section, I disabled all logging for this demo. If you need, you can enable it at this step. -> Click Next
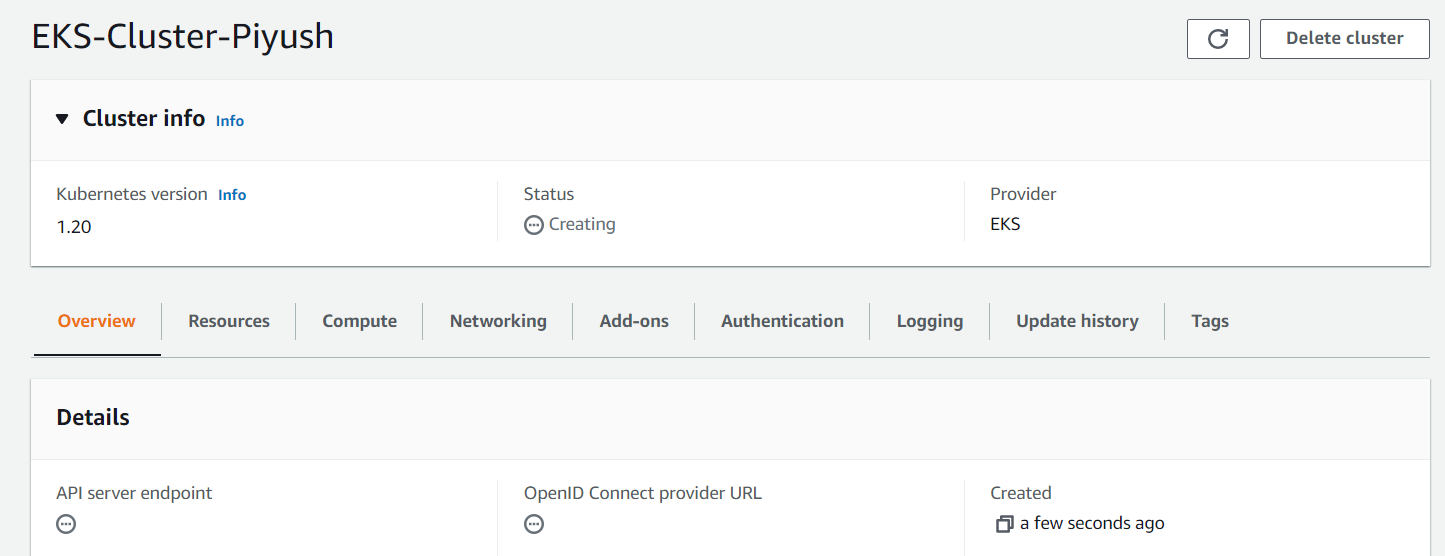
Review all the settings -> Click Create It takes about 5 minutes before your cluster is created. The output displayed will be: "CREATING"
Once the status changes to “ACTIVE”, we can proceed with updating our kubeconfig file with the information on the new cluster so kubectl can communicate with it.
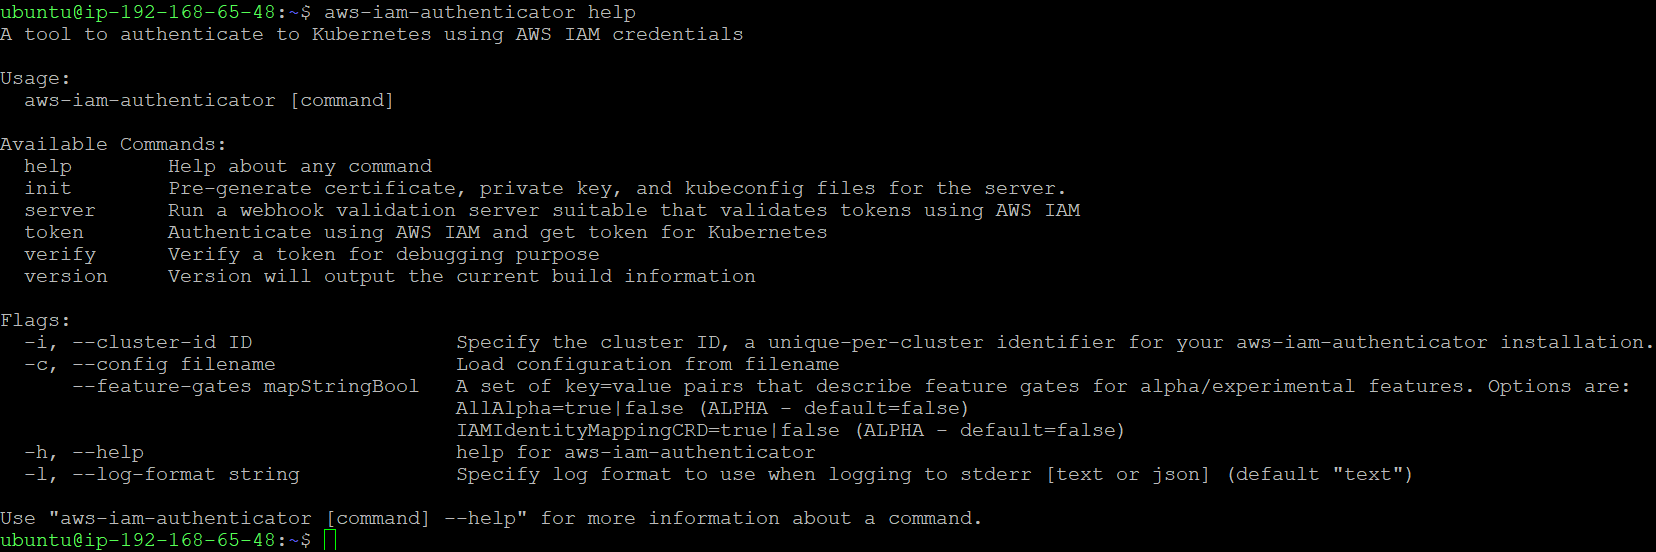
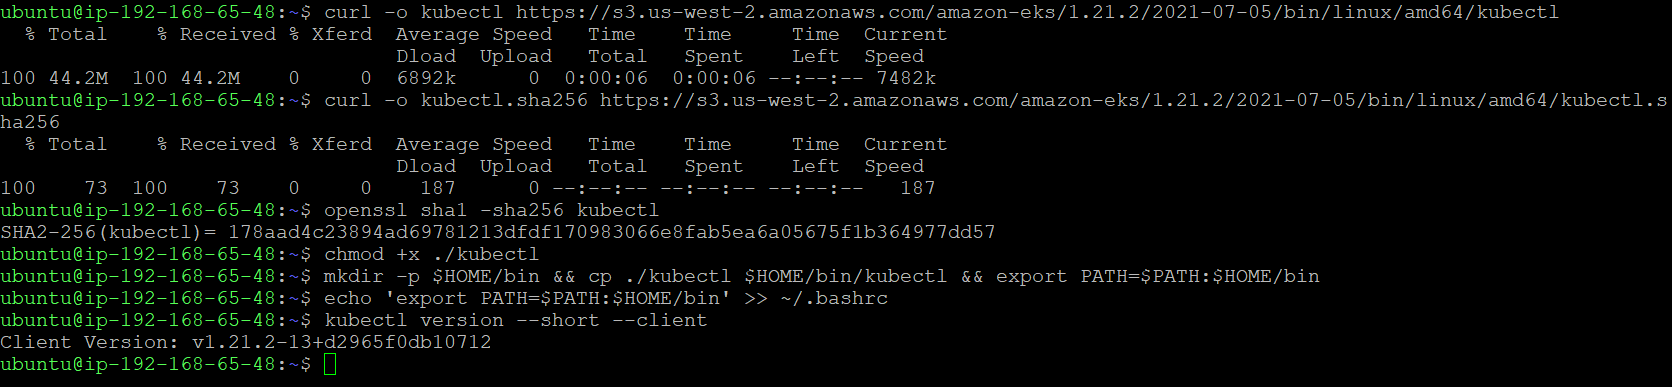
4. Install & Setup IAM Authenticator and Kubectl utility
For this we have already launched a new t2.micro AWS EC2 instance based on Ubuntu distribution. Also, we have installed and configured AWS CLI version 2. Now, its time to install and setup IAM Authenticator & Kubectl utility. I installed IAM Authenticator using the link here.
I have installed Kubectl utility using the link here.
Now, we are getting below error -

We can proceed with updating our kubeconfig file with the information on the new cluster so kubectl can communicate with it.
To do this, we will use the AWS CLI update-kubeconfig command (be sure to replace the region and cluster name to fit your configurations):
aws eks --region us-east-1 update-kubeconfig --name EKS-Cluster-Piyush
You should see the following output:
Added new context arn:aws:eks:us-east-1:279411461123:cluster/EKS-Cluster-Piyush to /home/ubuntu/.kube/config
Now, fire the below command to export the kubeconfig
export KUBECONFIG=~/.kube/config
We can now test our configurations using the kubectl get svc command:

5. Create IAM Role for Worker nodes
Go to AWS IAM Console -> Select Roles -> Click Create Role.

Select trusted entity as AWS Service -> For Use case select EC2
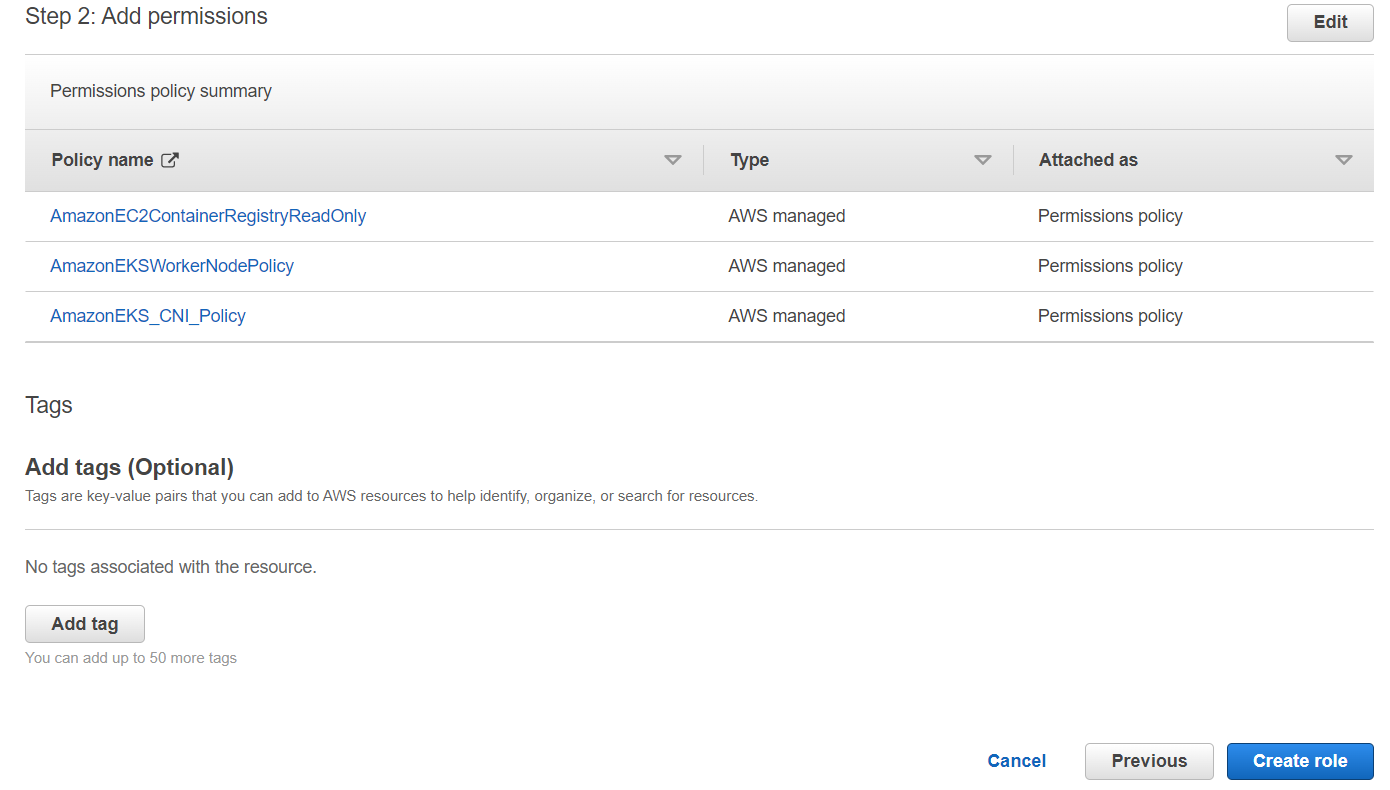
Attach the default policies required for worker nodes as follows - AmazonEKS_CNI_Policy, AmazonEKSWorkerNodePolicy, AmazonEC2ContainerRegistryReadOnly
On the next screen, Name, review, and create a Role.
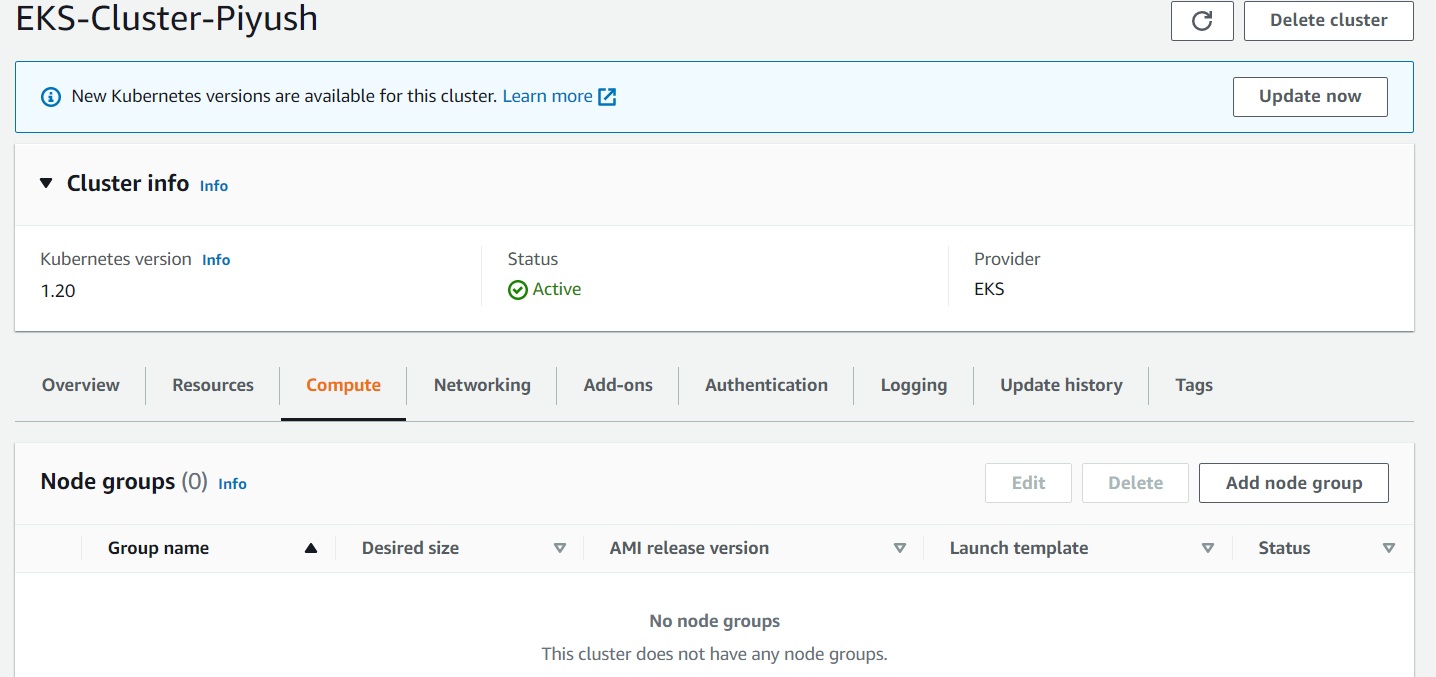
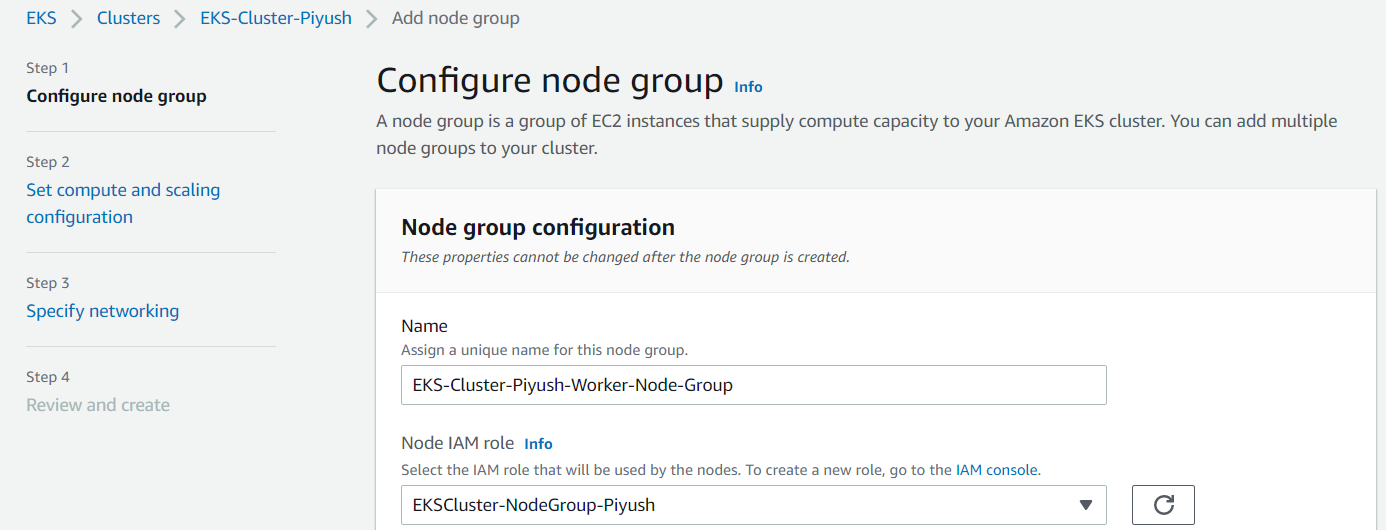
6. Add a Node group to EKS Cluster
Access EKS cluster via console -> Go to Compute tab -> Click on Add Node group
For configuring a node group, assign a unique name -> Select Node IAM role which we created in last step -> Click Next
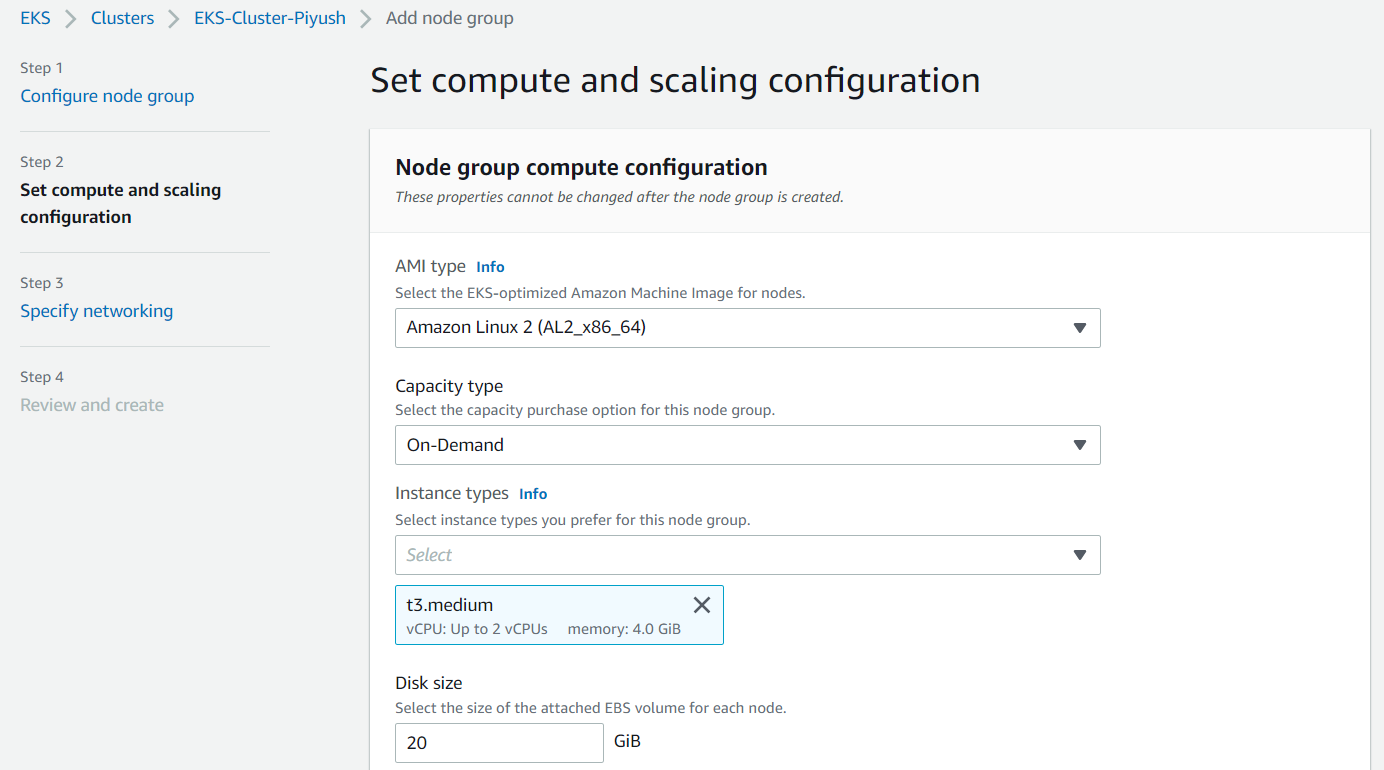
For setting up compute and scaling configuration, Select AMI Type, Capacity type, Instance type, Disk size as per your requirement.
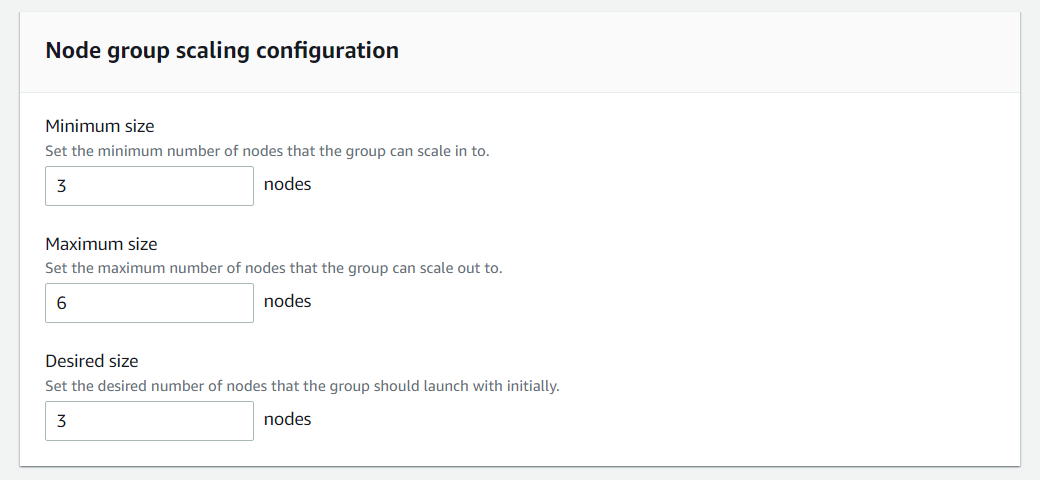
For Node group scaling configuration, since I am using 3 different subnets across 3 different AZs, I have kept Min, Desired size as 3 & Max size as 6 for this demo. Click Next
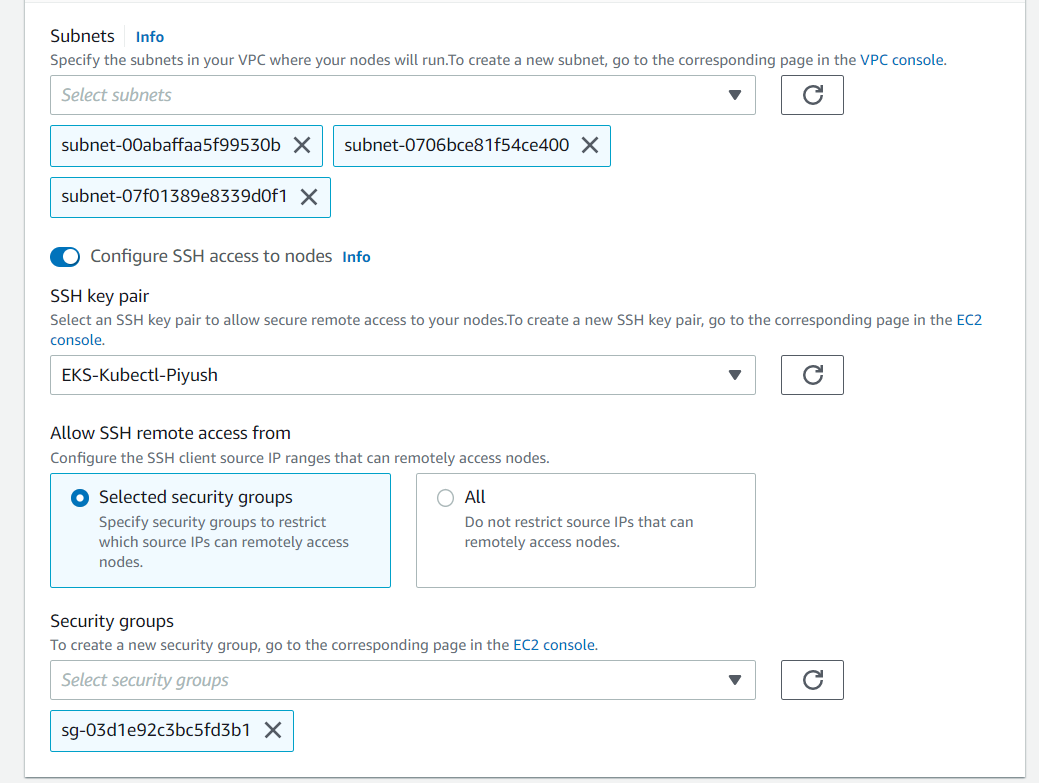
For networking part, Subnets are populated automatically. We are configuring SSH Access to nodes because I need it & I will allow the traffic only from my specific security group. Click Next
Review and create.
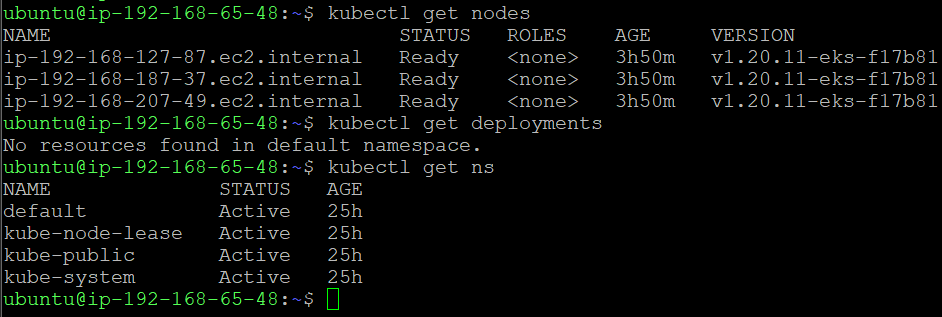
Now, I am able to list the nodes, deployments etc. via Kubectl.
7. Deploying a Sample Application with ALB
Congrats! Your Kubernetes cluster is created and set up. To take her for a spin, we’re going to deploy Knote app. This is a simple kubernetes-based microservices application that will help you to upload an Image with Notes. It is designed as a 2 tier architecture (frontend - nodejs and backend - mongodb). This was originally developed by https://github.com/learnk8s/knote-js and modified it for the educational demo purpose only.
We can deploy this application in working kubernetes cluster using kubectl commands or using YAML configuration files.
Backend: Here, we are using type as ClusterIP & 3 Replicas to run 3 pods on different different nodes.
---
apiVersion: apps/v1
kind: Deployment
metadata:
  name: mongo
spec:
  replicas: 3
  selector:
    matchLabels:
      app: mongo
      tier: backend

  template:
    metadata:
      labels:
        app: mongo
        tier: backend

    spec:
      containers:
        - name: mongo
          image: mongo
          ports:
            - containerPort: 27017

---
apiVersion: v1
kind: Service
metadata:
  name: mongo
spec:
  selector:
    app: mongo
    tier: backend

  ports:
    - port: 27017
      targetPort: 27017
  type: ClusterIP
Apply the above backend yaml.
kubectl apply -f mongo.yaml
Frontend: Here, we are using type as LoadBalancer so that cluster will issue Load Balancer IP to app & 3 Replicas to run 3 pods on different different nodes.
---
apiVersion: apps/v1
kind: Deployment
metadata:
  name: knote
spec:
  replicas: 1
  selector:
    matchLabels:
      app: knote
      tier: frontend
  template:
    metadata:
      labels:
        app: knote
        tier: frontend
    spec:
      containers:
        - name: app
          image: learnitguide/knotejs:1.0
          ports:
            - containerPort: 3000
          env:
            - name: MONGO_URL
              value: mongodb://mongo:27017/dev

---
apiVersion: v1
kind: Service
metadata:
  name: knote
spec:
  selector:
    app: knote
    tier: frontend

  ports:
    - port: 80
      targetPort: 3000
      nodePort: 30000
  type: LoadBalancer
Apply the above frontend yaml.
kubectl apply -f knote.yaml
Use kubectl to see a list of your services:
kubectl get svc
Summing it up
Kubernetes is THE container orchestration tool. There’s no argument there. But as already stated, it can be challenging, especially in large deployments and at a certain scale you might want to consider shifting some of the manual work to a managed solution.
Quoting the Kubernetes documentation, “If you just want to “kick the tires” on Kubernetes, use the local Docker-based solutions. When you are ready to scale up to more machines and higher availability, a hosted solution is the easiest to create and maintain.”
For those of you who are AWS power users, Amazon EKS is a natural fit. For those of you who are just migrating to the cloud or are deployed on a different cloud, Amazon EKS might seem a bit daunting to begin with.
Hope you enjoyed it.. :)
OK, folks that’s it for this post. Have a nice day guys…… Stay tuned…..!!!!!
Don’t forget to like & share this post on social networks!!! I will keep on updating this blog. Please do follow!!!
