

Deploy Python Flask Application to AWS Fargate with ALB

"Exceptional relationship builder with a talent for forging solid, lasting relationships with management, technical staff, clients and end users" "A visionary leader with the architectural skills, experience and insight to elevate any application, computing platform infrastructure or data operation to the cloud."
Managing application servers can become a tedious task. You need to patch, provision, configure and scale clusters of virtual machines to run containers. Then there is one jargon you’ve likely heard a lot, that is serverless.
A bit definition about serverless:
Serverless is a cloud-native development model that allows developers to build and run applications without having to manage servers.
When we say serverless, it doesn’t mean that there is no server. It means that the servers are abstracted from application development. All tasks like configuring, maintaining, provisioning, patching and scaling infrastructure are handled by the cloud provider.
There are several advantages regarding serverless:
- Lower cost
- Fewer things to worry about
- Enhanced scalability
- More focus on user experience
By having these advantages, it doesn't mean that serverless computing is a silver bullet to all applications. There are also cons to using serverless computing when it seems a dedicated server is way better. For example, if you have an application that running for a longer period and doing heavy computing tasks, it would be better to use a dedicated server. Because with serverless, there is a good chance that you’ll pay bigger than you expected.
With all that being said, let’s jump directly to step by step guide for deploying an application to AWS Fargate with an Application Load Balancer (ALB).
- Pre-requisite
- Create ECR Repository
- Create Cloud9 Environment
- Create Docker Image & push it to AWS ECR
- Create Fargate cluster based on ECS
- Create Fargate task definition
- Create App Load balancer and target group
- Create Fargate service & attach to our App Load balancer (No Auto Scaling for this demo)
- Modify Fargate service’s security group
- Test your App
- Clean up
Pre-requisite
You need to have an AWS account with administrative access to complete the Task list. If you don’t have an AWS account, kindly use the link to create free trial account for AWS.
Create ECR Repository
Let’s start with creating a repository for the Docker image in AWS ECR. Later when you create a Docker image in Cloud9 IDE, you can push the image to this repository for the deployment.
- Login to the AWS Console and select US East (N. Virginia) as the region.
- Go to the Amazon Elastic Container Registry (ECR) console and click on Get Started.
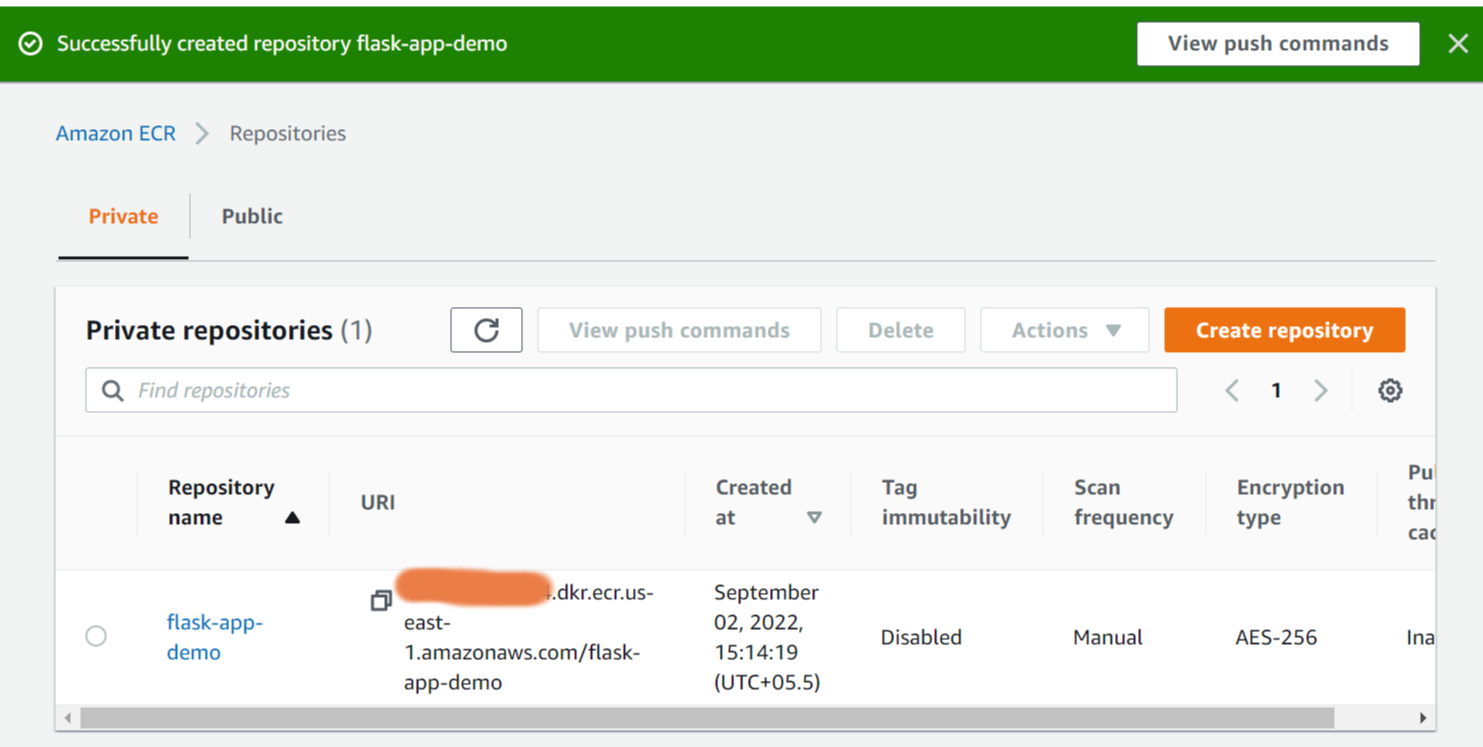
- On the next screen, select Private for the visibility settings. Enter flask-app-demo as the repository name and click on the Create repository button.

- The repository is created in no time. Select the repository created and click on the View push commands button.
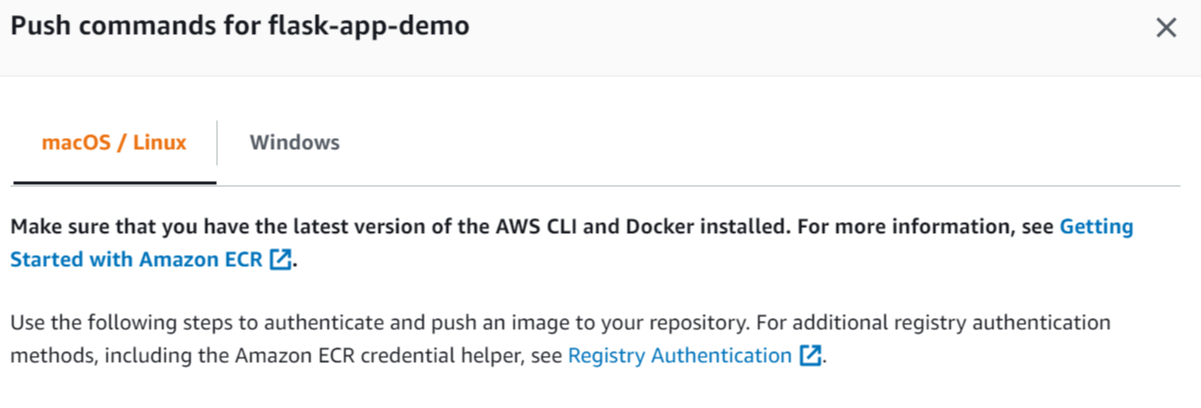
- In popup window, you can see the commands which are used to push the Docker image to the repository from the development environment. You will use these commands later in the Cloud9 IDE environment.
- The repository is ready. You now create and configure Cloud9 environment.
Create Cloud9 Environment
You will launch AWS Cloud9 environment. When you launch an environment, it starts an Amazon EC2 instance in the background and uses it with AWS Cloud9 IDE as the development machine.
- Go to the AWS Cloud9 console and click on the Create environment button.
- On the next screen, enter flaskappdemoenvironment as the name and click on the Next step button.

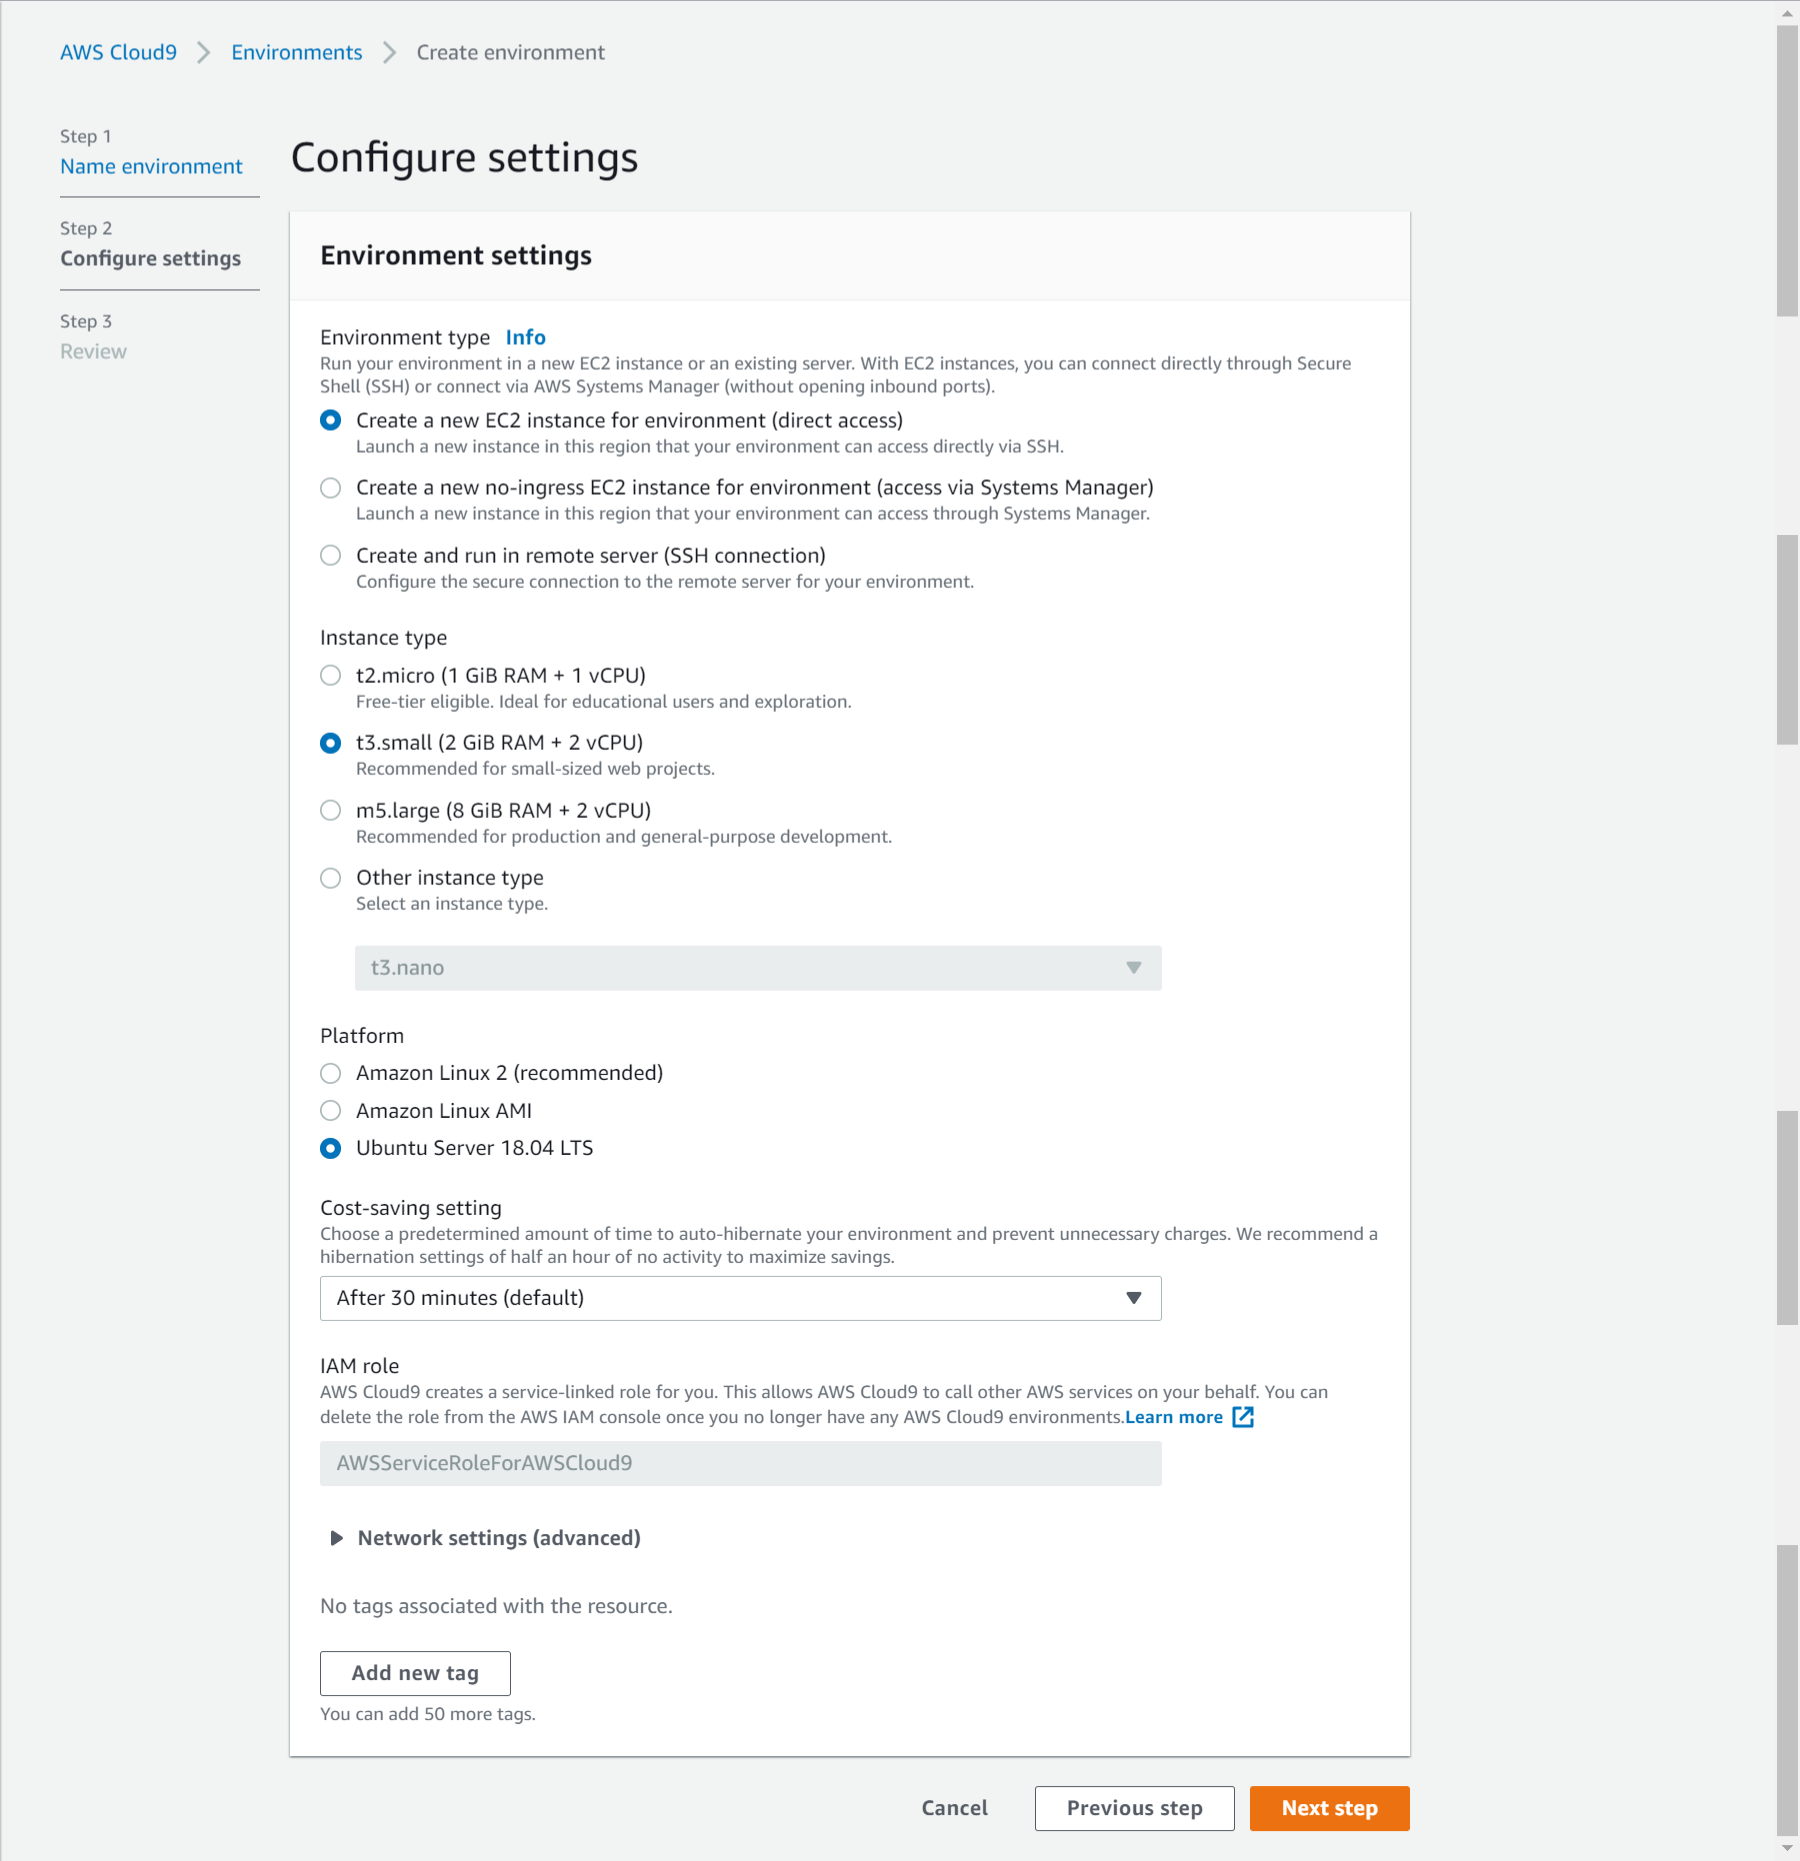
- On the next screen, select Environment type as Create a new instance for environment (EC2). Select Instance type as t3.small (2 GiB RAM + 2 vCPU). Select Ubuntu Server 18.04 LTS for the Platform. The development environment will have Ubuntu as the operating system. Keep rest of the fields with the default values and click on the Next step button.
- On the next screen, click on the Create environment button.
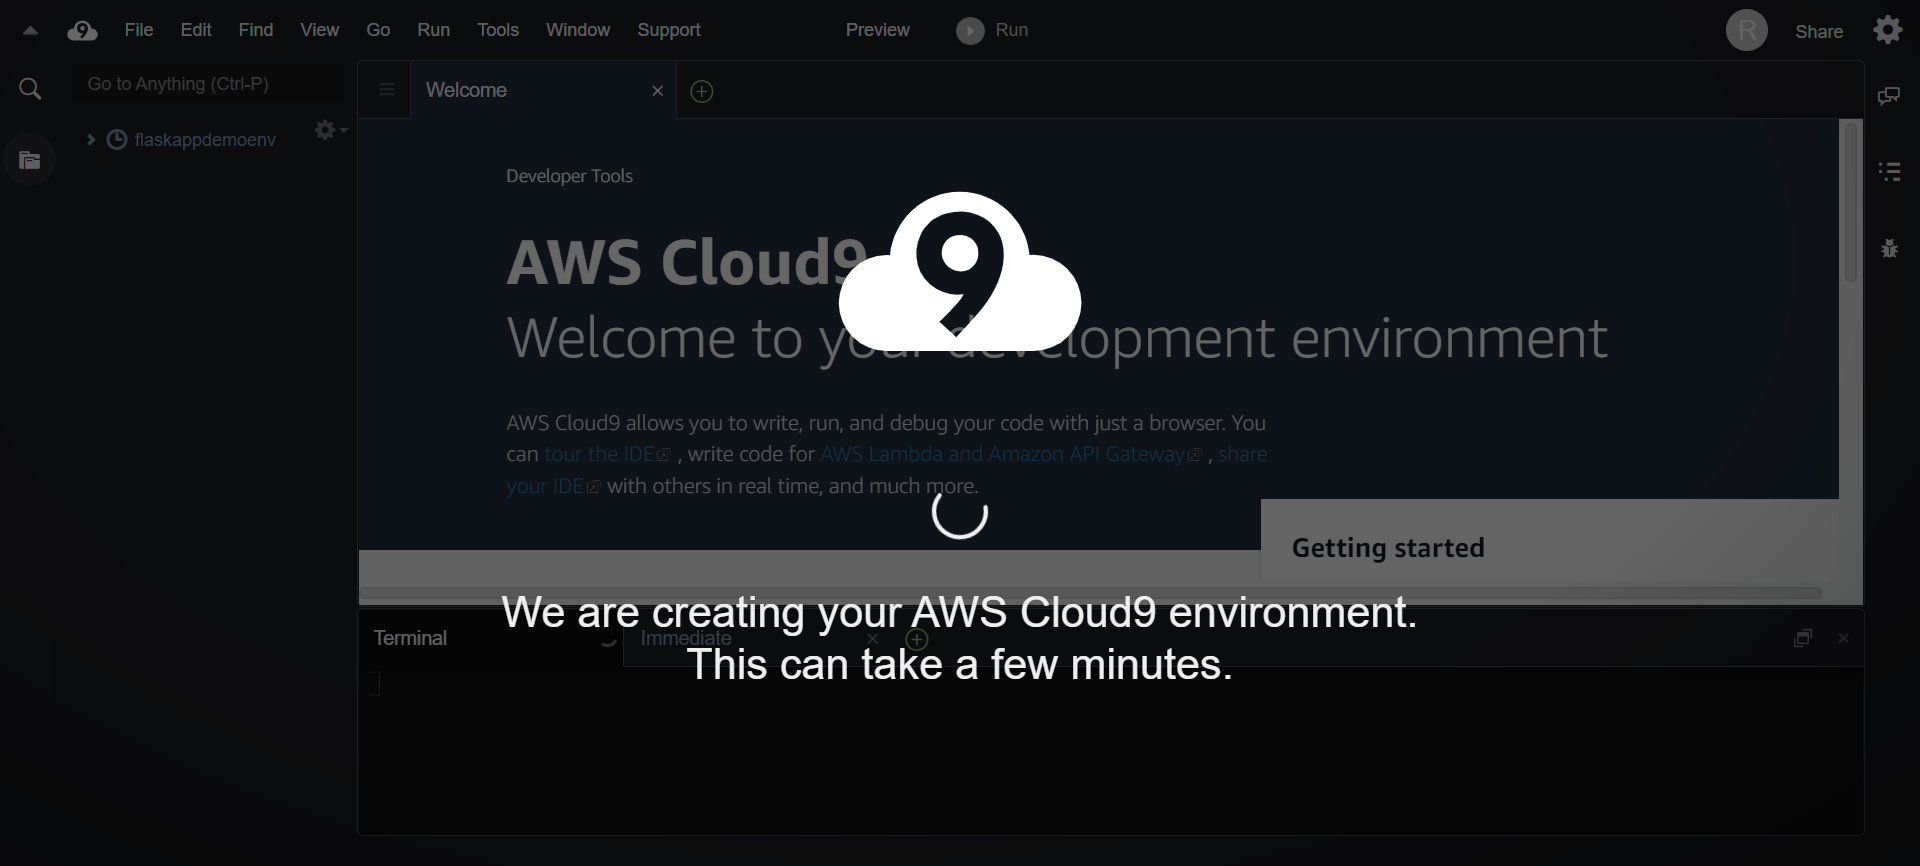
- It will take couple of minutes to create the environment. Wait for the environment to be ready. Once it is ready, you can see console window in the bottom part of the screen. It provides console base access to the development machine.
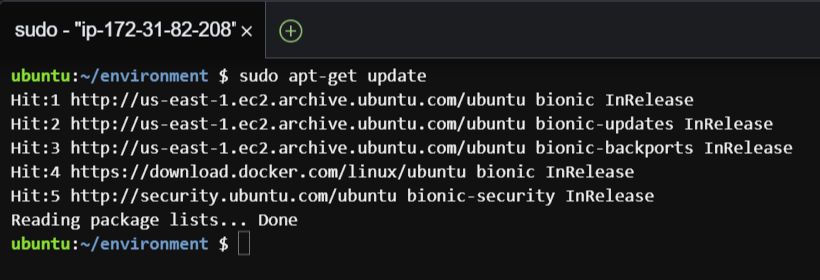
- You will now configure the environment for the Docker. Run the following command in the console to update the environment.
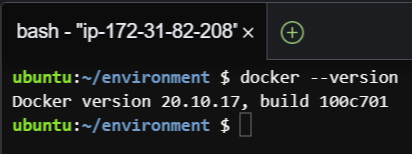
- The Docker is installed and configured. Run the following command to check the version of the Docker installed.
- With environment ready, it is time to create the Docker Image & push it to AWS ECR
Create Docker Image & push it to AWS ECR
You create a Docker image and then upload to the AWS ECR repository. You will create Docker image with a sample python file app.py which deploys a Flask application.
- In AWS Cloud9 IDE, create a file app.py and copy paste the following code. The code is running a simple Flask application. The 0.0.0.0 is a wildcard IP address that will match any possible incoming port on the host machine. The application port is changed to 80 from the default 5000.
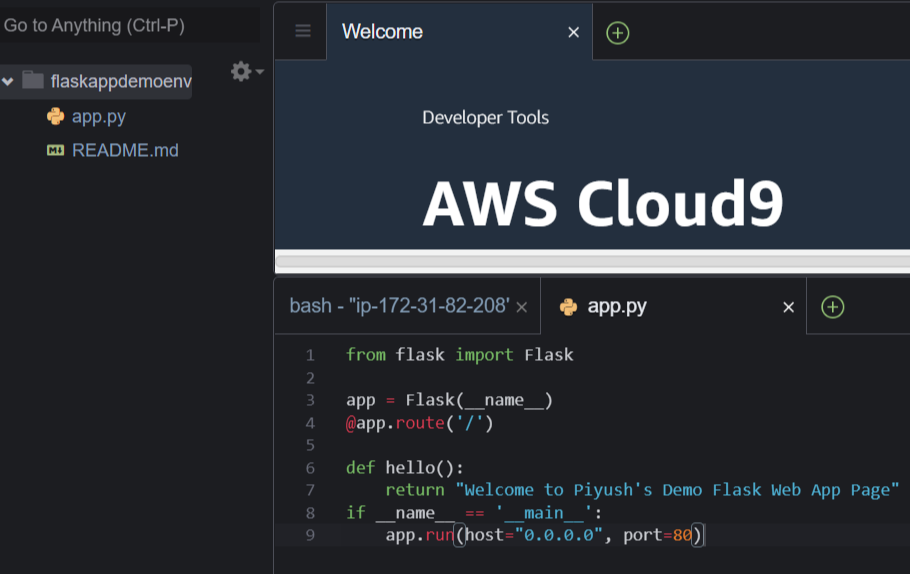
from flask import Flask
app = Flask(__name__)
@app.route('/')
def hello():
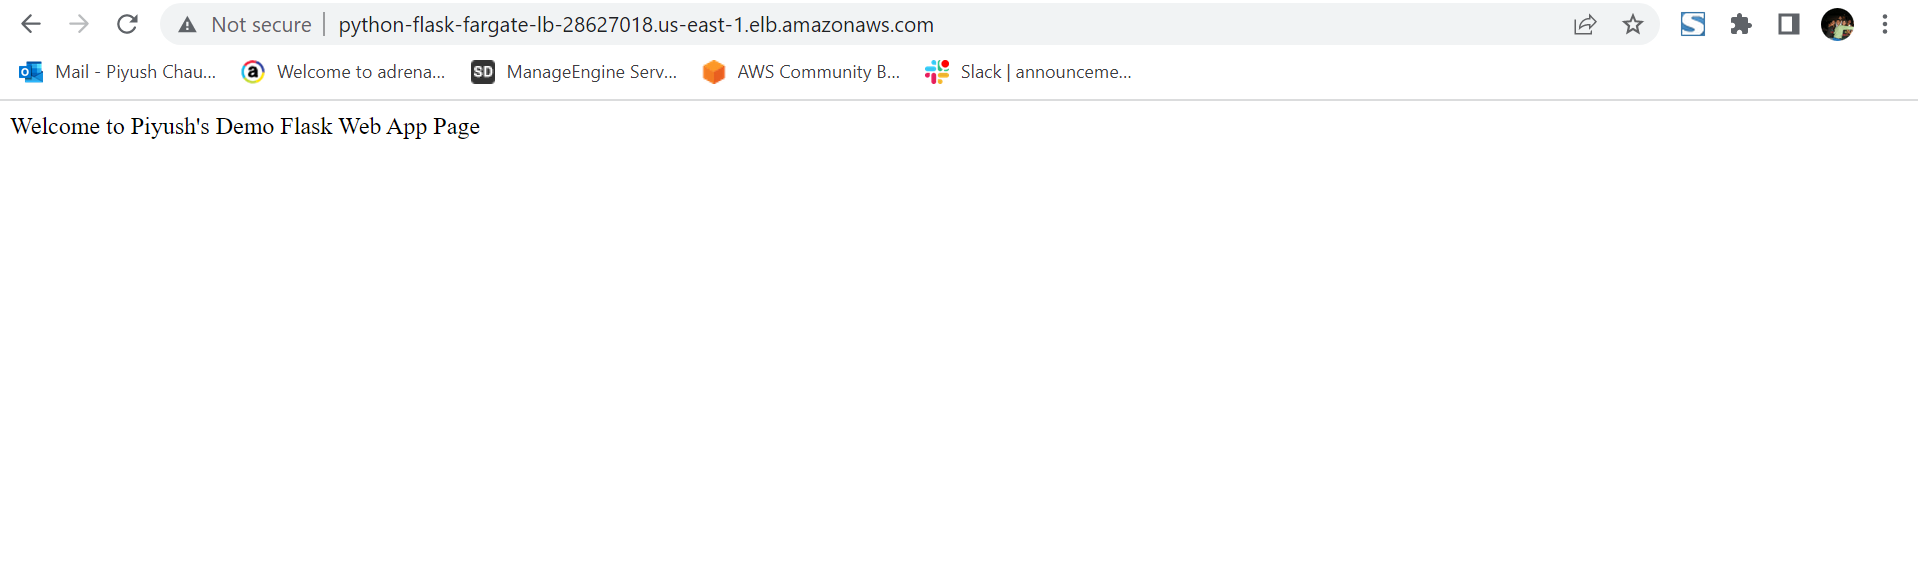
return "Welcome to Piyush's Demo Flask Web App Page"
if __name__ == '__main__':
app.run(host="0.0.0.0", port=80)
- In AWS Cloud9 IDE, create another file with the name Dockerfile and copy paste the following script. The script is using Python:3 as the base image from the DockerHub. Copies app.py file to the root. Installs Flask python package and finally runs app.py file.
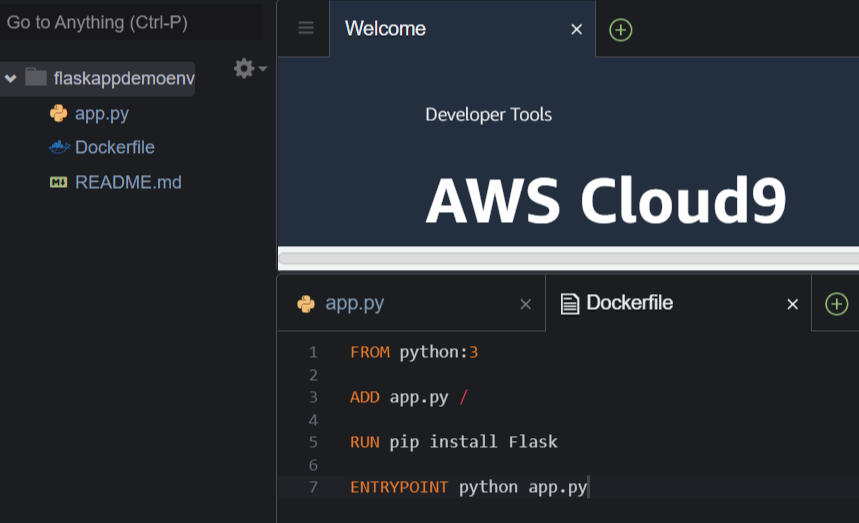
FROM python:3

ADD app.py /

RUN pip install Flask

ENTRYPOINT python app.py
- The files are ready. You will use the push commands from the AWS ECR repository to create and upload the Docker image. Run the following command in the console to authenticate to the ECR registry. Replace with the code of the region you are using. Replace with the account number of the AWS account you are using.
aws ecr get-login-password --region <Region-Code> | docker login --username AWS --password-stdin <Account-Number>.dkr.ecr.<Region-Code>.amazonaws.com

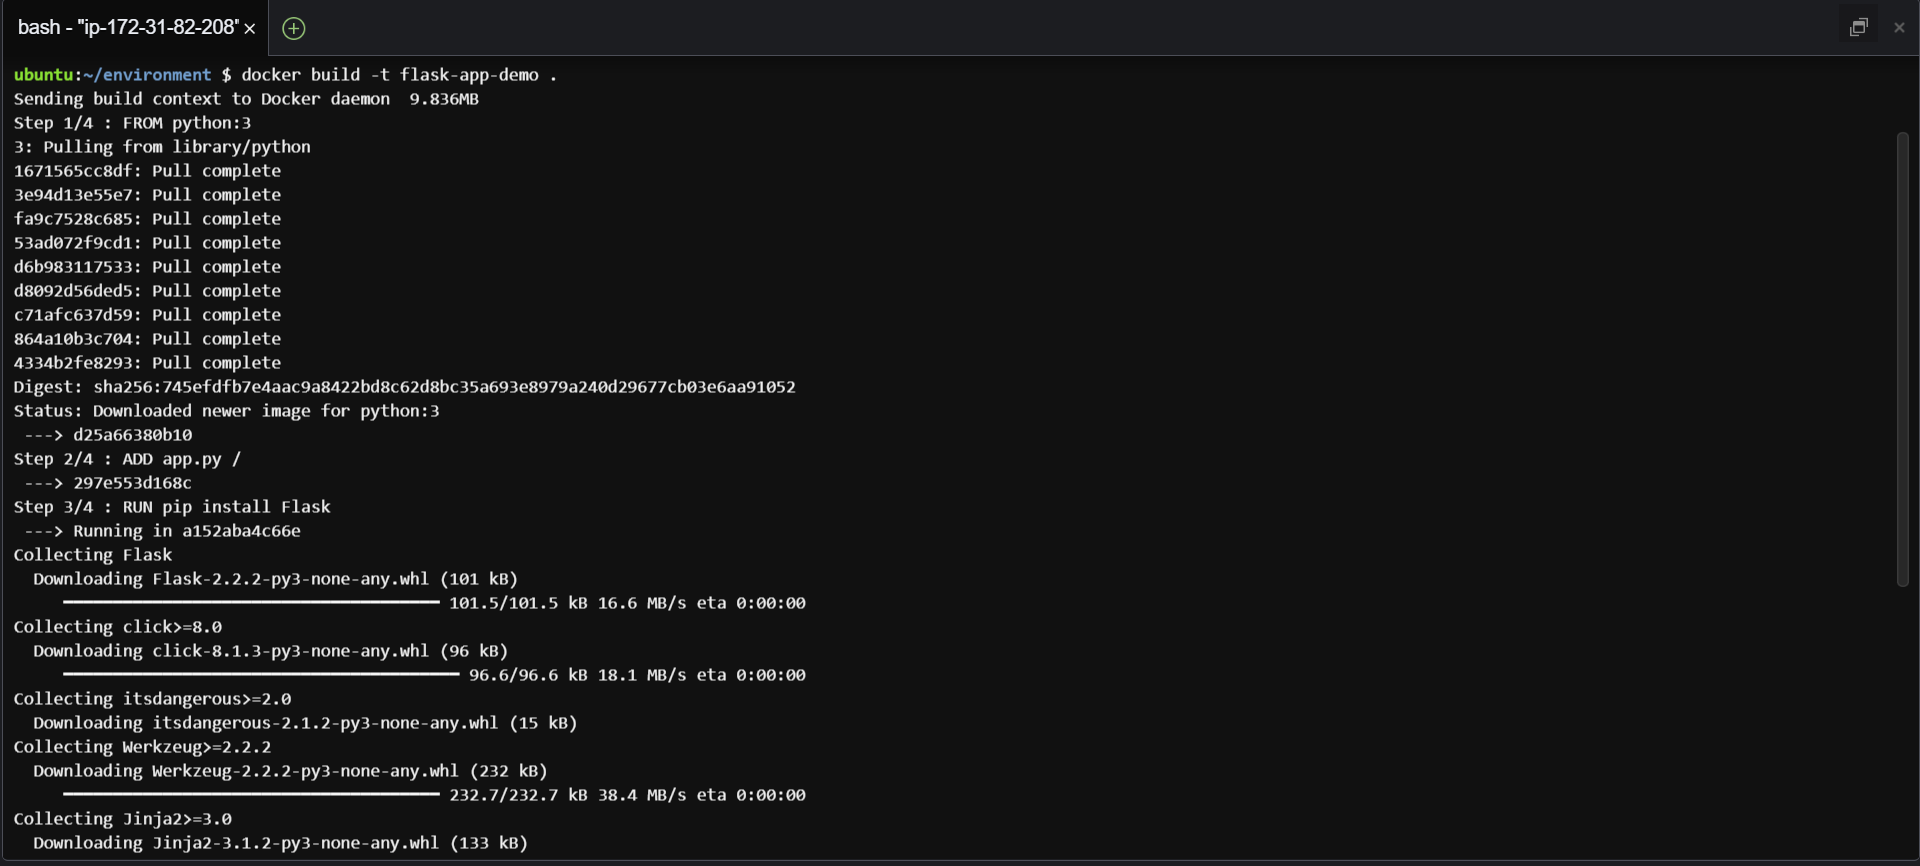
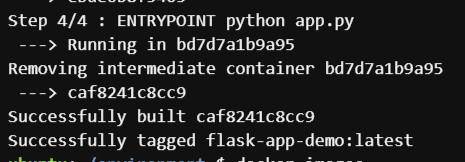
- Next you run the following command in the console to create the Docker image. There is a dot in the end of the command, copy the complete command.
- Next you run the following command to tag the image so you can push the image to the repository. Replace with the code of the region you are using for the workshop. Replace with the account number of the AWS account you are using.
docker tag flask-app-demo:latest <Account-Number>.dkr.ecr.<Region-Code>.amazonaws.com/flask-app-demo:latest - Finally, run the following command to push the image to the AWS ECR repository. Replace with the code of the region you are using for the workshop. Replace with the account number of the AWS account you are using.
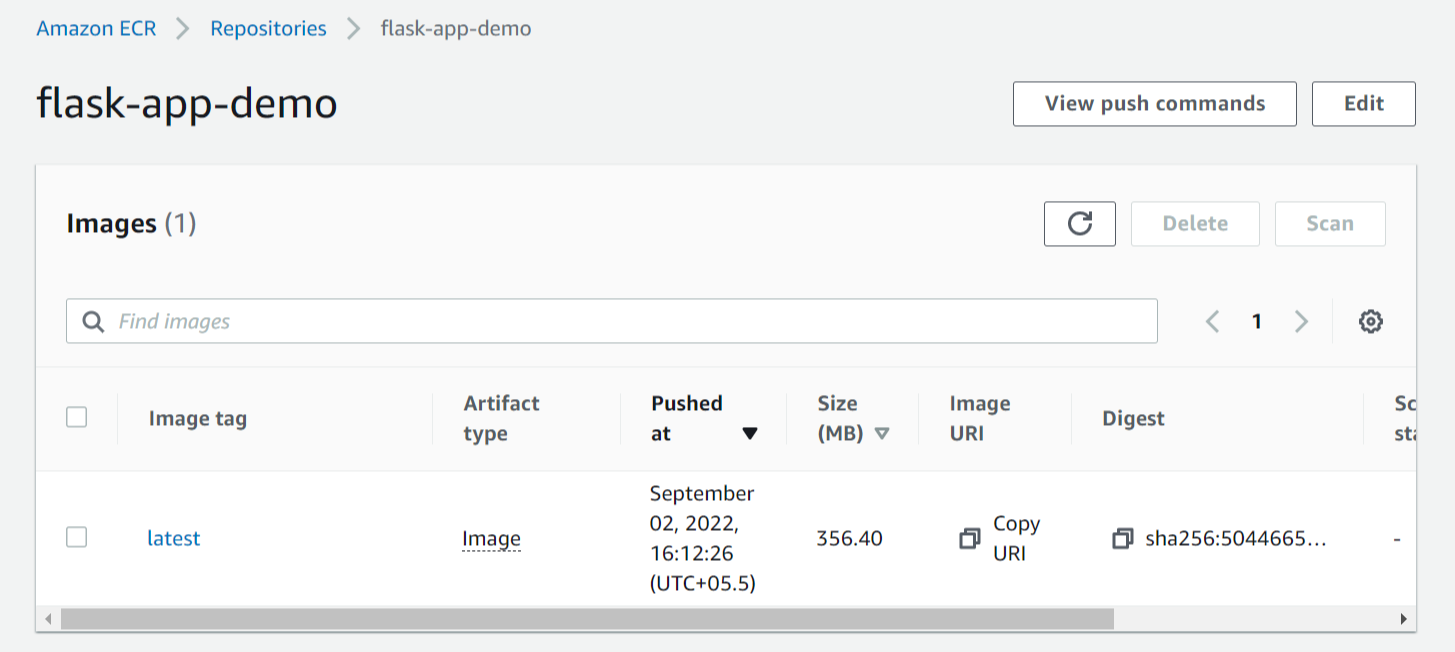
docker push <Account-Number>.dkr.ecr.<Region-Code>.amazonaws.com/flask-app-demo:latest - The Docker image has been pushed to the AWS ECR repository. You can verify it by opening the flask-app-demo repository. Make note of the Image URI as you need it later when configuring container in Amazon ECS Fargate.
- The image is ready. Let’s start configuration of the ECS Fargate cluster and launch application based on the image.
Create Fargate cluster based on ECS
- Goto the AWS Elastic Container Services (ECS) console and click on the Clusters menu in the left and then click on the Create Cluster button.
- On the next screen, select Networking only option and click on the Next step button.
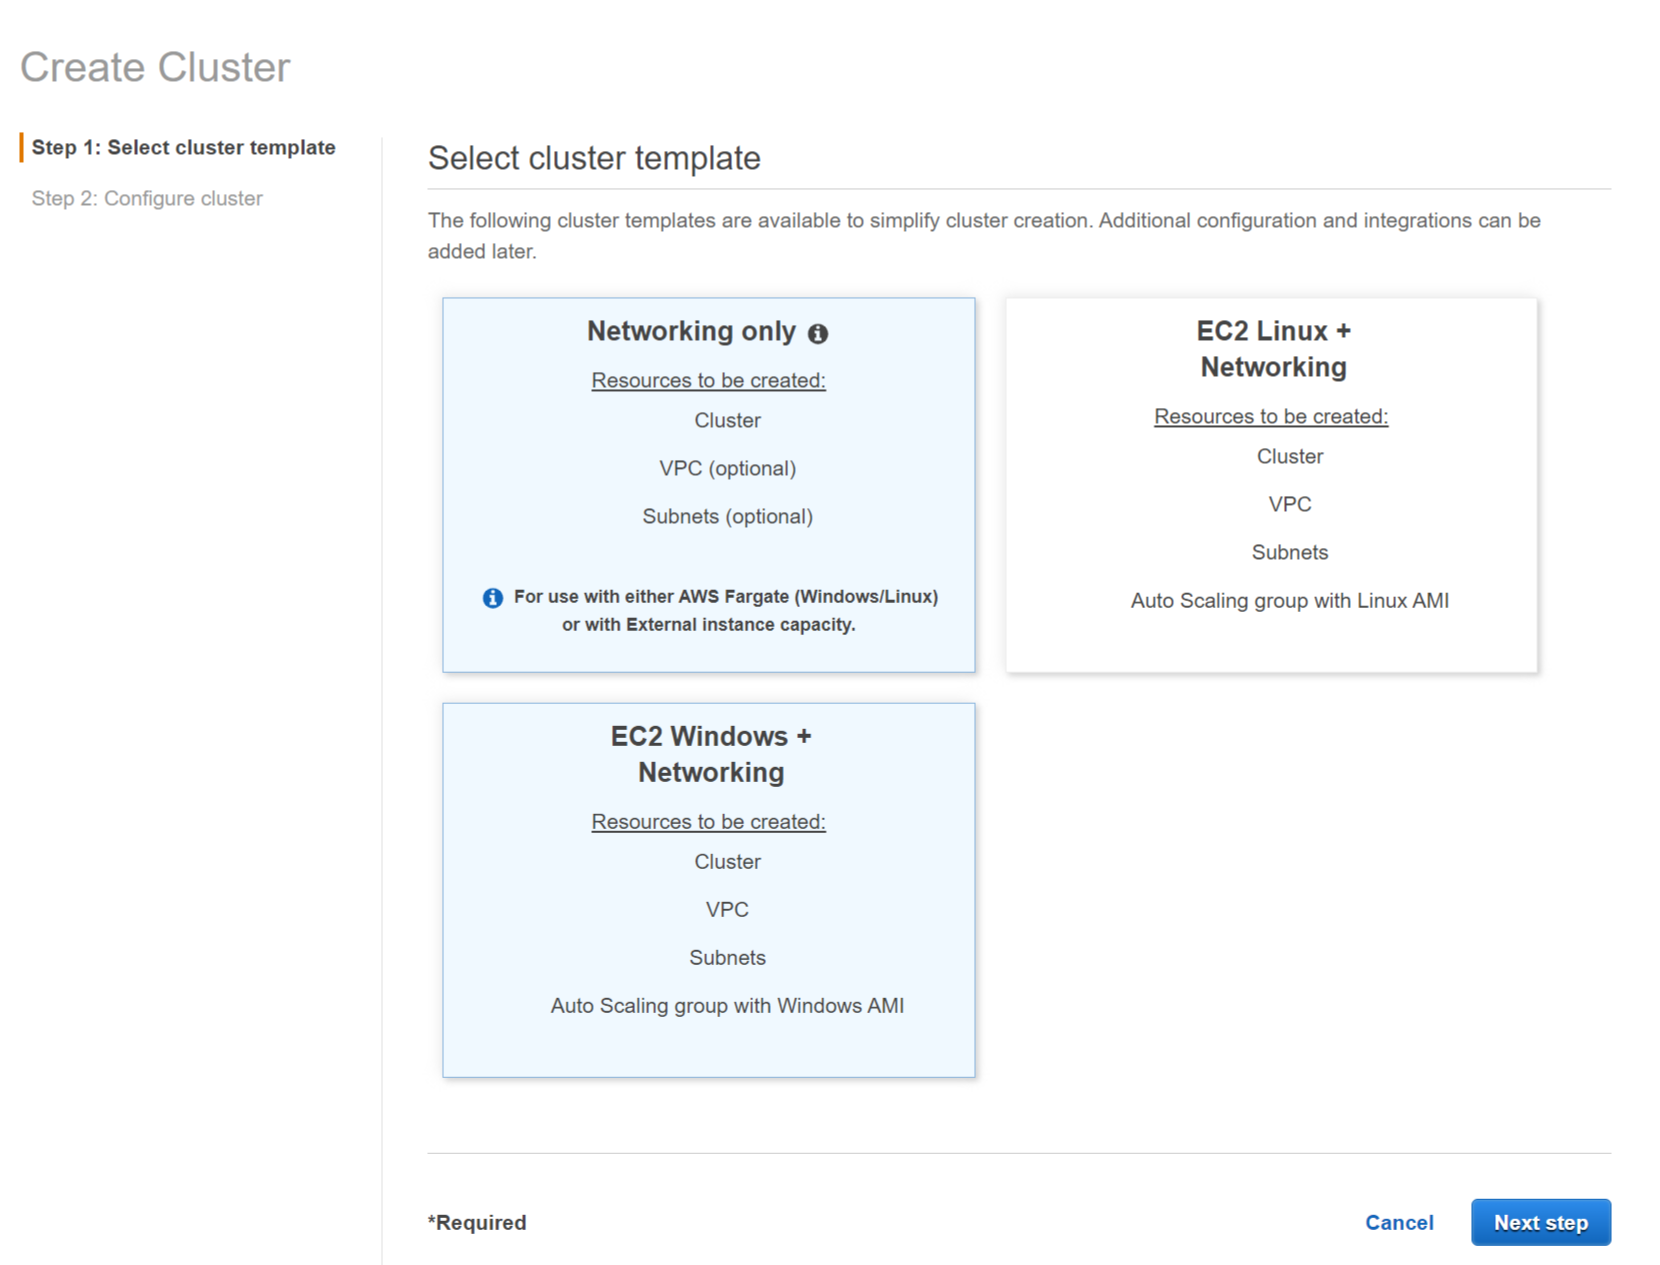
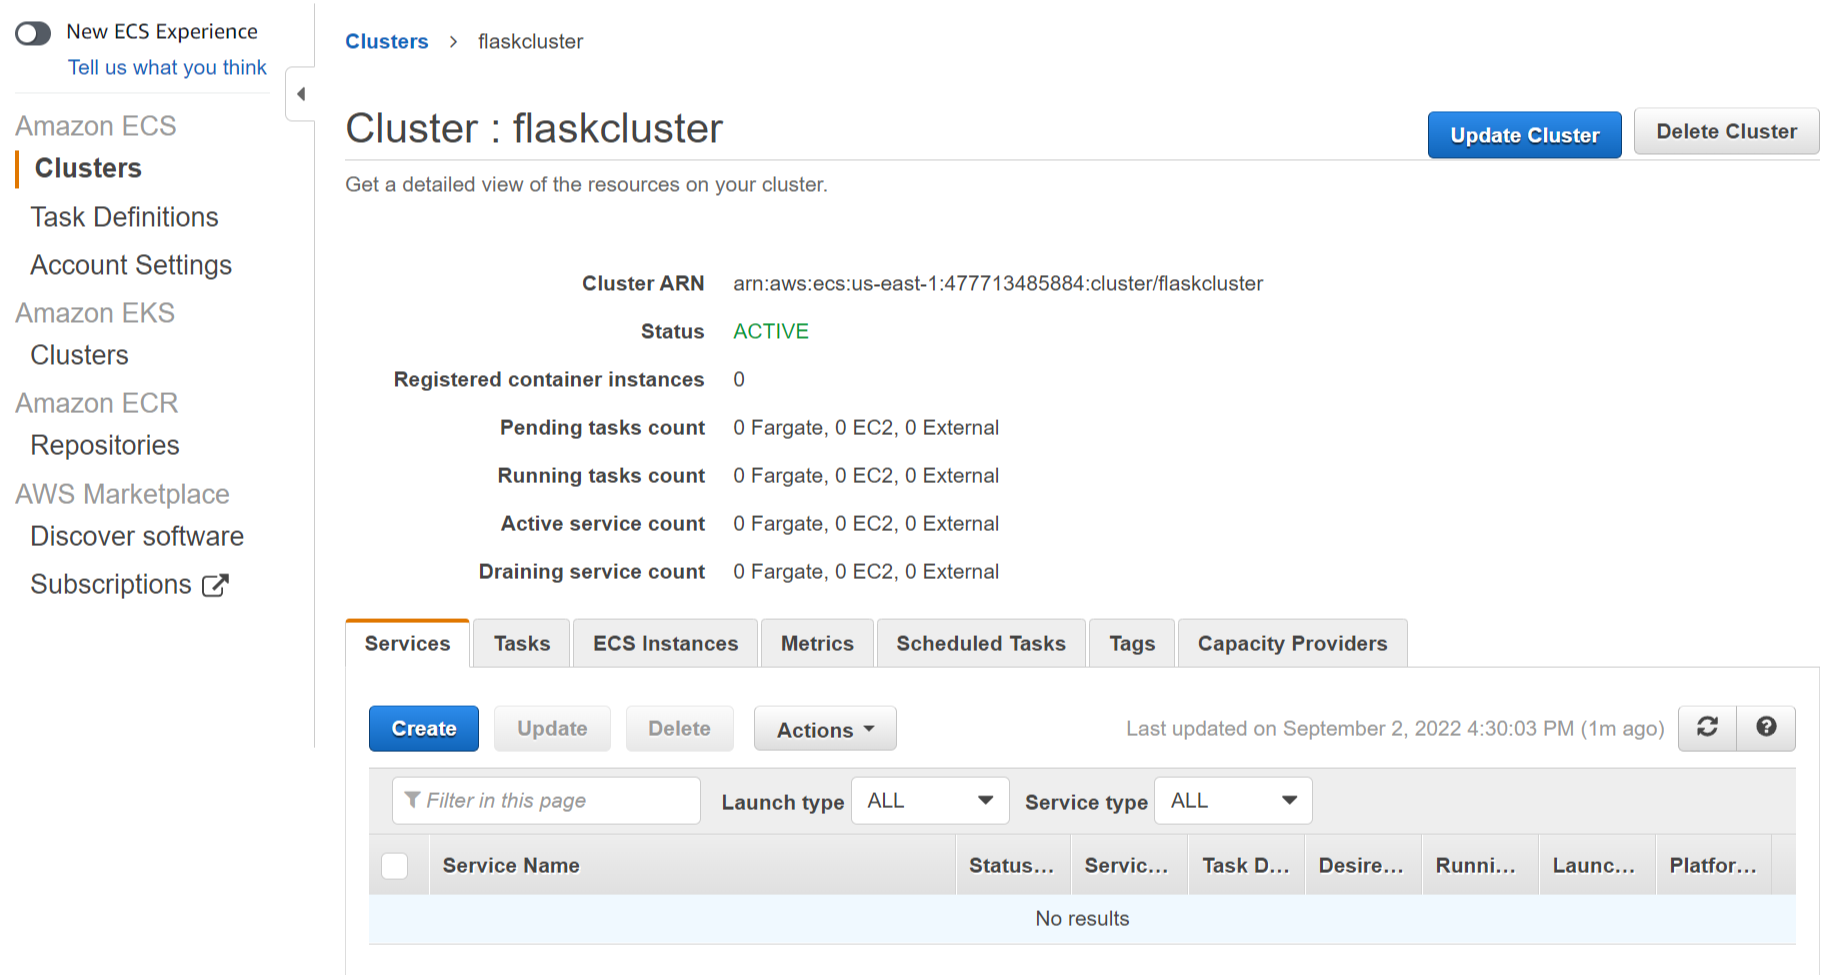
- On the next screen, type in flaskcluster as the cluster name.
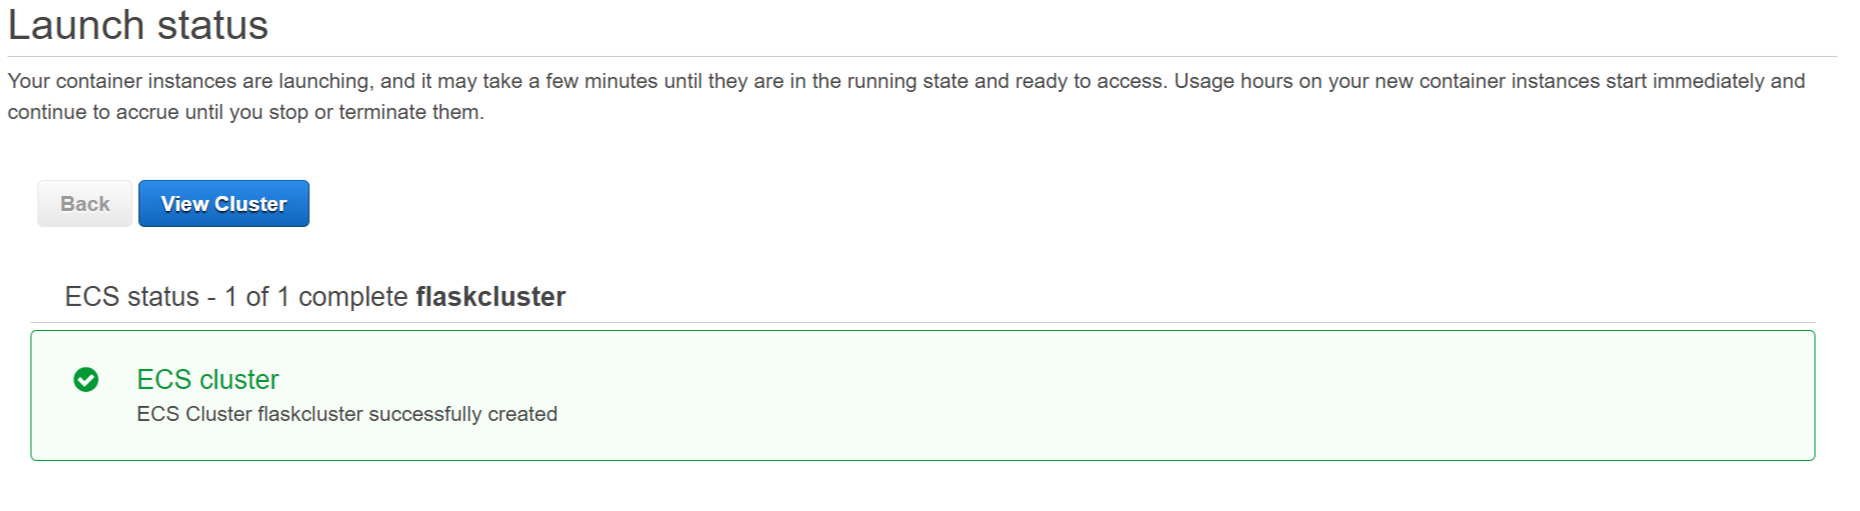
- The cluster will be launched in no time. You now configure the task definition.
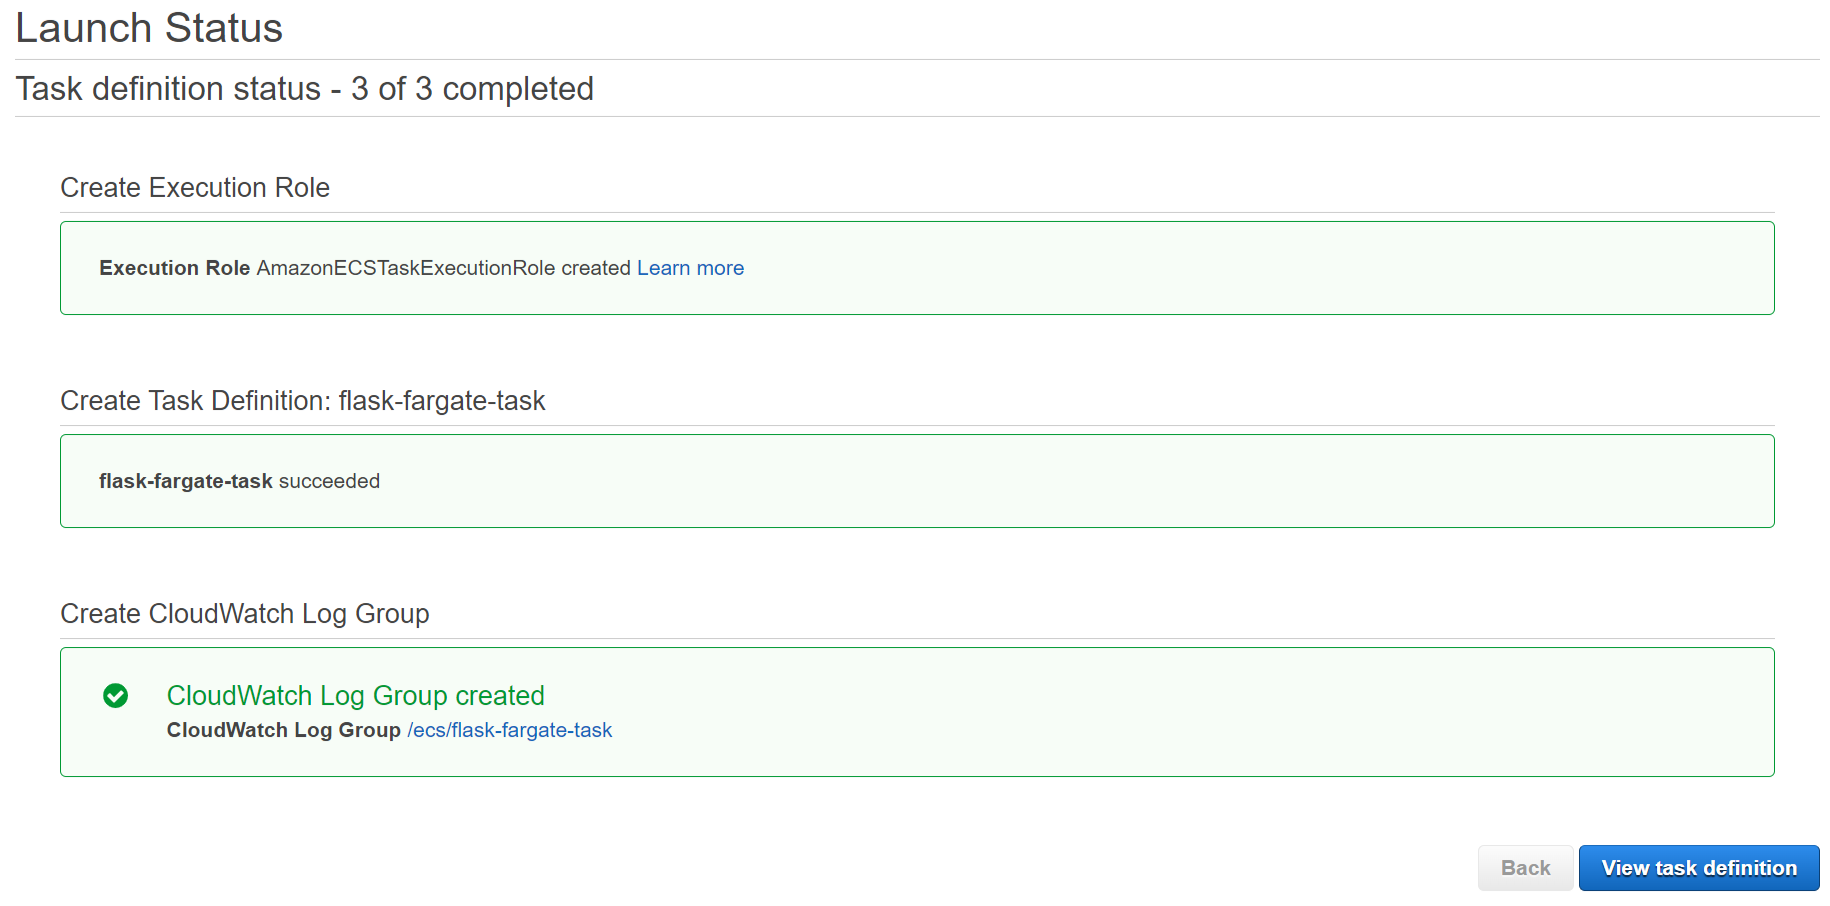
Create Fargate task definition
You create task definition which is used to run the docker image as a task on the ECS cluster.
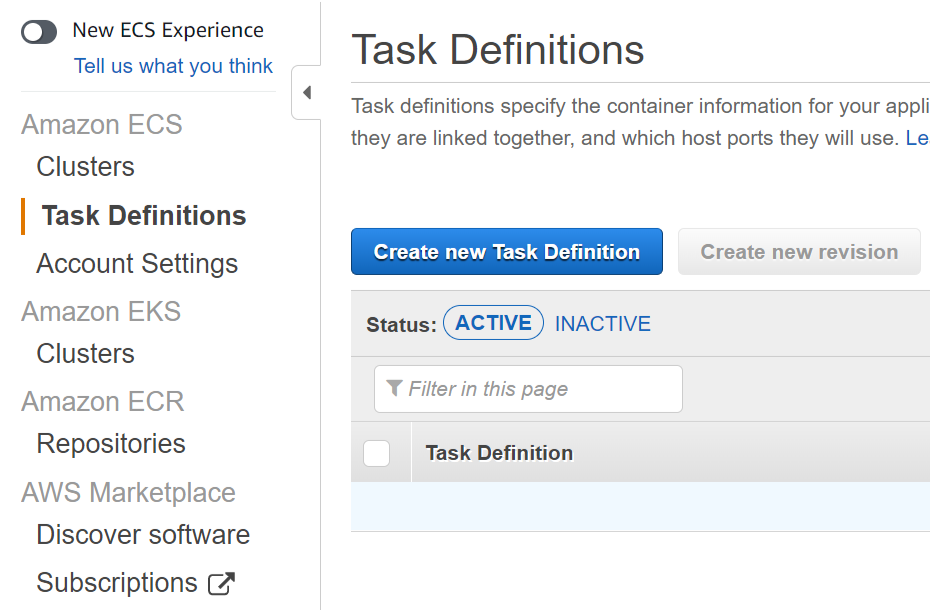
- Go to the AWS Elastic Container Services (ECS) console and click on the Task Definitions menu in the left and then click on the Create new Task Definition button.
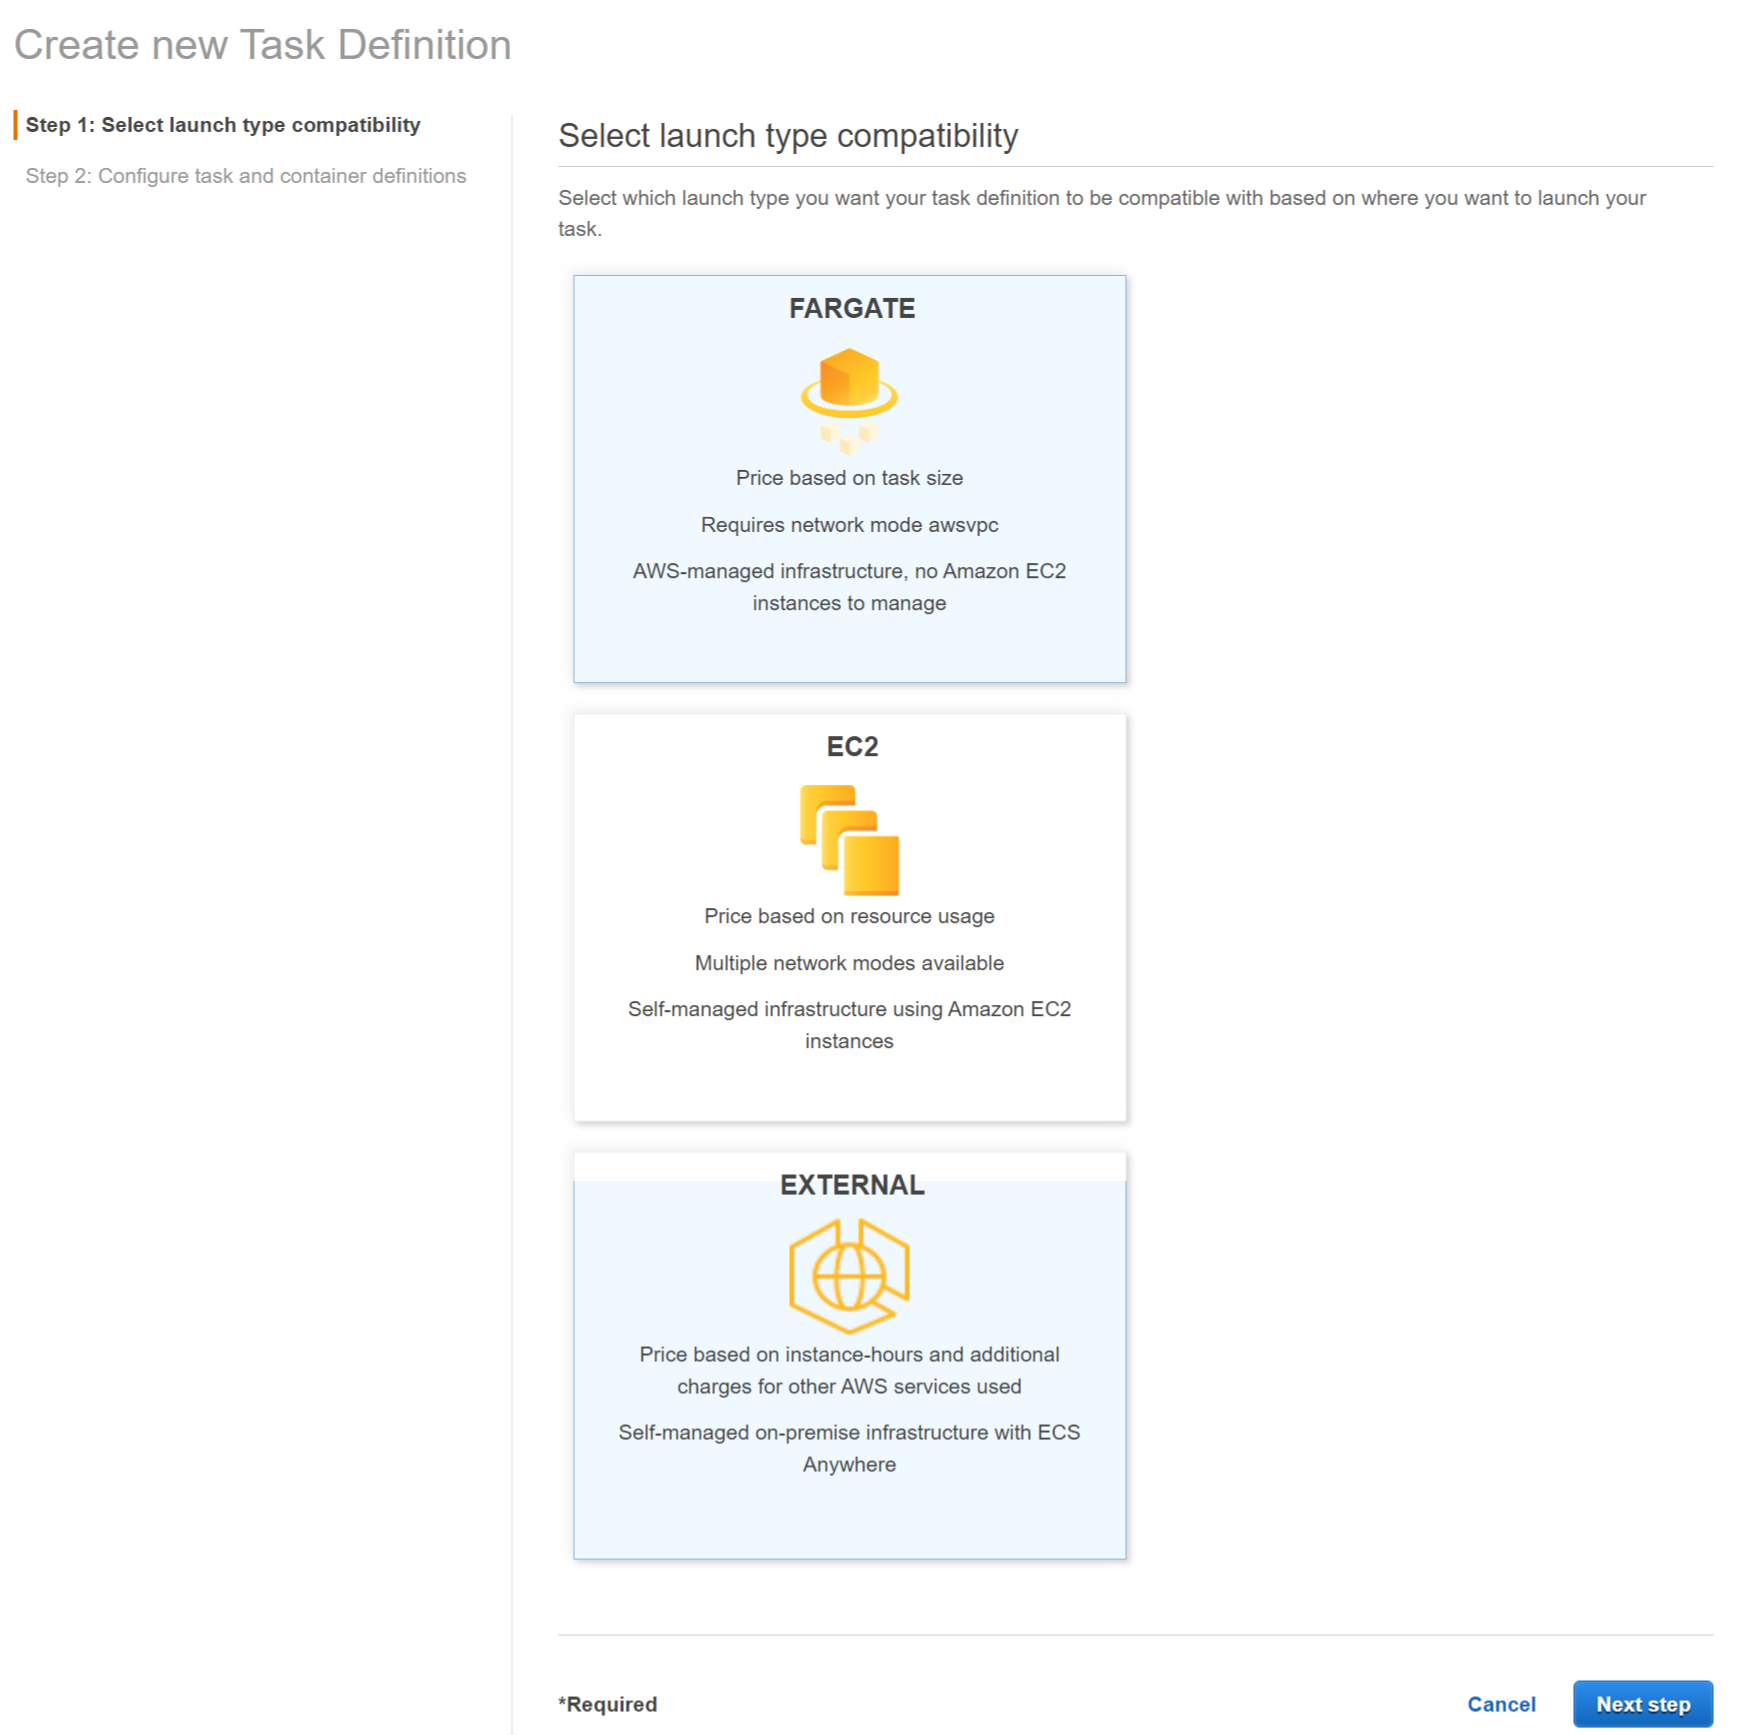
- On the next screen, select Fargate option and click on the Next step button.
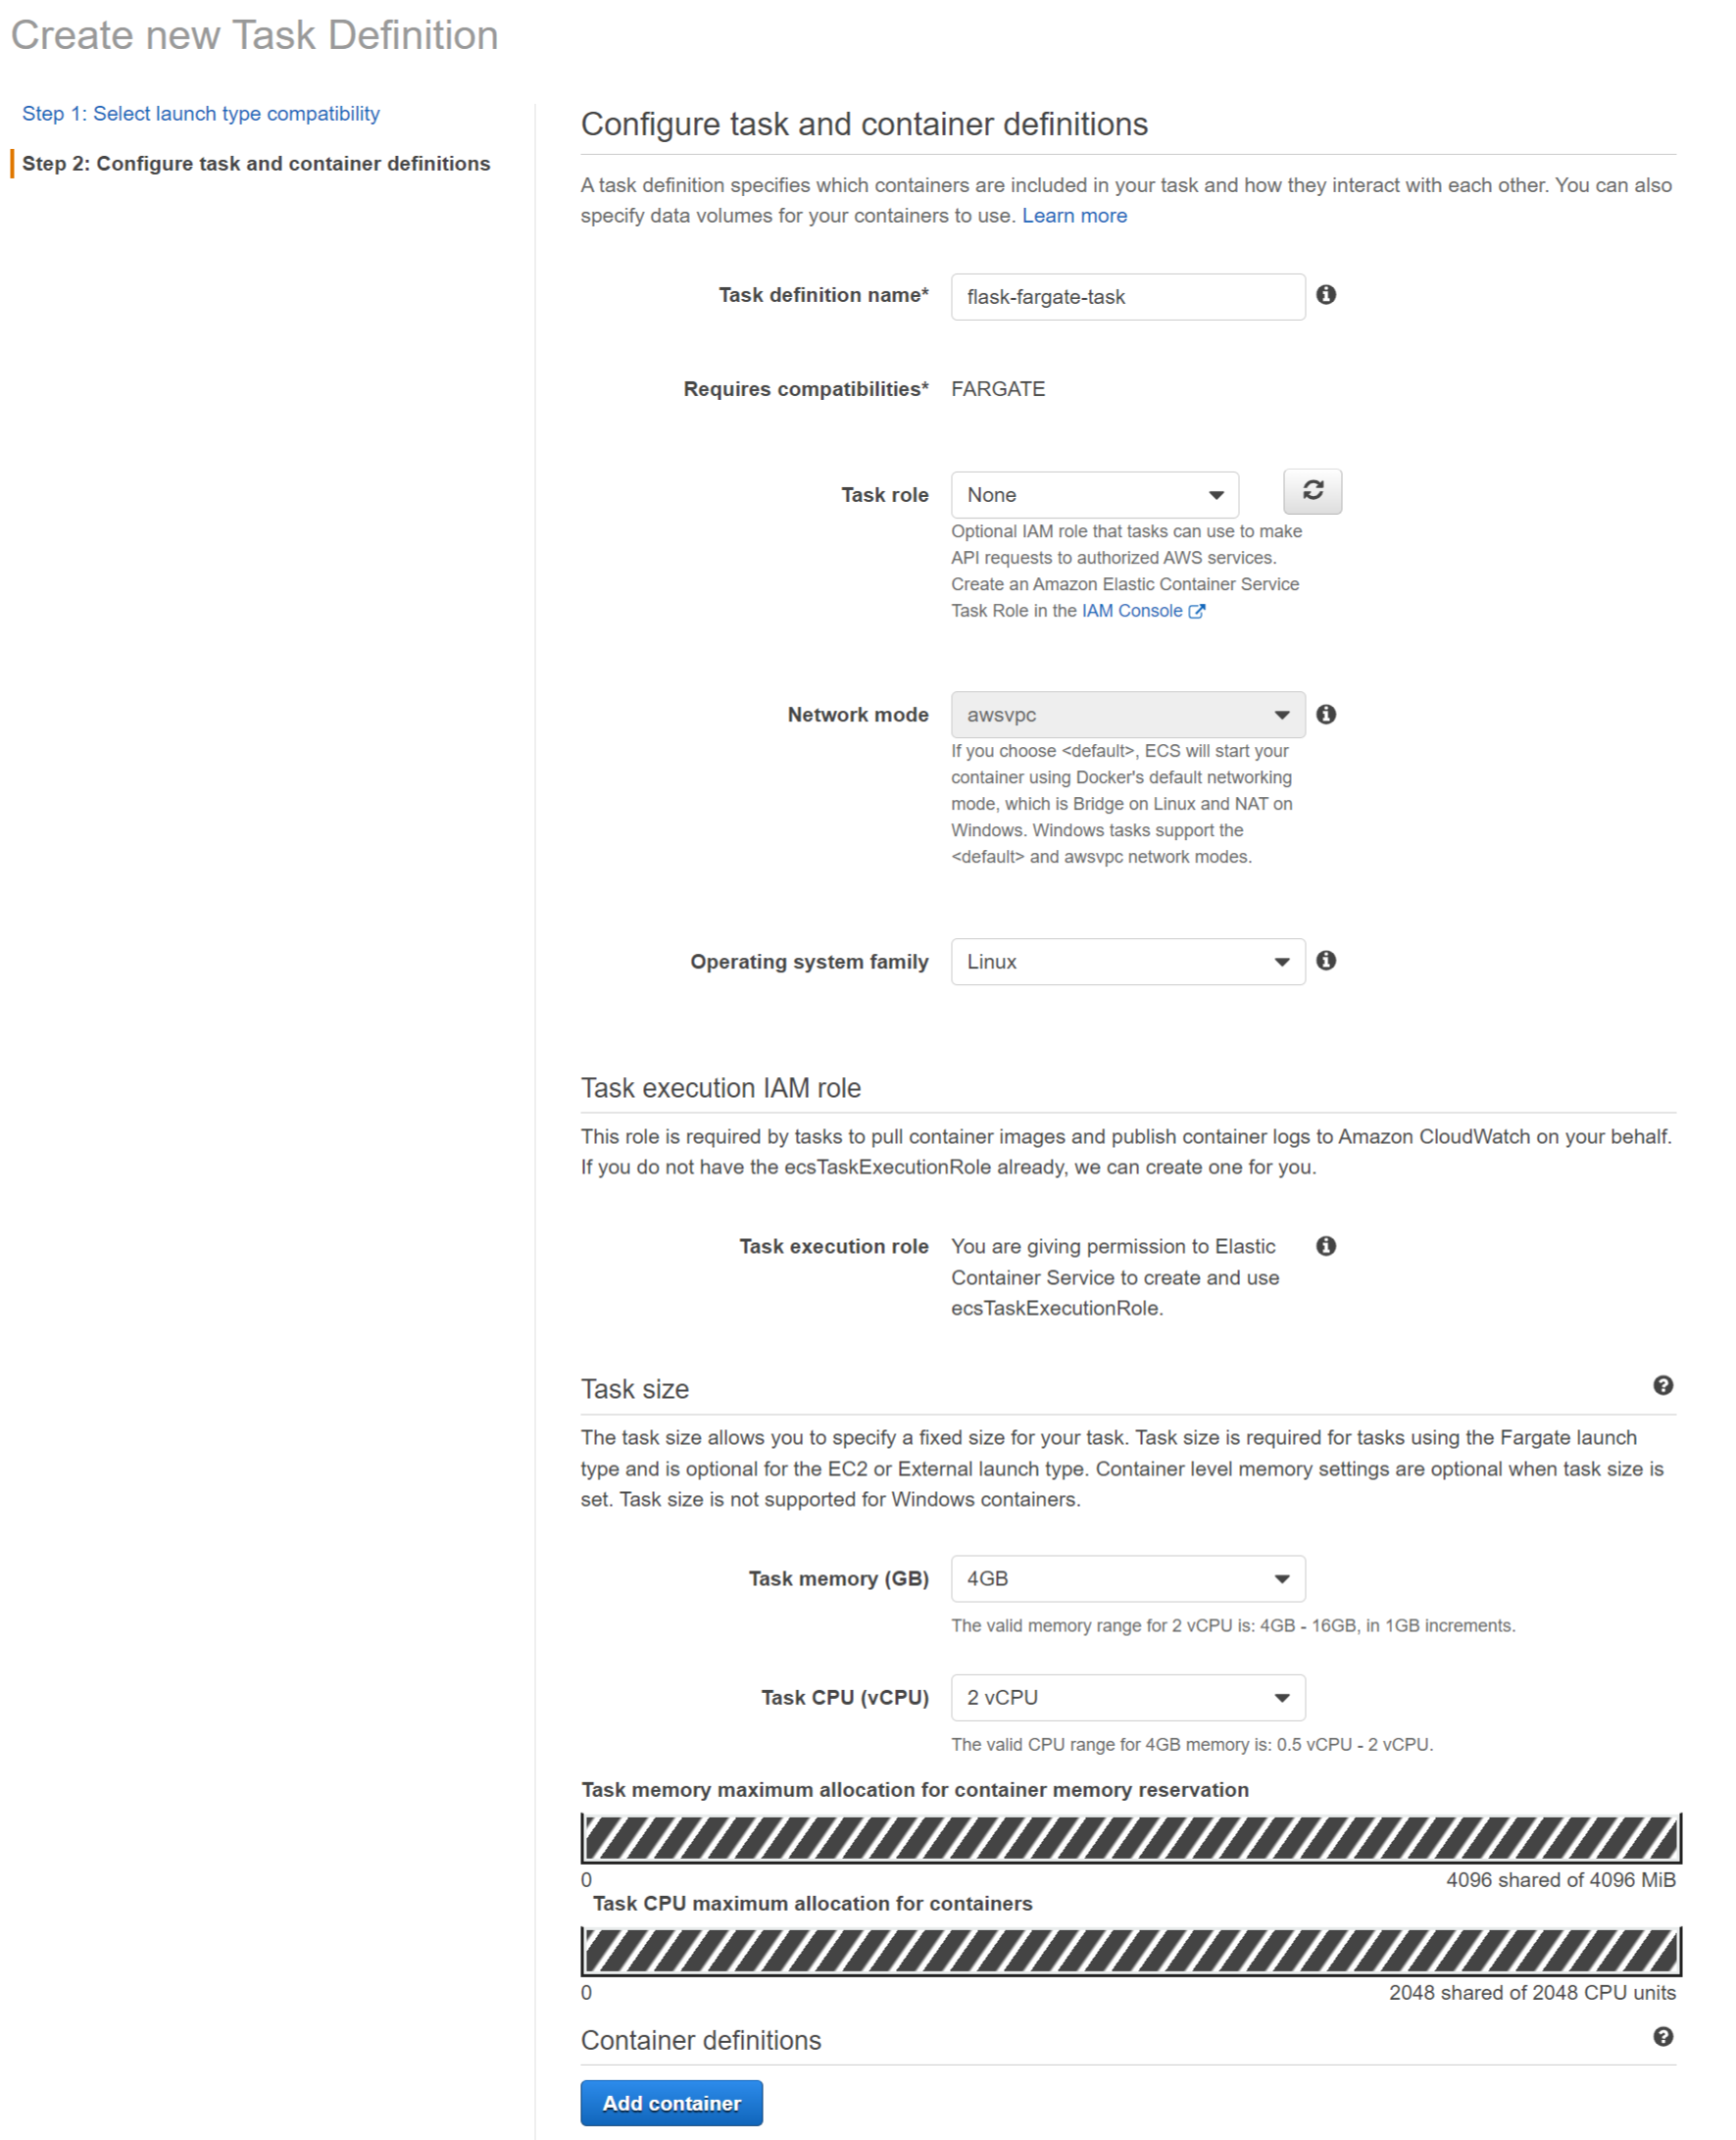
- On the next screen, type in flask-fargate-task as the task name. Select None for the task role. For the network mode, it is awsvpc. Select OS Family as Linux. For the Task size, lets take 2vcpu & 4GB Memory.
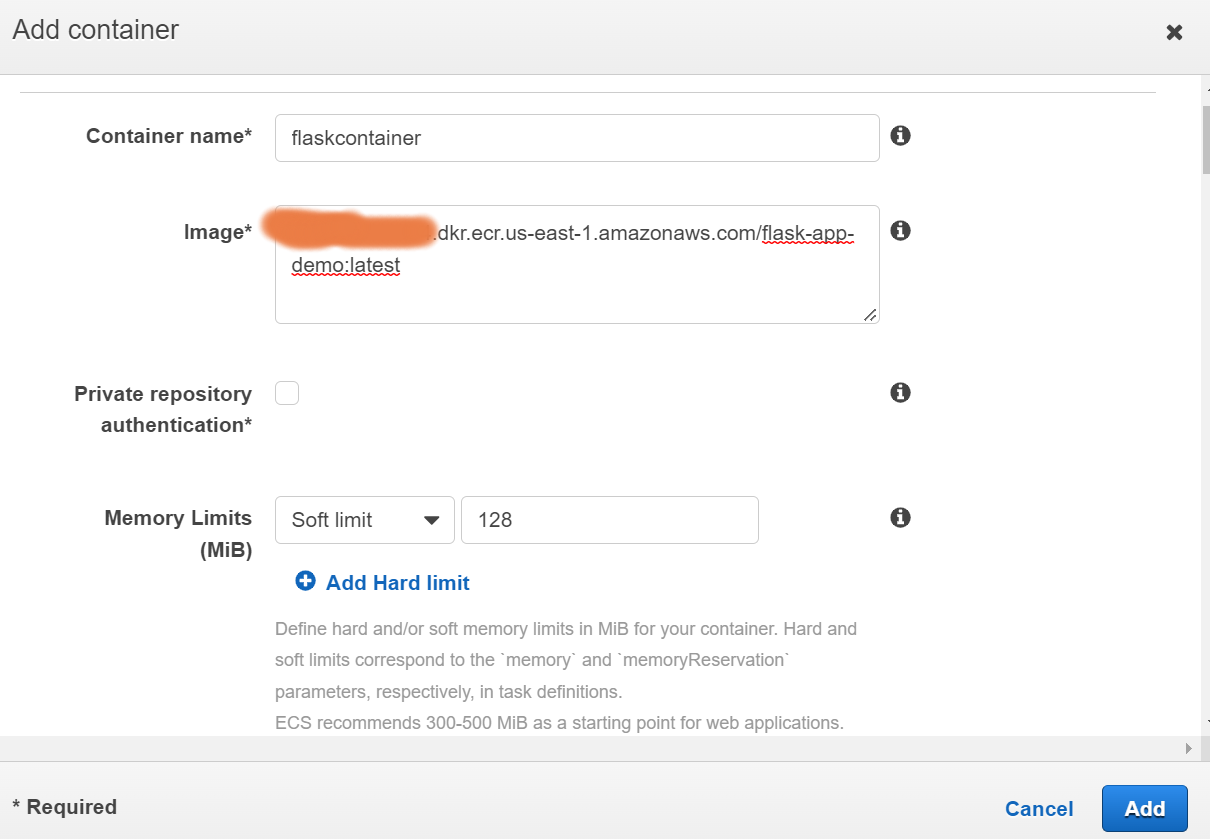
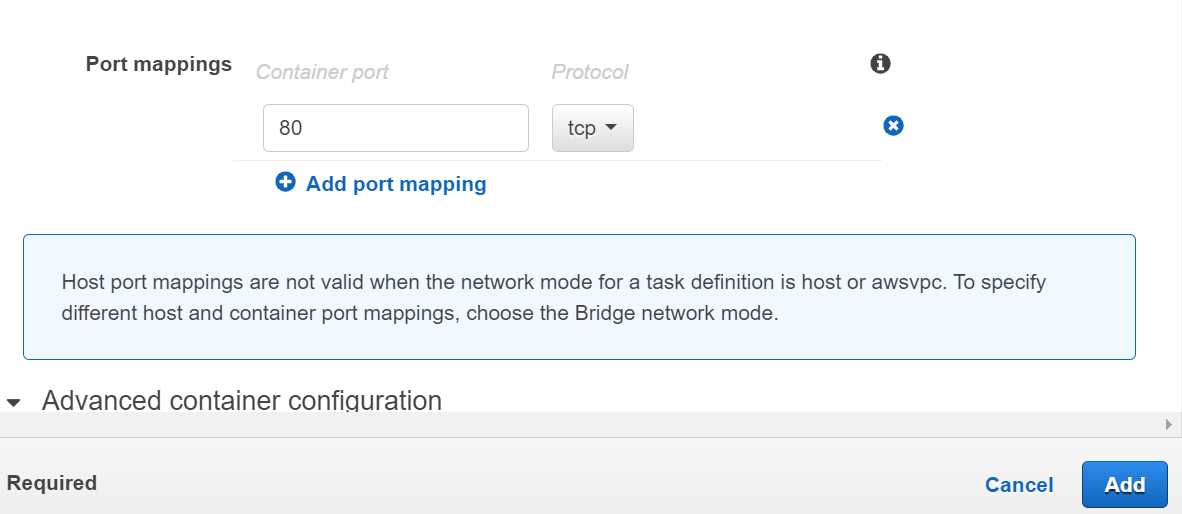
- Click on the Add container button. On the add container popup, type in flaskcontainer as the container name. Copy-paste docker image URI in the Image field. Type in 128 for the memory soft limit. Type in 80 for container port. Keep tcp for the protocol and click on the Add button.
- The task definition is created in no time. In the next step, you create App Load balancer and target group.
Create App Load balancer and target group
Let’s move to EC2 console. Here, we need to set up a load balancer and target group. A load balancer will sit in front of our Fargate services and redirect user requests from the public internet to our services.
On EC2 console, look inside the left drawer for “Load Balancing” and choose “Load Balancers”. Then click “Create Load Balancer”.
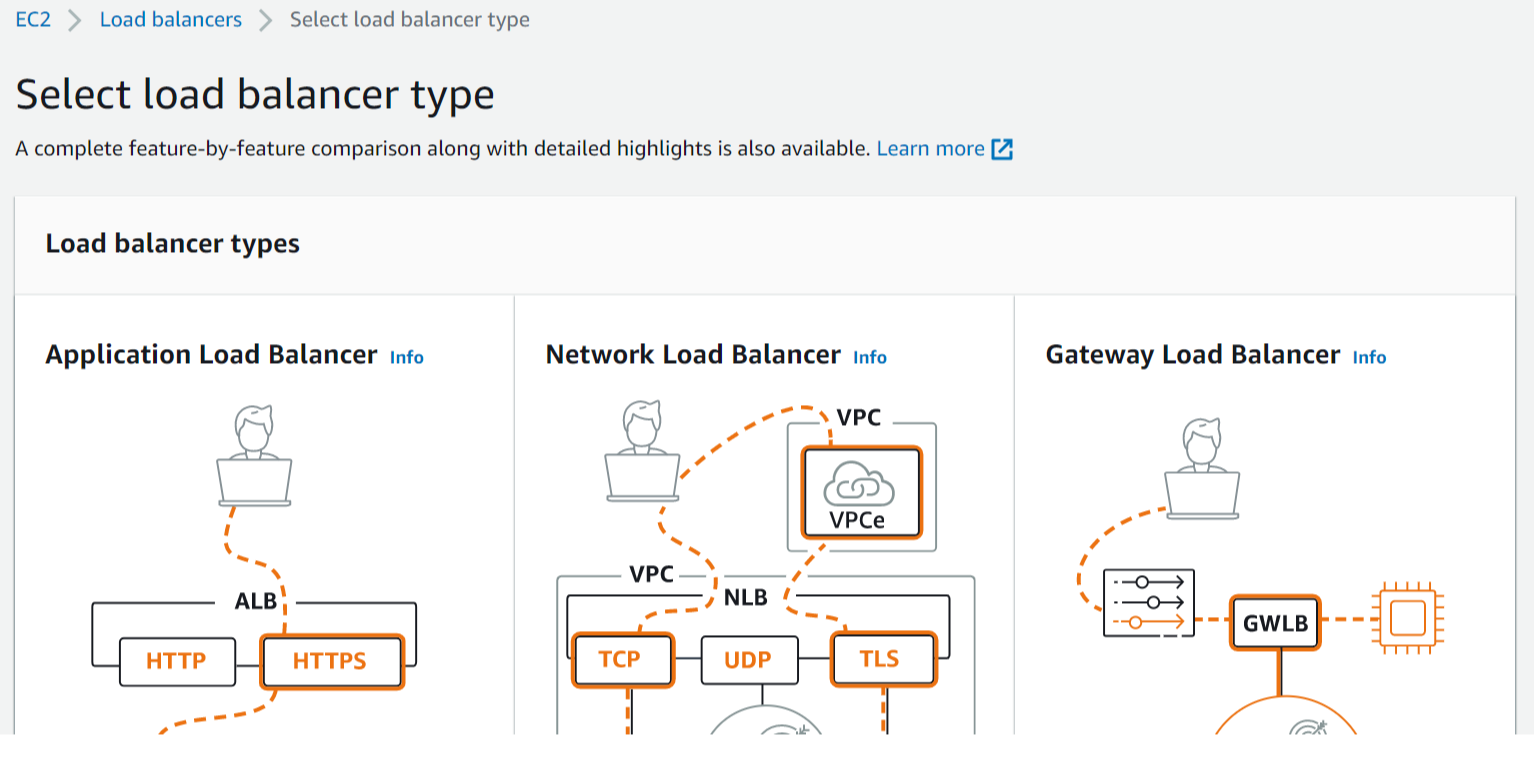
 You’ll see options for load balancer types. Now, choose Application Load Balancer.
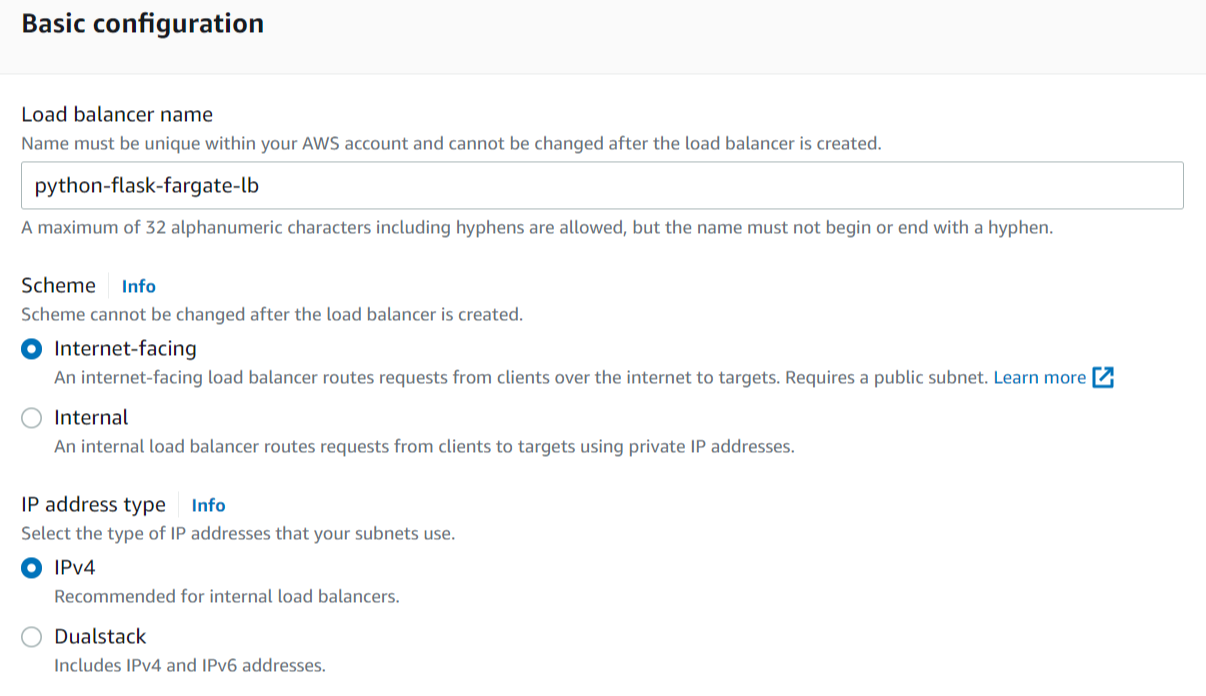
For the basic configurations:
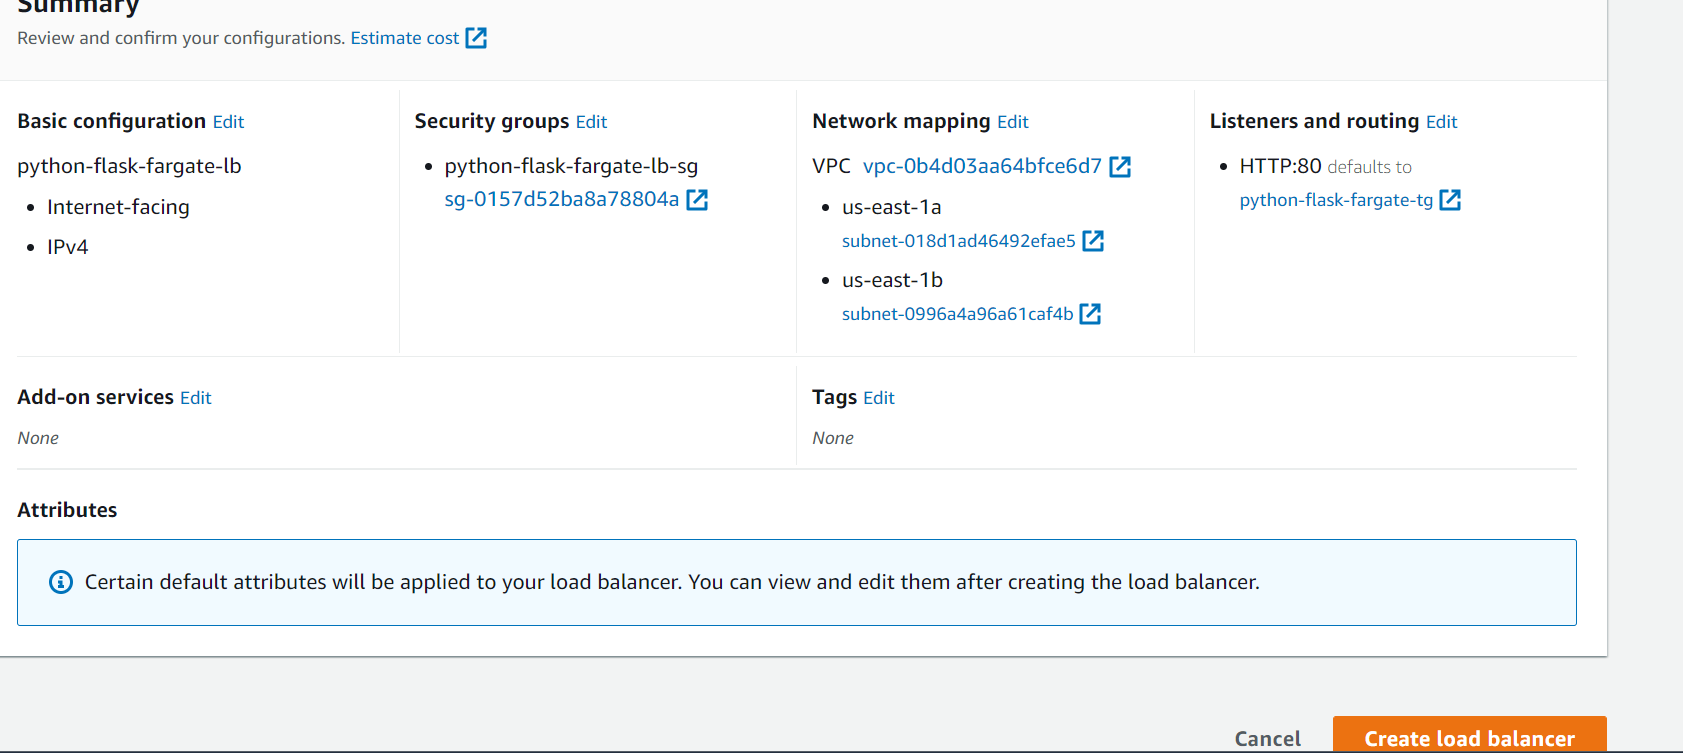
- Provide load balancer name, eg: python-flask-fargate-lb.
- For scheme, leave internet facing selected.
- Also, the same thing for IP address type, let IPv4 be selected.
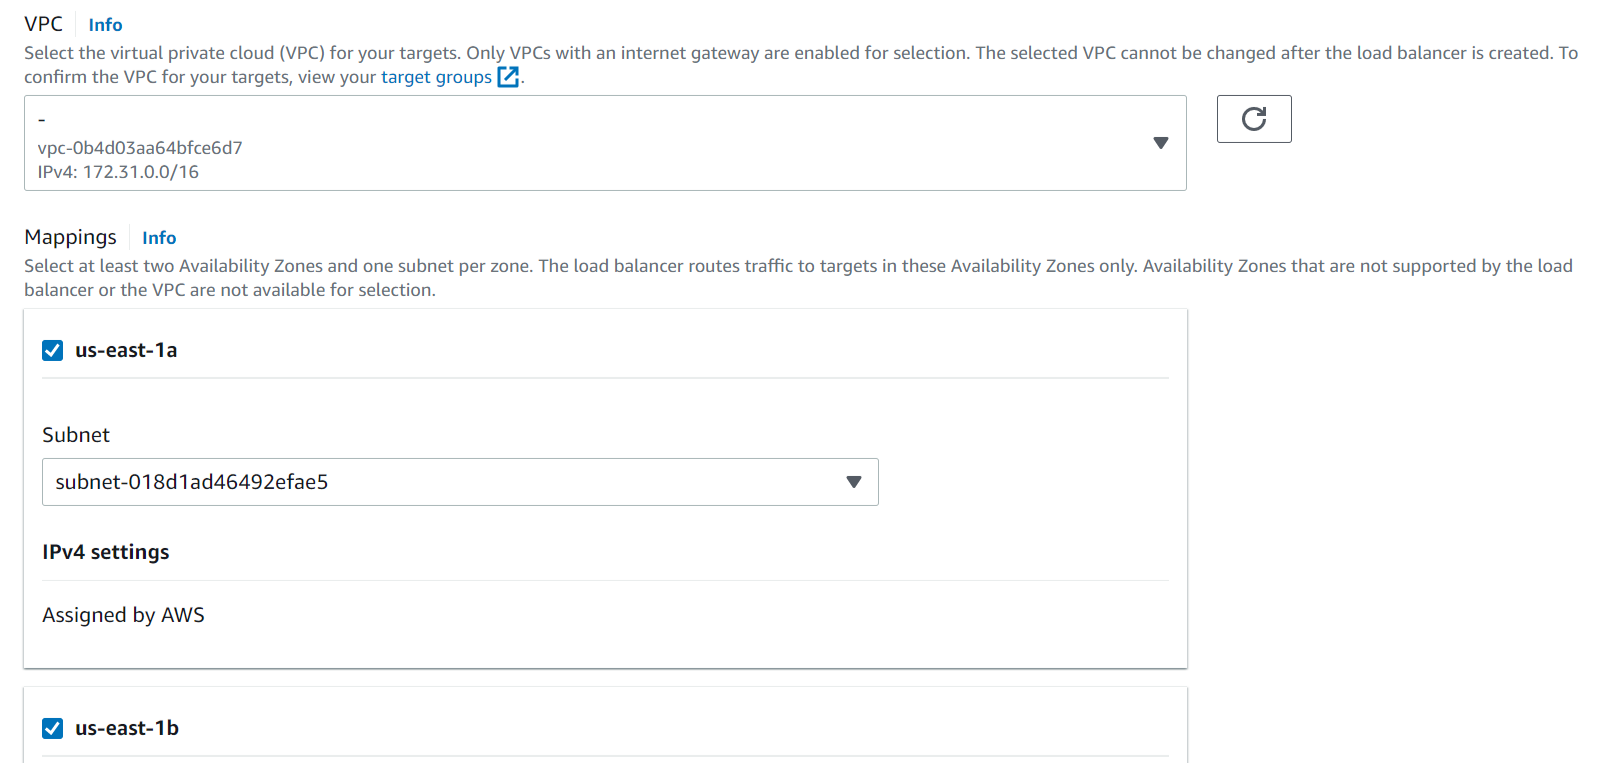
 For network mapping:
- Let’s use our default VPC.
- For mappings, you can select at least two availability zones. We’ll have to select the same thing when creating ECS cluster services. For this example, you can choose 1a and 1b.
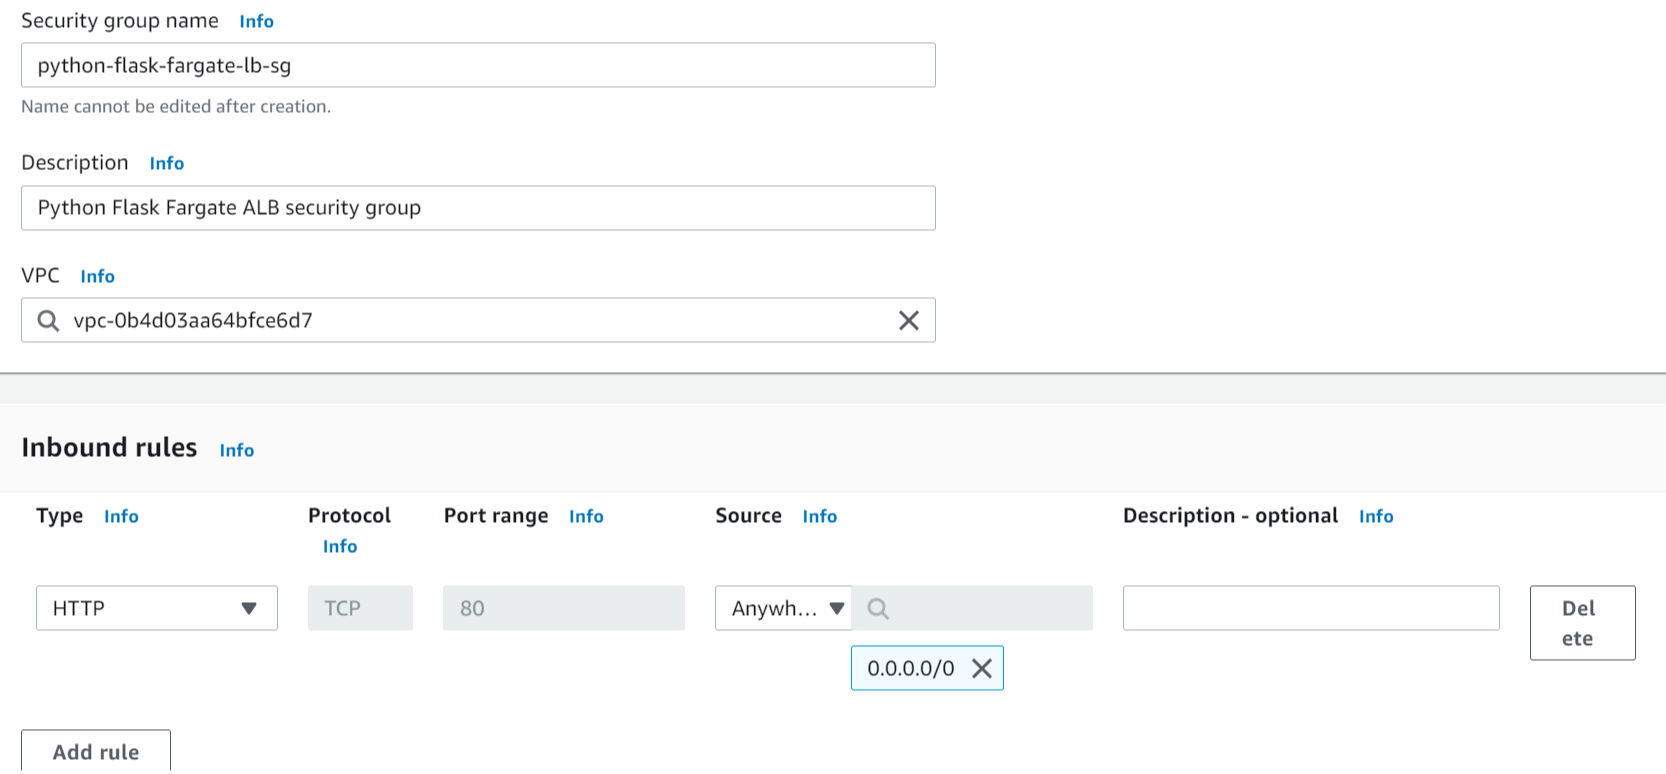
 Fill in the details about security group name and description, e.g: python-flask-fargate-lb-sg and FastAPI Fargate ALB security group, respectively. Note that LB stands for load balancer and SG stands for security group. Then leave VPC as it is.
For the inbound rules, we need to add a new rule.
Fill in the details about security group name and description, e.g: python-flask-fargate-lb-sg and FastAPI Fargate ALB security group, respectively. Note that LB stands for load balancer and SG stands for security group. Then leave VPC as it is.
For the inbound rules, we need to add a new rule.
- Click add rule and choose HTTP for type and source Anywhere. By doing this, we allow HTTP internet access to our load balancer from anywhere.
- Leave outbound rules as it is. Finally, click “Create security group”.
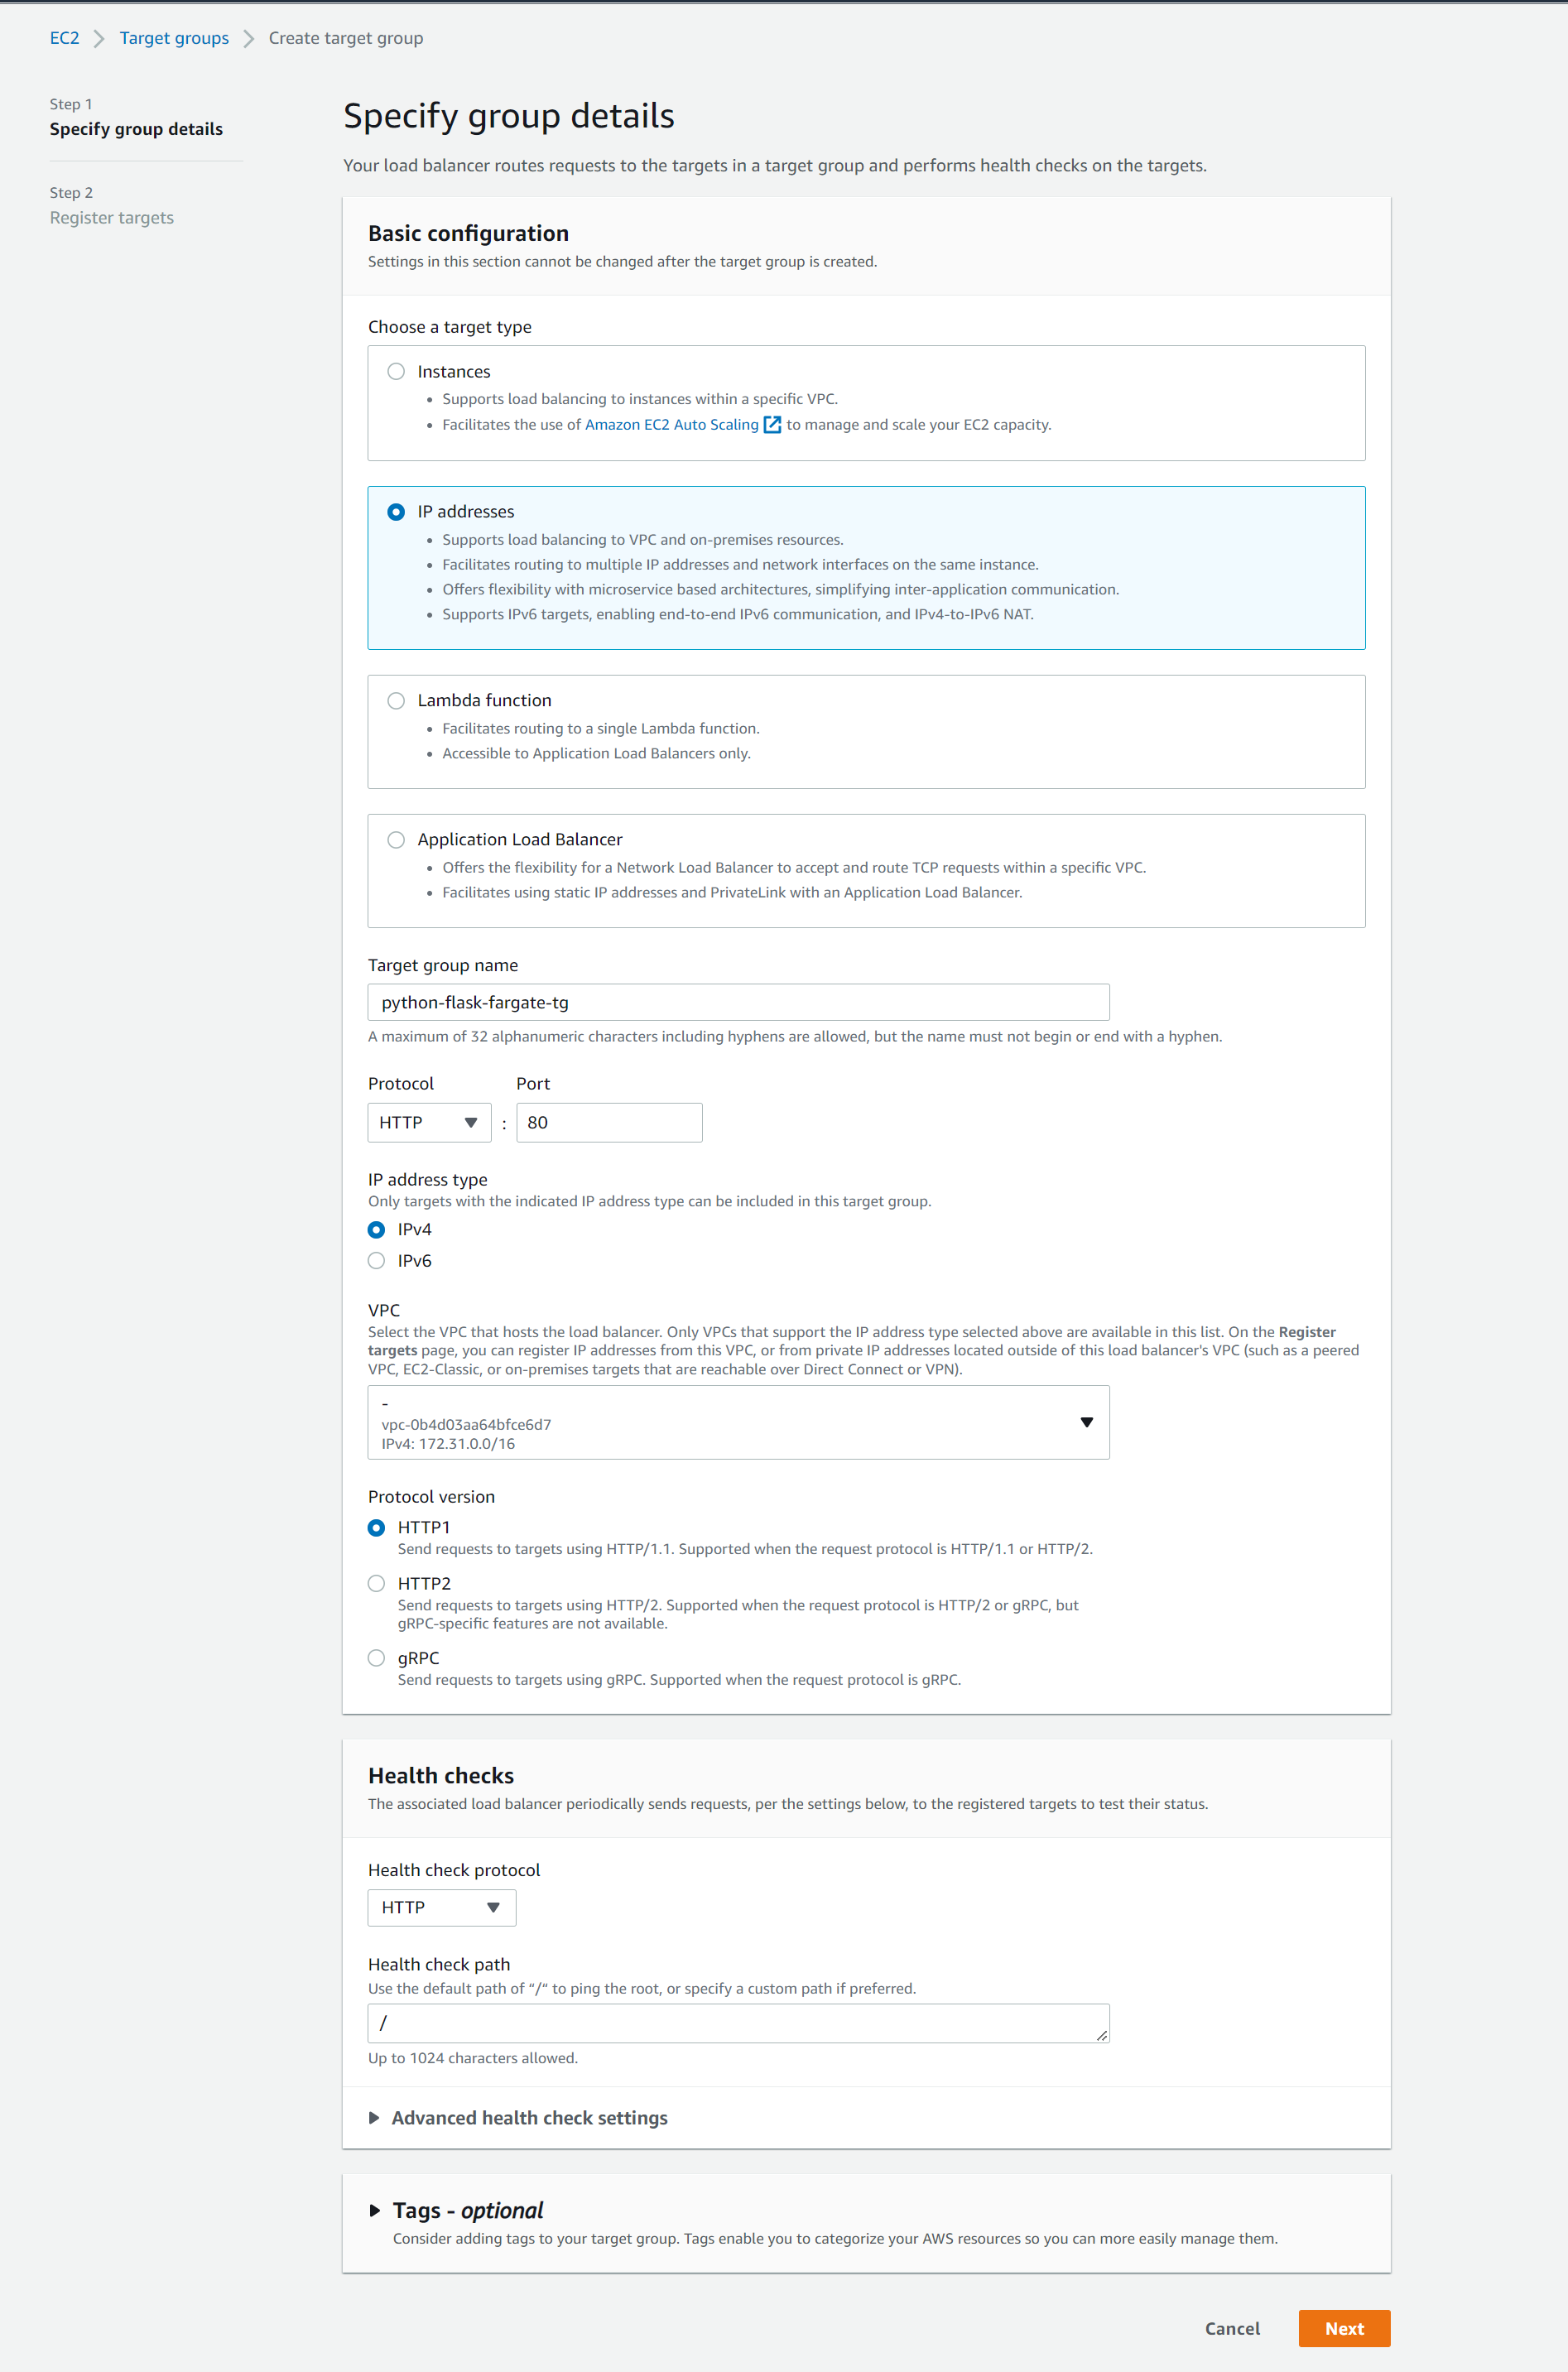
Now, we need to create target group. Like when we were creating security group, open “Create target group” in another tab.
For the basic configurations:
- Choose IP address as target type.
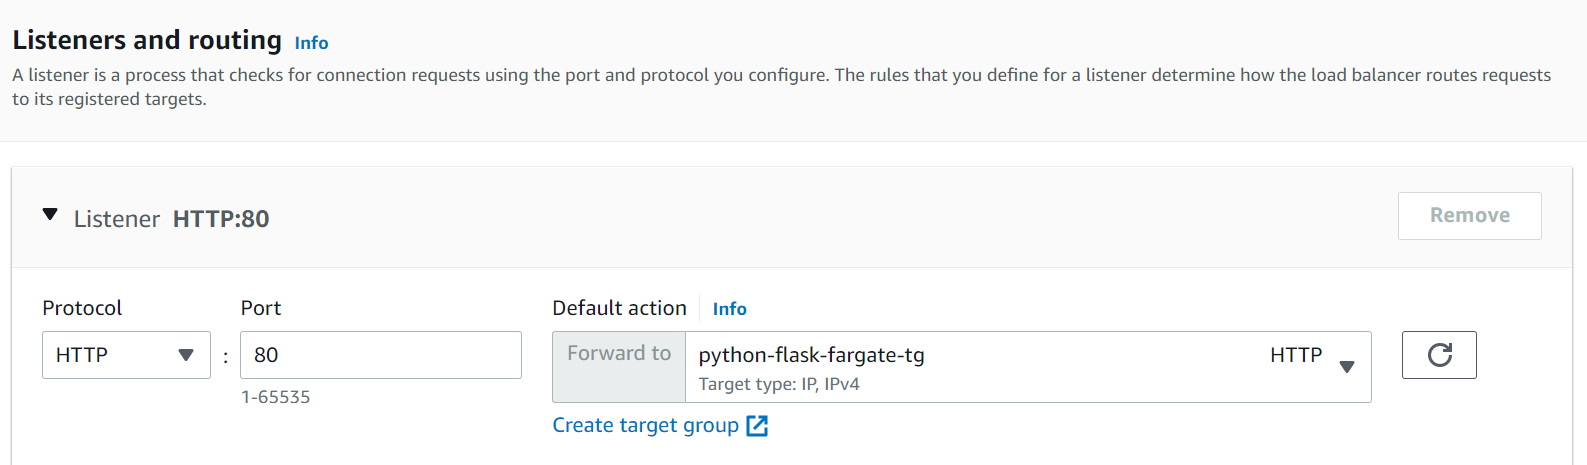
- Provide target group name, e.g. python-flask-fargate-tg.
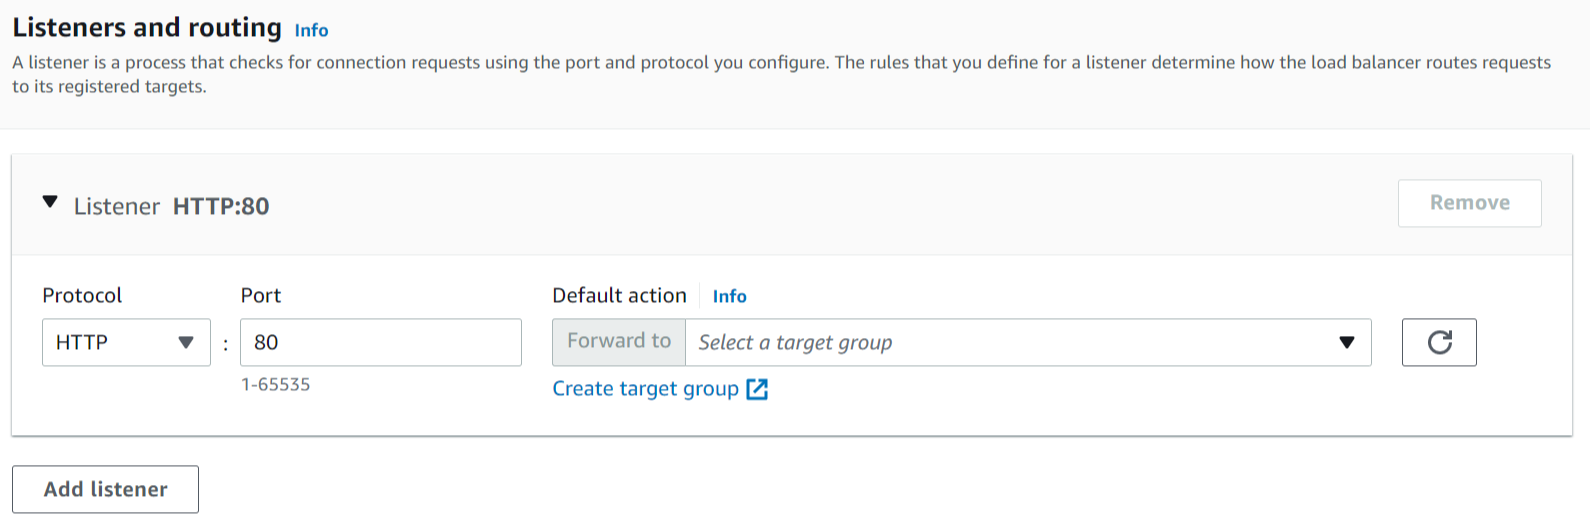
- Remember that our application runs on port 80. It means that we need to choose protocol HTTP and port 80.
- Then leave the rest as it is and click next.
 After that, there will be a section about register targets. We don’t need to do anything for now. We’ll attach load balancer and target group to Fargate instances when we are creating the cluster’s service.
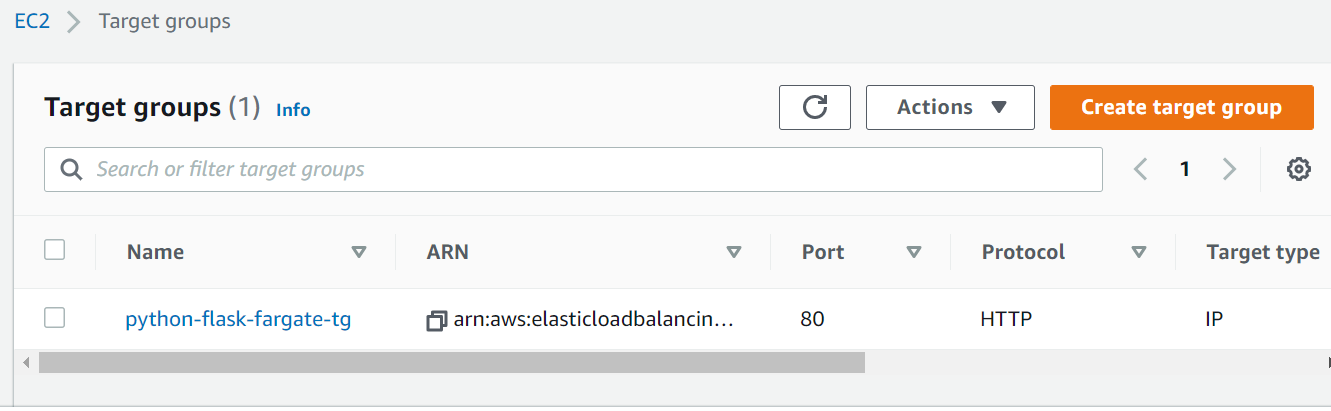
 Back to when we had to choose a target group. Click refresh then you can choose the newly created target group. Then jump to the bottom of the page and click create.
Create Fargate service & attach to our App Load balancer (No Auto Scaling for this demo)
After spending several moments in EC2 console, we need to go back to ECS console to create a service inside the previously created ECS cluster. So, choose our cluster.
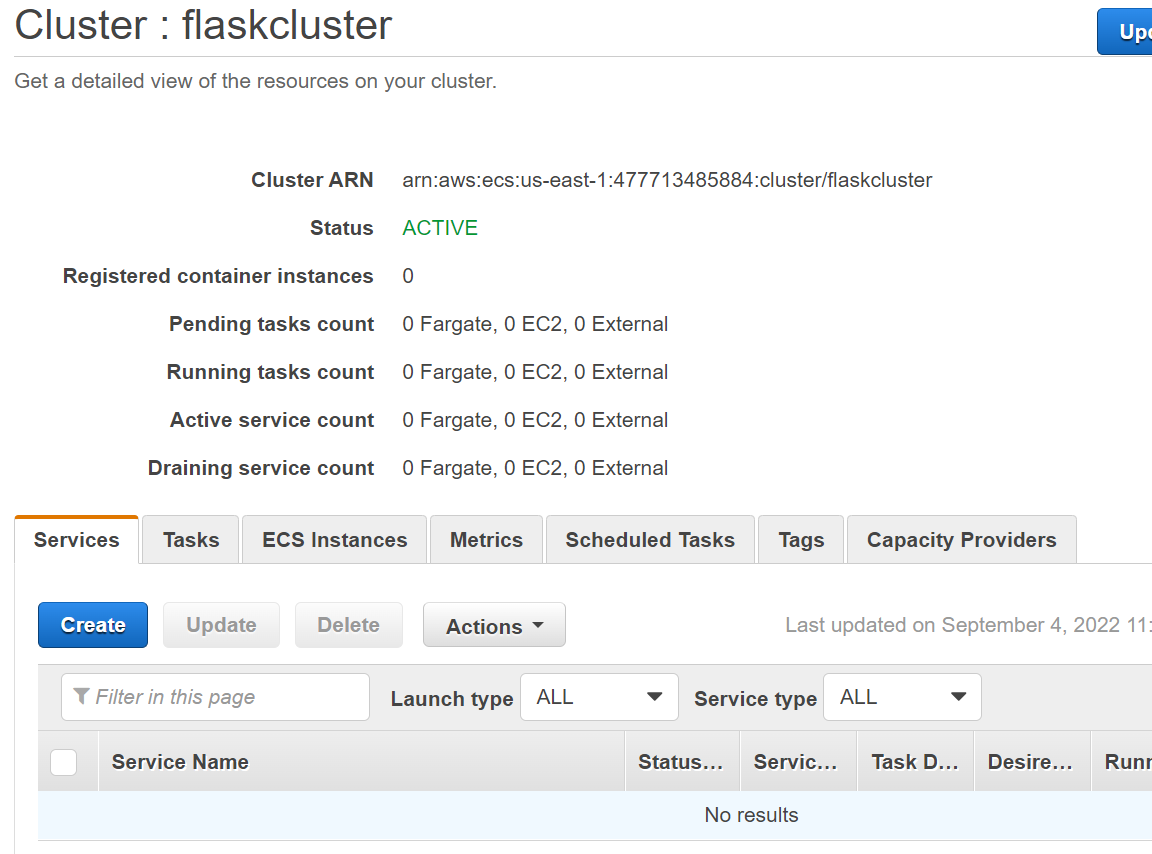 After you click create, you’ll see a page like the below image.
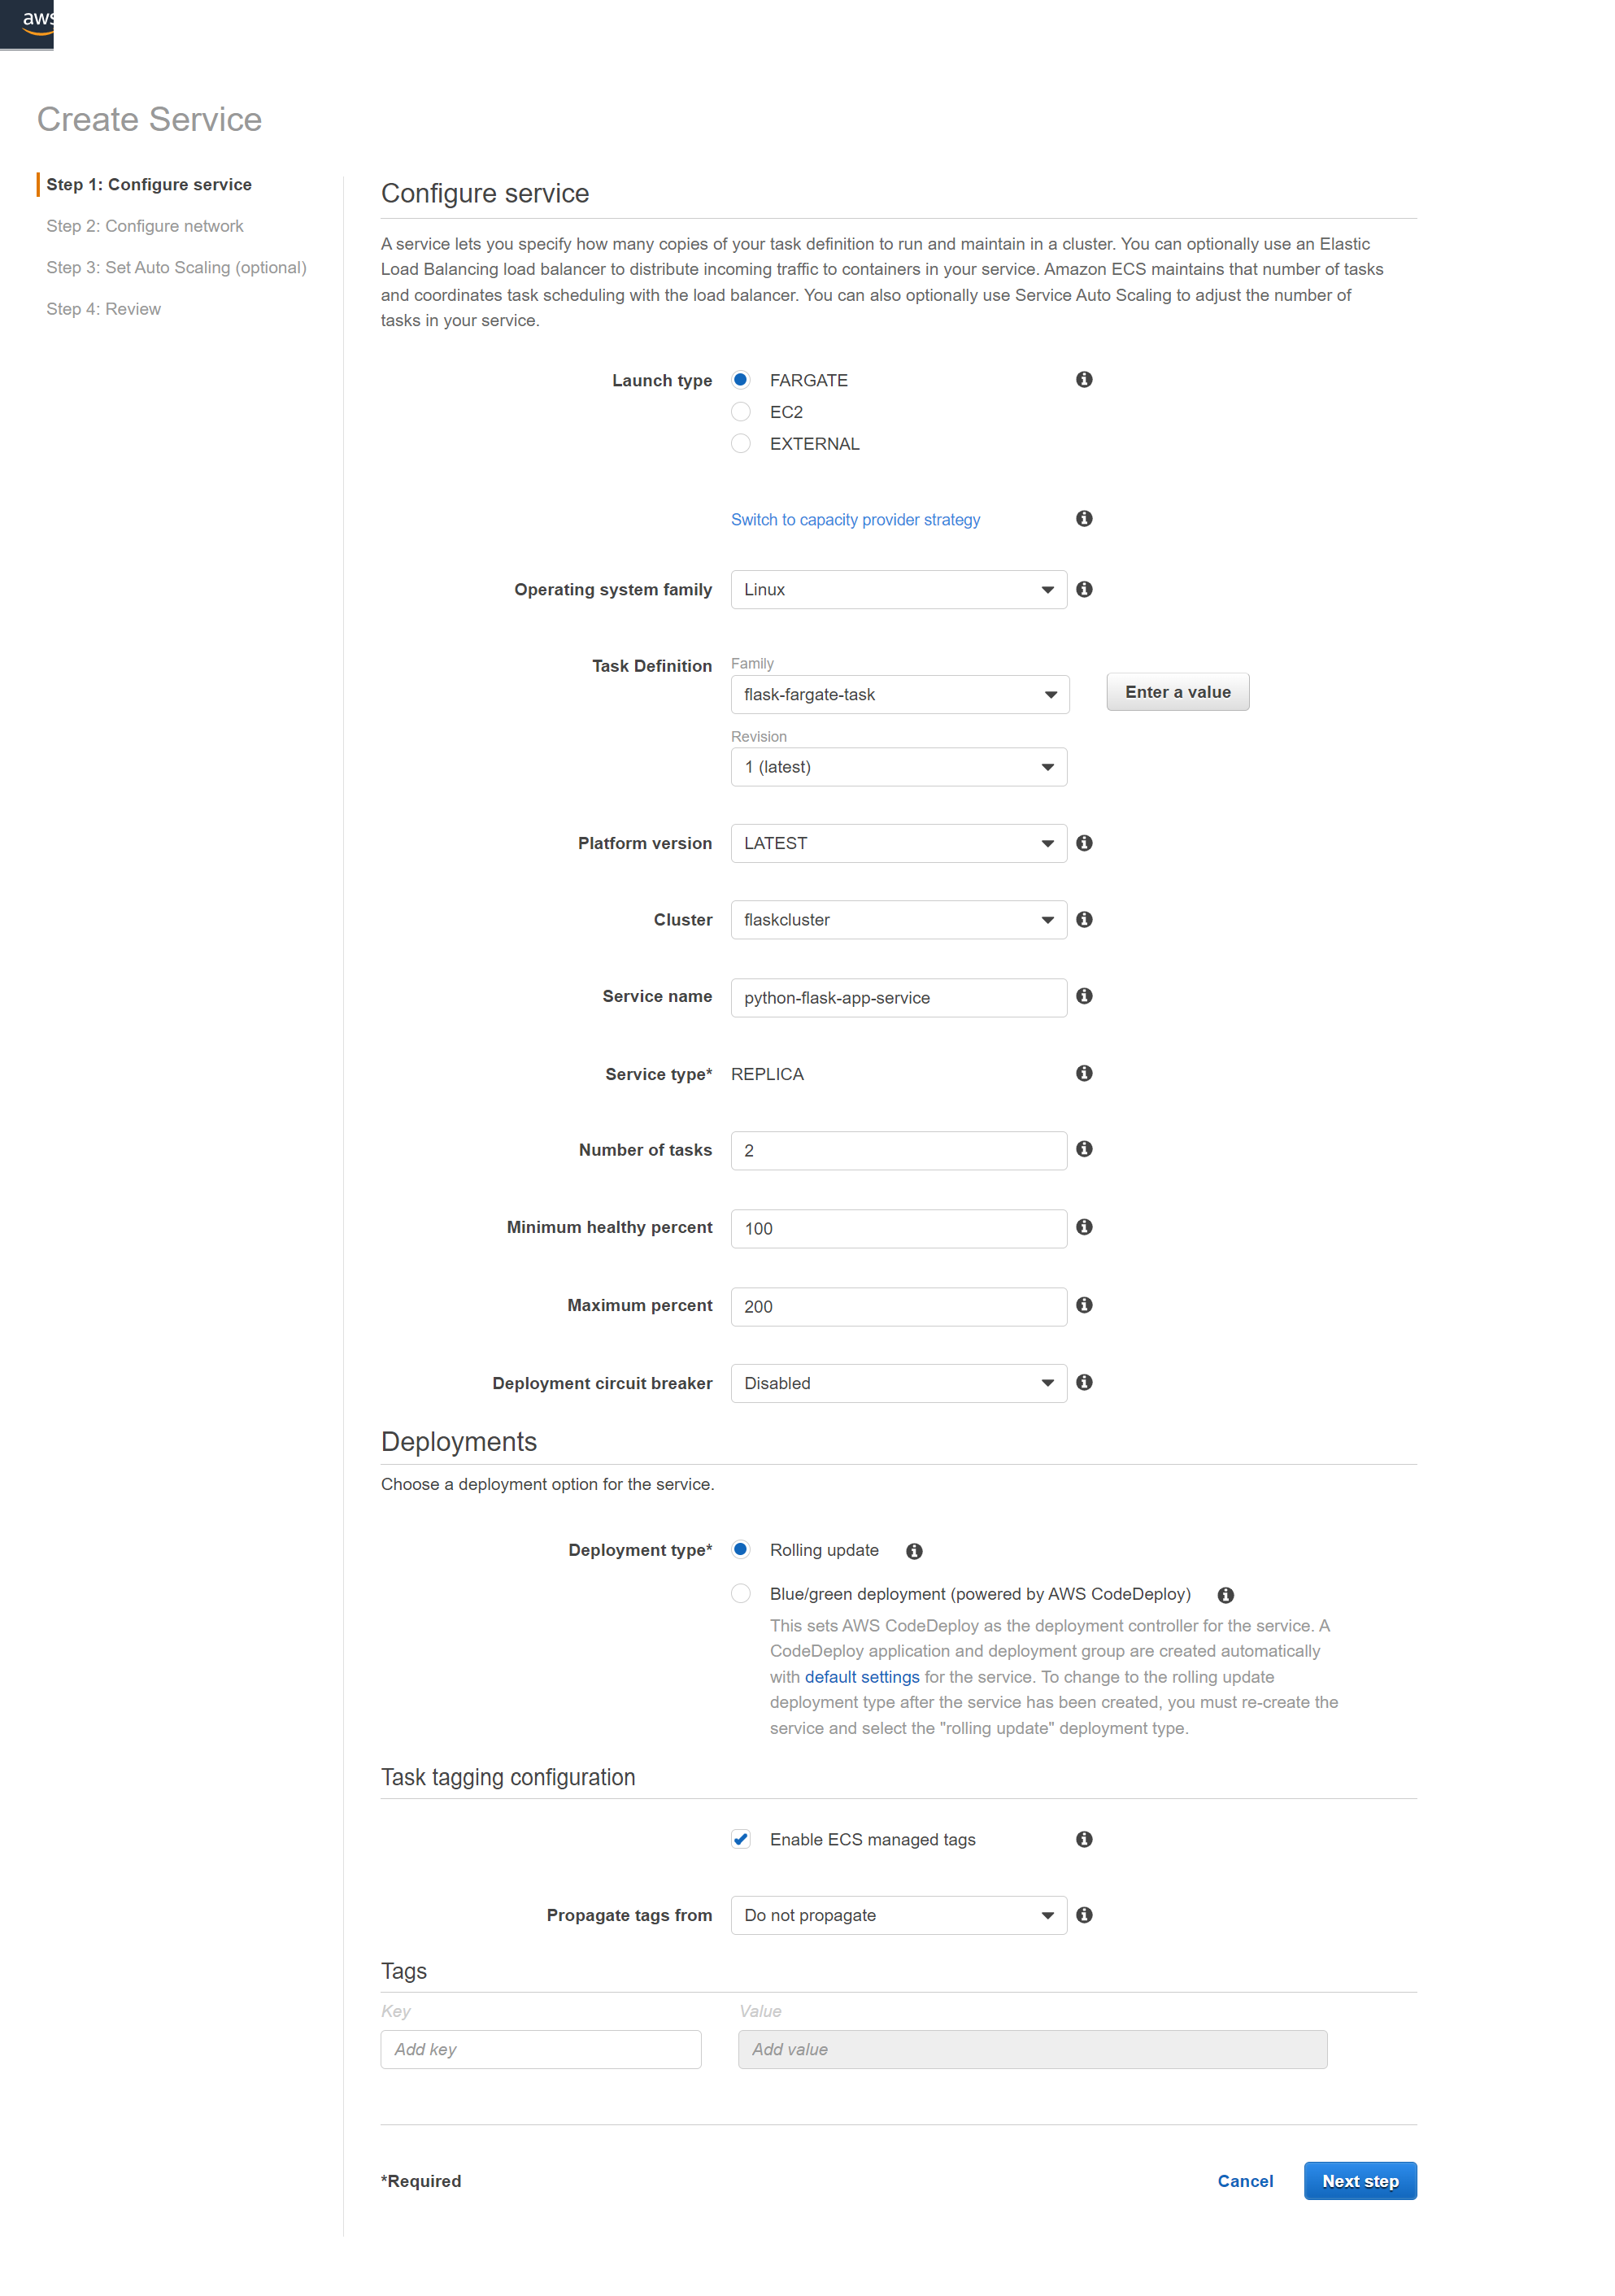
- For Launch type, choose Fargate.
- For OS family, choose Linux.
- Previously, we’ve created a task definition and we’ll use it here. Choose that one, including task definition revision.
- Fill in service name python-flask-app-service.
- For number of tasks, this value specifies how many Fargate instances will be created. So the final architecture will be composed of a load balancer and two services. Then choose the next step.
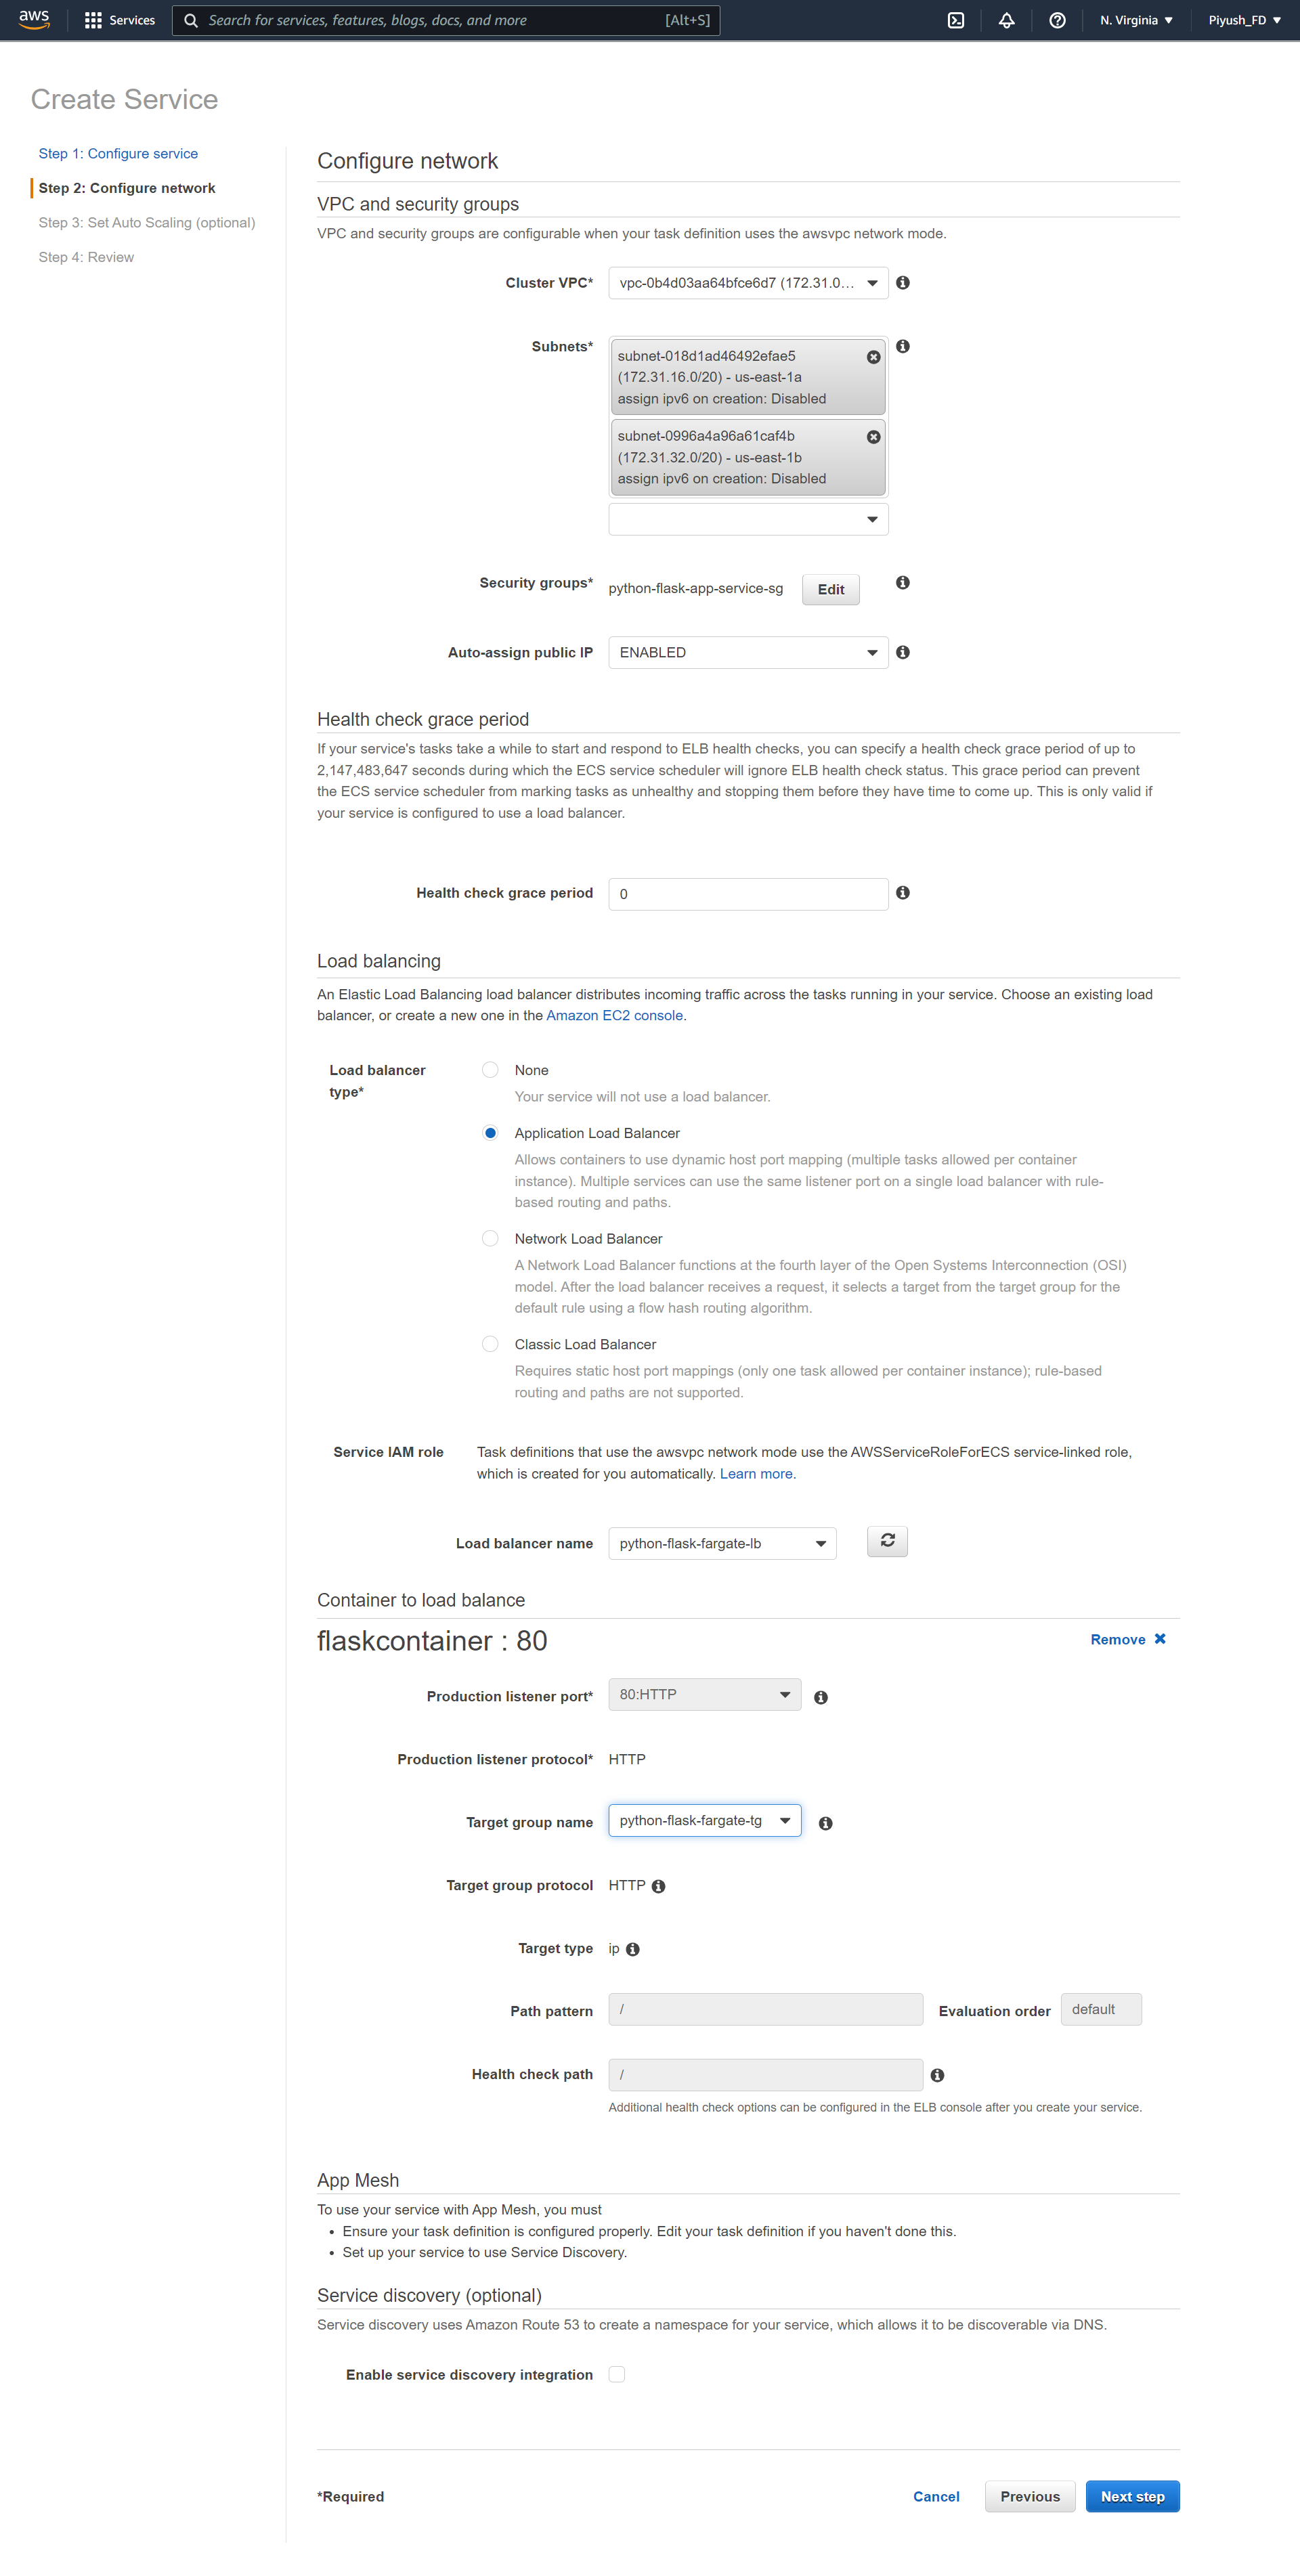
 Next, configure network.
- Choose default VPC.
- Choose subnets. Make sure that you use the same subnets as in the load balancer.
- For security groups, click Edit. There will be a left drawer opened.
- Here, create a new security group by filling in the security group name. Leave the inbound rules as it is. Then click save. Now, we need to attach our services to the load balancer.
- For Load balancer type, choose Application Load Balancer.
- For load balancer name, choose our load balancer.
- For container name and port, it seems like you’ve chosen the correct container name and port. But you still need to click “Add to load balancer”.
- For production listener port, choose port 80.
- For target name, choose the previously created target group.
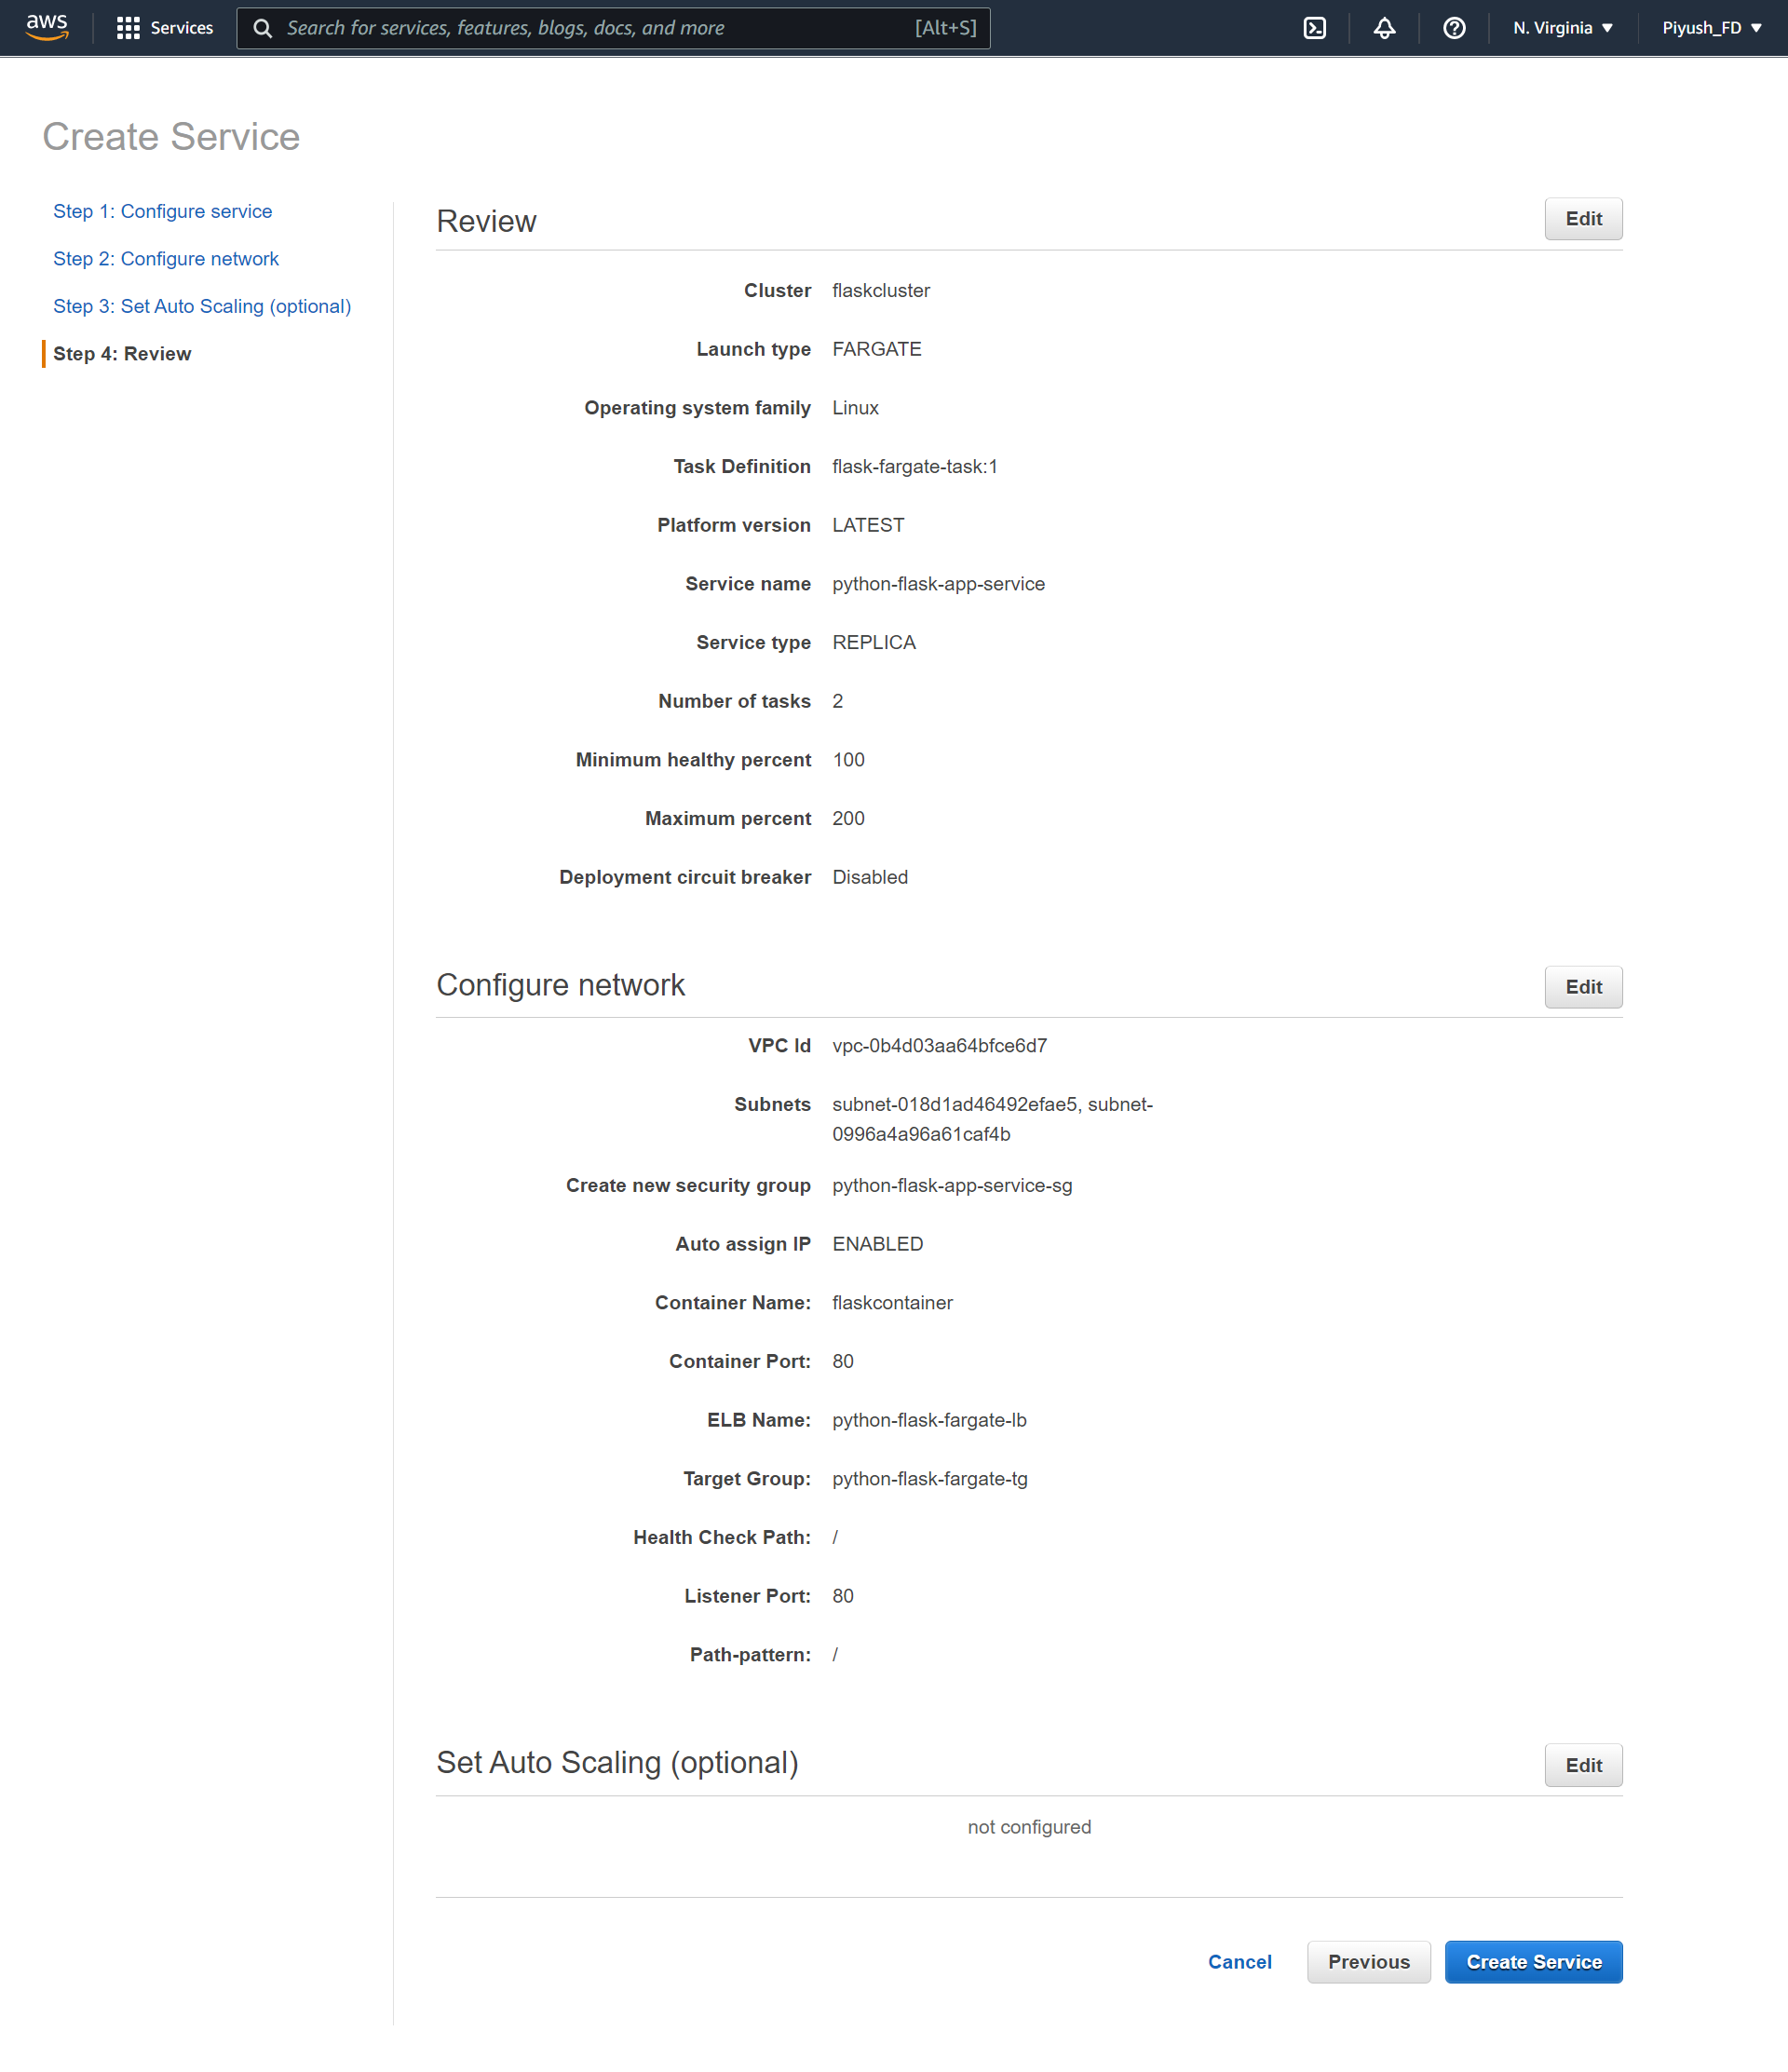
 You can go to the next step to set up auto scaling. I skip this one, so there are only three services no matter how much load our services handle. Lastly, go to review and create.
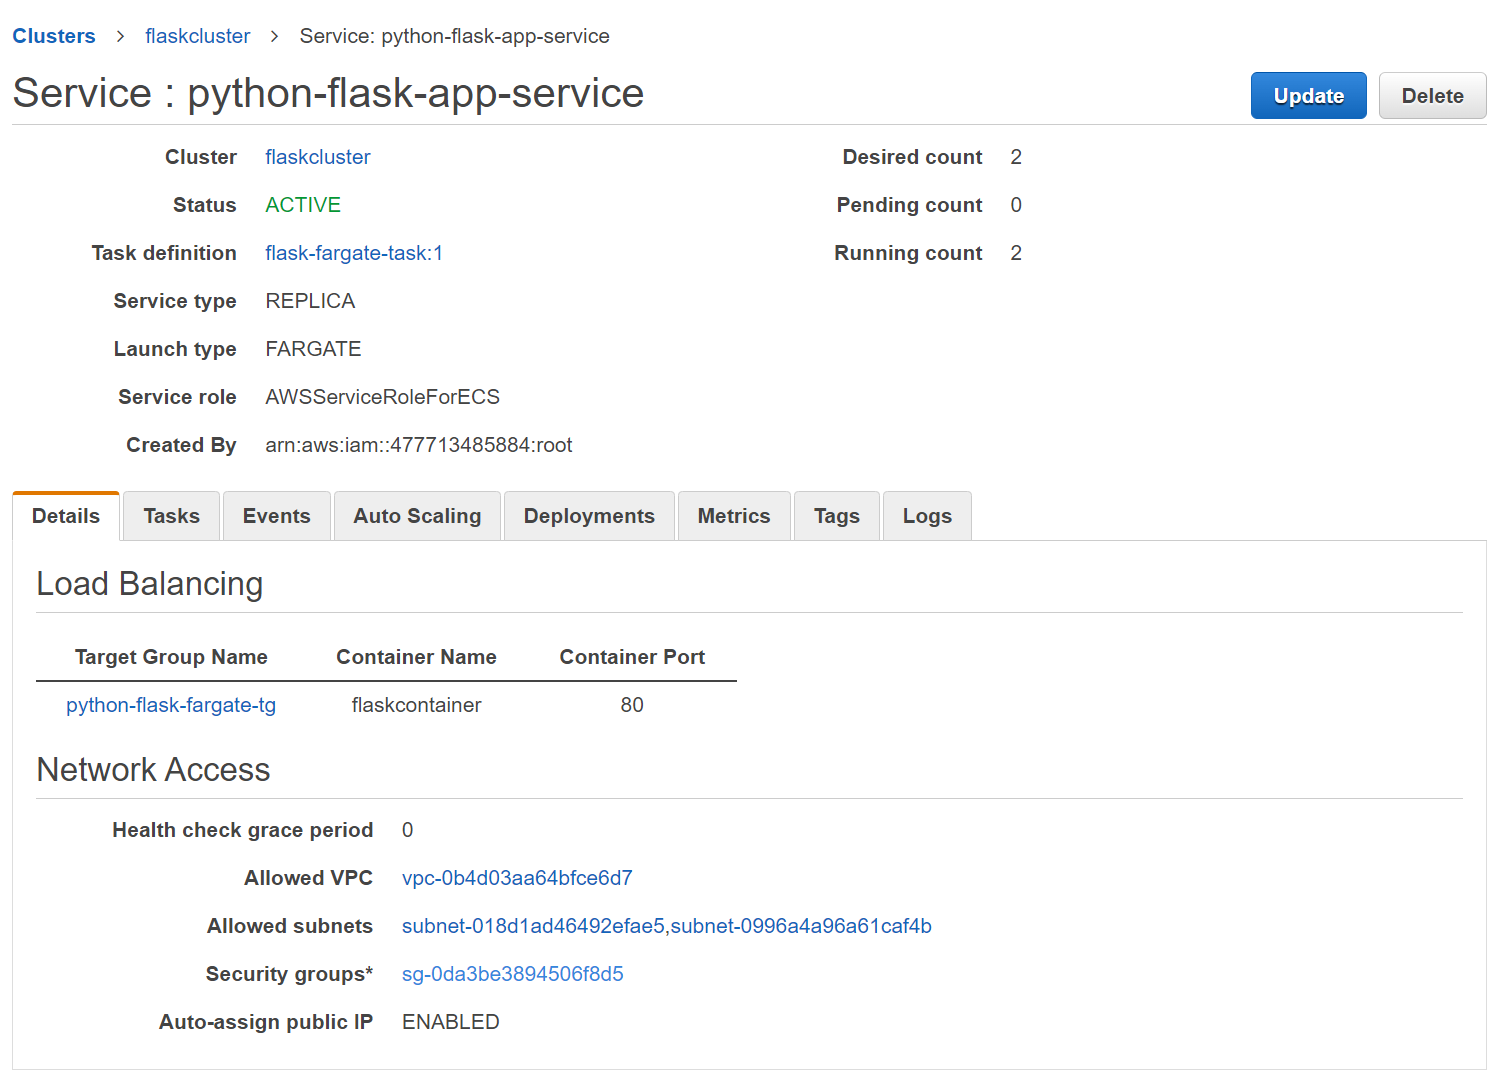
Modify ECS Fargate service’s security group
To make sure everything works as intended, we need to modify ECS service’s security group to allow load balancer access. Go to service’s security group by clicking security group id.
 Edit inbound rules for this security group to allow load balancer access. To do that, choose all TCP access and source to custom. After that, for the source’s value choose load balancer security group like in the below image (or you can copy security group id of the load balancer into this field).

Test your App
Finally Okay, this is the last one. I promise!
Back to our load balancer and open the DNS name in the new tab.
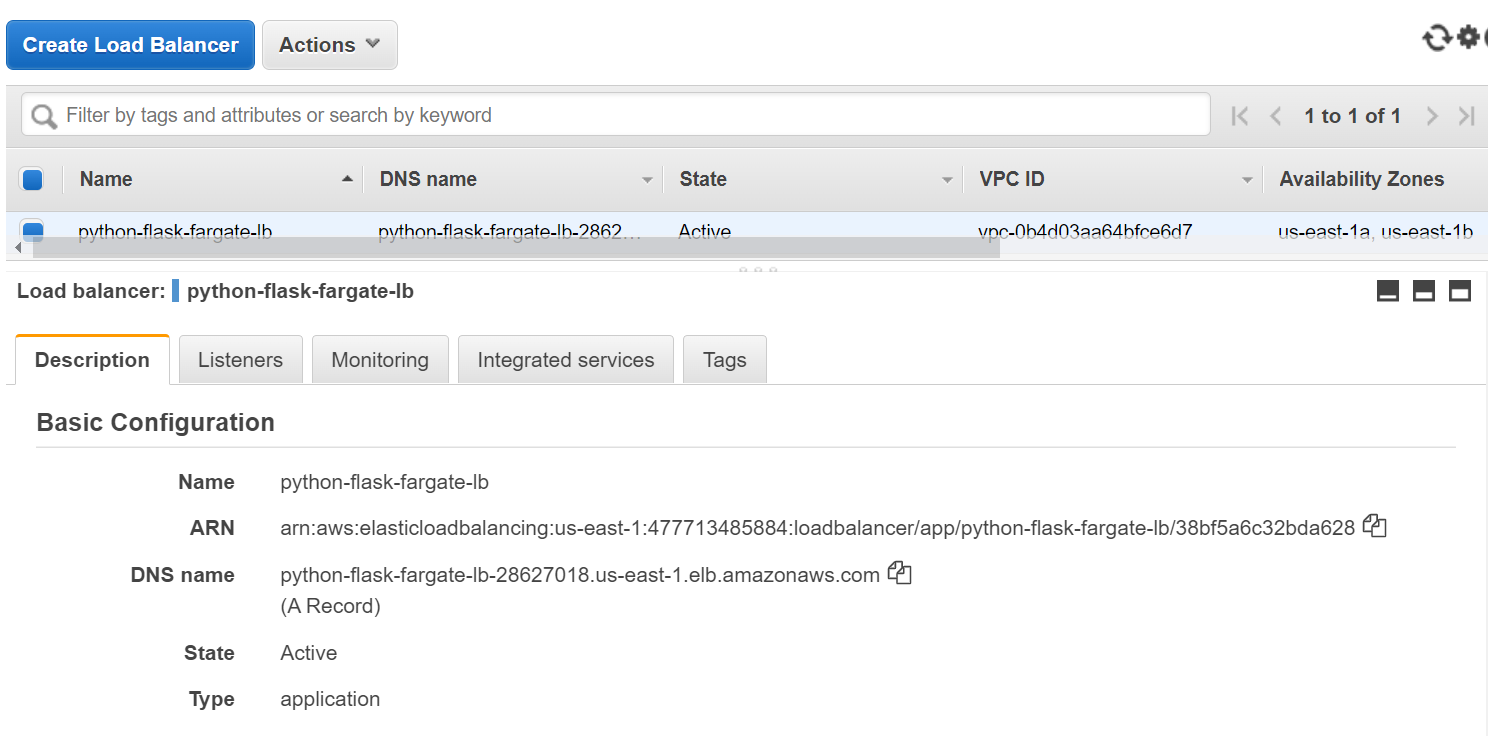
Bingo.....!!!!! Our App is LIVE!!!!
 How interesting is that? :)
Clean up
Before closing this article, you should clean up the previously created AWS services if you don’t want to get billed. This is the list of things you need to clean up:
- Delete Cloud 9 IDE Environment
- Stop all cluster’s tasks
- Delete cluster’s service
- Delete cluster
- Delete ECR repository
- Delete load balancer
- Delete security group
It’s okay if you want to keep security groups and ECS task definitions. But you can also clean them up.
There are quite enough steps only to deploy a containerized application. Several times we went back and forth. Set up this, then create that.
It will be such a tedious task if we have to do this thing over and over again. Do you want to do this over and over again? Therefore, CI/CD will go hand in hand with this technology.
Hope you enjoyed it.. :)
OK, folks that’s it for this post. Have a nice day guys…… Stay tuned…..!!!!!
Don’t forget to like & share this post on social networks!!! I will keep on updating this blog. Please do follow!!!
